
 Facebook
 Twitter
 Pinterest
 Copy Link
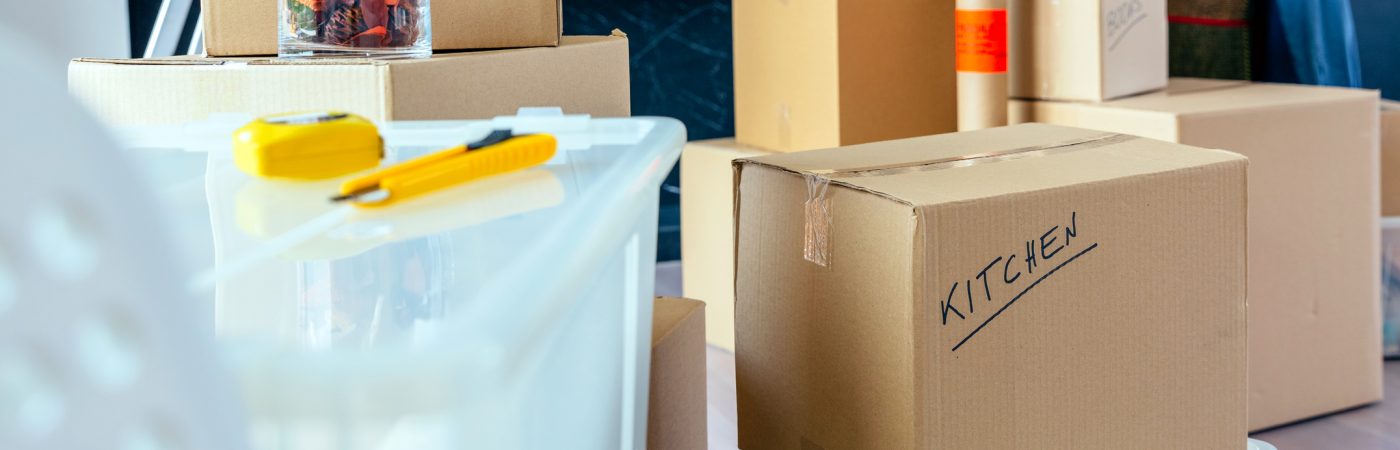
Moving Day Count Down: A Weekly Checklist

Did you know May is National Moving Month? May is the kick-off to the busiest moving season. In fact, nearly 40 million of us move in the summer and begin to plan in May. If you are one of those on the move this season, we want to help you plan. Unlike the popular perception, moving doesn’t need to be a stressful and overwhelming process! The key is to plan ahead and then the to-dos of moving are very manageable.
Okay, so what are the to-dos and when do I do them? Here you go, use this expert two-month moving calendar to keep you organized. Simply follow these steps and check them off one-by-one. The insider secret to a stress-free move: stay in the know and know what is ahead!
EIGHT WEEKS TO GO:
Start the process of selecting a mover.
Check your mover’s record with the BBB, on Yelp and other social review sites. A great reputation is the best way to choose a mover.
If you’re being relocated by your company, verify what the company relocation policy covers and what responsibilities fall on your shoulders.
Start to inventory your belongings: Decide which items to donate, recycle, to take and which items (if any) need to go into short-term or long-term storage.
Your tape measure is your new BFF – measure all the rooms in your new home, include layouts of doors, closets and windows. Measure all the furniture that is going with you and create scaled cutouts to place in a scaled layout for each room. Once you have finalized a room layout that works, photocopy your final layout for each room. Give a copy to the movers on moving day and tape a copy to each room.
FOUR WEEKS TO GO:
Mail change of address cards or change your information online:
- Post office
- Social security
- Insurance companies
- Credit card companies
- Credit bureau and/or other creditors
- Employer (to forward W2s)
- Car registration
- Broker
- Mail order accounts
- Department of motor vehicles
- Magazines
- Friends and relatives
Arrange to clean furniture, drapes, etc. in your new place if necessary.
Gather personal records (medical, dental, etc.)
Arrange to transfer children’s school records
Gather all pet’s vet records and make sure all pets are micro chipped and it corresponds to a cell number that goes with you on your move.
Order new tags and licenses with new address.
Check homeowner’s insurance policies to see if moving is covered. Be sure your new home is protected by transferring fire, theft and other
personal-property insurance.
Start to pack.
THREE WEEKS TO GO:
Make arrangements to discontinue current utilities and schedule the start-up of new utilities:
- Telephone service
- Telephone listings
- Cable TV
- DSL/Cable/Phone line for internet access
- Electricity (check for refund)
- Gas (check for refund)
- Fuel oil
- House cleaners
- Babysitters
- Dog walkers
- Gardeners
- Pool service
- Diaper service
- Water
- Water softener
- Parking
Have appliances serviced for shipment.
TWO WEEKS TO GO:
Arrange to transfer local bank accounts. Speak to your bank and find out about new checks being printed, etc. Don’t forget your safety deposit box contents.
Ask doctors, dentists and veterinarians for medical records.
Cancel newspaper delivery.
Refill all prescriptions. Get prescriptions transferred to new pharmacy closer to new home.
Make arrangements to move children and pets. Do you need a babysitter for a day or two? A pet sitter?
Confirm that mover will move houseplants; if not, make arrangements. Houseplants, usually, cannot be moved by a mover, especially on long distance or out of state moves.
Start to disassemble any shelving, closet systems, etc. that you plan to take.
If you need one, hire a cleaning crew to clean your empty place to get your deposit back. Will your new place need a cleaning crew before move in too?
ONE WEEK TO GO:
Pack in separate boxes the items necessary for first days in new home: Label “LOAD LAST.” And label where to put each of those boxes in your new home: “top of kitchen counter.”
Medicine (always keep prescriptions on you)
Comfortable clothes
Linens and towels
Toothbrushes and toiletries
Paper goods
Disposable plates and silverware
Foil and wax paper
Plastic containers
Microwave
Vacuum cleaner
Garbage bags
Tool kit
Step ladder
Extension cords
Light bulbs
Cleaning items (mop and pail, broom and dust pan, etc.)
Each member of the family should also pack a suitcase with what they need for a few days while you’re getting settled into your new place.
Don’t forget cell phone chargers, medications and favorite teddy bears.
If the movers are packing all or part of your goods, call to schedule and confirm the details. Make sure your mover knows how much packing you expect to do yourself and how much you expect them to do.
Plan to use up most food items before the move. If you have any leftover food on moving day, donate it to Move For Hunger.
TWO DAYS TO GO:
Defrost and dry refrigerators/freezers to be moved.
Gather valuables and important documents from jewelry cases, safe deposit box, etc. to take with you in car. Do not pack these items with your other belongings.
MOVING DAY:
Moving Out
Arrange to be on hand for last minute details and to give directions to movers.
Leave the whole day for your move. Don’t plan to go back to work, arrange a dinner date, etc.
Have payment for movers on hand. Avoid having to run out to bank, ATM, etc.
Have tips ready for everyone who is assisting you: cleaning crew, doormen, nanny, dog sitter, movers, etc.
Before leaving, check each room and closet. Check garage, basement and attic.
When you leave, turn off lights, close windows and lock doors.
Moving In
Supervise placement of boxes and furniture. Refer to your premade layout. Scotch tape a copy of the layout to each room’s door.
Check for damages. Inspect large items; look for boxes that are crushed or open. Inform the moving foreman and review the claims procedure with him.
Go back to the truck. Make sure nothing was left behind. Check all the compartments where fragile items are often kept for their protection.
Settle in to your new place, take photos for friends and family. A new chapter in your life has just begun! Let the new adventure begin!
Top 10 Damaged Items When Moving & How to Protect Them

Nearly 40 million of us move in the summer and begin to plan in April. If you are moving this season, we want to help you protect your precious belongings and make your move a smooth one!
Before you start to pack, make a game plan. Which of your items are fragile? What will you need to pack them? We’ve seen some folks pack themselves so, unfortunately, we know which household items are most likely to break and typically aren’t packed properly. We have compiled a list of the top 10 items damaged when moving. It’s surprising what items make the list. Not only have we complied the most breakable list, we’ve included tips on how to protect them properly so you can “break” this pattern.
1. Drinking Glasses
It is no surprise glasses are the #1 breakable. But, with simple steps you can ensure they arrive in one piece.
Protect: One of the key factors to keeping your glasses and wine glasses from breaking or getting crushed is using the proper box. Use a “dishpack” box that has double thick walls for extra protection. Place a glass on packing paper horizontally. Grab a corner of the packing paper and roll the glass into the paper. Make sure to tuck the sides of the paper in, like you would do wrapping a burrito. Repeat 3-5 times (depending on thickness of glass) with more sheets of packing paper. Make sure to label your glass burrito: “Wine Glass” so it won’t get tossed aside with the packing paper during the unpacking process. Cushion the bottom of box with crumpled packing paper. Place the wrapped glasses vertically (yes, you read that correctly: VERTICALLY) in one layer in the box. They are much more secure vertically. After completing the first layer, place packing paper on top. Repeat these layers until the box is full. Fill all remaining space with crumpled packing paper.
2. Plates
The biggest moving crime — plates are often placed in boxes without enough packing paper. You don’t want to hear the dishes rattle in the box!
Protect: To keep plates from breaking, first wrap each plate in packing paper. Repeat 3-5 times with more sheets of packing paper until the plate is properly secured & cushioned. Label your little plate package: “Plate.” Again, use a secure dishpack box. Always, use plenty of tape on the bottom and tops of every moving box, just don’t use one strip of tape, use multiple strips and run the tape both directions to make sure that box is secure. Before placing any of the wrapped plates in the box, cushion the bottom of box with crippled packing paper. Then place the wrapped plates VERTICALLY in one layer in the box. After completing one layer, place packing paper on top. Repeat these layers until the box is full. Once the box is full, fill any remaining space with crumpled packing paper.
3. Artwork
Glass artwork often breaks because there is not enough cushioning in the moving box and the top of the box is left with a gap. The top of the box then collapses and the piece of art breaks.
Protect: To protect artwork from breaking use a picture box. Line the bottom of the box with crumpled paper. Place the glass art in the box, then stuff front, back and along the top with paper and or eco-bubble wrap. You want to be sure the box is completed packed with paper (top, bottom and sides) with no air gaps.
4. Lamp Shades
Lamp shades are an awkward shape and large, making it difficult to pack. If not packed properly, they can easily be dented or torn.
Protect: Wrap the lamp shade in eco-bubble wrap, covering every inch. Then fill the interior cavity of the lamp shade with packing paper (do not use newspaper as the print may rub off onto your lamp shade). Fill the box with enough packing paper to keep the shade from shifting around inside. Do not place anything on top of the shade, not even soft items such as linens. Use only packing paper to secure the lamp shade from shifting.
5. Liquid Cleaning Supplies
Many times homeowners pack bottles of liquid cleaning supplies without sealing them properly. This causes leaks and damages things inside and outside of the box. Do not pack or move flammable supplies!
Protect: First, remove the cap from each bottle and place a small piece of plastic wrap over the opening. Then tightly screw the cap back on. Use tape again to secure the cap to the bottle. Begin placing the cleaning products in a small book size box and check the weight as you go. You don’t want to pack the box too heavy. When the box is full and not too heavy, place packing paper all around the bottles to keep them from shifting. And, this is important, remember on every box be sure to use more than one strip of tape on the bottom and top of the box and run the tape in multiple directions. When a box is not taped properly, boxes can open at the bottom and spill on the floor. Always, label every box with its contents, room in the new home where the box should go and directional arrows pointing up. Repeat the label on each and every side of the box. You will hate us for this tip while you’re writing and rewriting the same thing over and over again and love us later when you have stacks of boxes and don’t have to turn boxes around to find out what’s what.
6. Wine & Liquor Bottles:
Again these bottles can easily leak or break, and damage items in and outside of the box.
Protect: Use a divided/cell box you can get free from a specialty wine shop or liquor store, or purchase a cell kit from a moving store. Use smaller boxes so they are easy to lift and carry. Again, be sure you double and even triple tape the bottom of the box. If you’re packing opened bottles, ensure they are properly sealed by tightening the caps. Tape the caps on to the bottles. Roll each bottle in packing paper with 3-4 layers of paper. Secure the wrapping with tape and make sure there are no loose ends. Label the bottle: “Bordeaux.” Finally, place the bottle into the box. If there’s any space or gaps between the bottle and the divider, fill it with paper. Make sure the box is not too heavy.
7. Mirrors
The big mistake with mirrors is that people pack them in picture boxes without any eco-bubble around the mirror. If the front of the mirror faces the wall of the box without protection, it will break.
Protect: Use a flat box or have your movers pack the mirrors in a custom wood crate to provide extra protection. If you’re doing the packing, line the flat box with crushed packing paper to create a padded bed for the mirror. Wrap the mirror completely in multiple sheets of paper or eco-bubble. Tape the wrapping tightly around the mirror and place the mirror in the box. Fill any gaps with more crumpled paper. Only pack one mirror to a box.
8. Glass Pictures
Glass picture frames are easily broken if not packed in the right box. We want to keep those precious memories in one piece!
Protect: Use a picture box. Line the bottom of box with crumpled packing paper. Wrap each picture frame in packing paper or eco-bubble and pack each frame in the box vertically. Stuff packing paper in between each picture and on top, making sure nothing will shift.
9. Stereo & Audio Equipment:
The reason stereo and audio equipment gets damaged is folks stack a few components in the same box and they do not put any layers of padding in-between the pieces of equipment.
Protect: If possible, pack your stereo equipment in their original cartons. If you did not keep their original boxes, use a dishpak box. Remember, dishpaks are specially designed boxes to handle and protect fragile items. If you can’t find dishpaks, use double corrugated boxes. After double taping the bottom of the box in the both directions, pack the bottom of each box with crumbled packing paper for padding. Wrap each electronic component separately in eco-bubble. Pull the wrap over and tape it all together. Make sure the item is completely covered. Place it up right, vertically in the box. Repeat this process for the next big item then place it vertically in the box next to the first item. Do not stack! Stuff packing paper in open spaces and on top for extra cushion.
10. Books:
This one is a surprising one, but if books are packed improperly they can actually get damaged. When books are placed too tight together the edges get folded and covers get damaged. Also, if books are packed with too many air pockets/gaps inside the box they can shift during transportation and get damaged (smashed corners, wrinkled covers, etc).
Protect: Use a book box. Place books flat, horizontally and stack them with the heaviest books on the bottom and the paperback books on top. Be sure not to make the box too heavy. Pack paper on top and sides if there are any air gaps.
With these steps your move will be unbreakable! Remember, you can always do some of the packing yourself and leave the rest to the professionals.
How to Fight Hunger and Reduce Food Waste During Your Next Move
Moving forces people to make a number of difficult decisions about what they can and can’t take with them. In those frenzied days of wrapping, packing, and figuring out whether or not that dresser is really going to make it up the stairs, most of us don’t take the time to consider what we’re going to do with all the food we’ve stored in our cupboards and pantries. Too often, these perfectly good items are tossed in the trash or left behind.
More than 42 million Americans are considered food insecure, meaning they lack of access, at times, to enough food for an active, healthy life for all household members and a limited or uncertain availability of nutritionally adequate foods. Meanwhile, 40% of all food produced in the United States each year is lost or wasted.
So while throwing away a box of cereal or a few cans of soup may not seem like such a big deal at the time, when you consider that more than 30 million Americans move each year, it adds up.
Fortunately, there’s a solution.
Move For Hunger is a national non-profit organization that has mobilized the relocation industry to reduce food waste during the moving process. Our network of moving & relocation professionals provides customers, clients, and residents with the opportunity to donate their unopened, non-perishable food to a local food bank instead of letting it go to waste, all free-of-charge.
It was a simple idea that has had a profound impact. Since 2009, Move For Hunger has delivered more than 10 million pounds of food – that’s the equivalent of 8.3 million meals – to food banks and pantries nationwide.
There’s something about food waste that tugs at our conscience. Perhaps we inherited that from our grandparents, who lived through the rationing of the World Wars, saw the bread lines of the Great Depression and never missed a chance to remind us how good we have it now. Wasting food was unthinkable to earlier generations, and it should be unthinkable now, too.
If you are relocating this year, or if you know someone who is, please share what you can spare and helped provide meals to your neighbors in need. Visit MoveForHunger.org to learn more about our work and check out our Find a Mover map for a listing of socially-responsible moving companies in your area.
Every move is an opportunity to help a family in your community. Please donate your food when you move. It will be the most important box you’ll pack.
Source: CB Blue Matter Blog
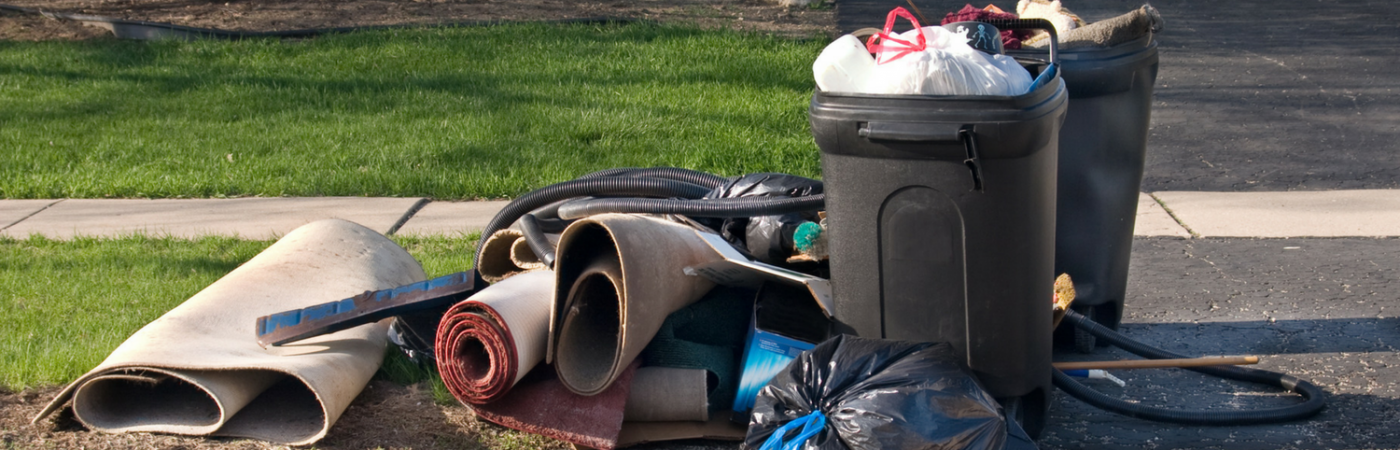
Moving Day: Five Simple Ways to Reduce Waste & Save Green
The start of a new year brings the same old resolutions: get organized, get in shape and eat healthier. What if we all look beyond ourselves and add find new ways to be kinder to Mother Earth to our list? The impact would be pretty fantastic, a re-energized movement to preserve our one and only beautiful earth.
One simple way to fulfill that resolution is to be eco-conscious on moving day. Moving is one of the most wasteful times in a household. We finally get around to cleaning out those over stuffed closets, basements and garages. It’s the time we toss out those old clothes, electronics, magazines, bikes, etc. On top of the major weeding out of our belongings, we use tons of boxes and packing materials; and create piles and piles of waste that contribute to our landfills. Let’s just face the fact: moving time equals major trash time.
The great green news is there are simple steps you can take during a move to reduce your waste. Being eco-conscious on moving day will save you some green in your wallet too!
Follow these 5 steps to make Mother Nature & your wallet proud:
Use Eco-Friendly Moving Supplies
From boxes, packing paper to bubble, there are now green 100% recyclable materials to keep our neighborhoods cleaner and greener. Yep, there is even biodegradable eco-bubble, pop away guilt free.
ECO-BONUS: Save money by asking your moving company for used boxes made of recyclable materials. You can get used boxes at a discount and some moving companies will even give you a refund for returning your used boxes at the end of your move. Pop! Pop! Cha-ching!
It’s Not Just for the Movies
Instead of the foam popcorn and peanuts, use real popcorn to pack fragile items! Just pop and fill the gaps in your boxes to secure and pad fragile items. Cheap and earth friendly!
Give Back
Finally, the garage and closets actually are getting cleaned out. Hurray! Now is the time to get rid of what you don’t really need: the growing collection of tuna and soup cans in the pantry; the many, many sport teams t-shirts; go-go boots; your 10 year old’s toddler clothing, etc. But, don’t just toss them out. Donate unwanted furniture to the Habitat for Humanity Restore and clothing and household items to your local favorite charity such as Goodwill for someone else to enjoy.
ECO-BONUS: Reuse your moving boxes to donate your items. Simply visit GiveBackBox.com to learn how to use your used boxes to ship your donations off to a charity. Lastly, if you have any unopened leftover food on moving day, donate it to Move For Hunger. Don’t forget to keep your moving and donation receipts to save green on your taxes next year!
Be Kind to Your Electronics
You may no longer want your lemon-yellow microwave, but don’t just put it on the curb or throw it in a dump. If you do, it will likely be shipped off to unregulated third world environmental disaster dumping grounds instead of being recycled in facilities that follow U.S. environmental regulations. Contact a domestic e-waste recycler so your old computers, microwaves and other electronics are recycled domestically, under environmental laws, rather than being shipped off to be processed by highly toxic and polluting techniques.
Hire an Eco-Conscious Moving Company
Use your “green” to influence and encourage green habits by hiring companies that use environmental-friendly practices. Make sure your moving company is bright green by asking: Does the staff recycle? Are the offices and warehouse designed to be energy efficient? Do they use biodiesel to run their trucks? Do they use 100 % recyclable materials? Do they sell used boxes? Do they buy them back at the end of the move? Chances are if they care about the earth, they care about their customers too! It’s a great big green win – win!
Pat yourself on the back; you’re making Mother Earth smile and future generations will thank you!
Laura McHolm is an organizational, moving & storage expert and co-founder of NorthStar Moving Company. NorthStar Moving Company is an award winning, “A+” rated company, which specializes in providing eco-luxury moving and storage services.
Source: CB Blue Matter
Prevent a Holiday Disaster at Home With These 10 Must Read Tips
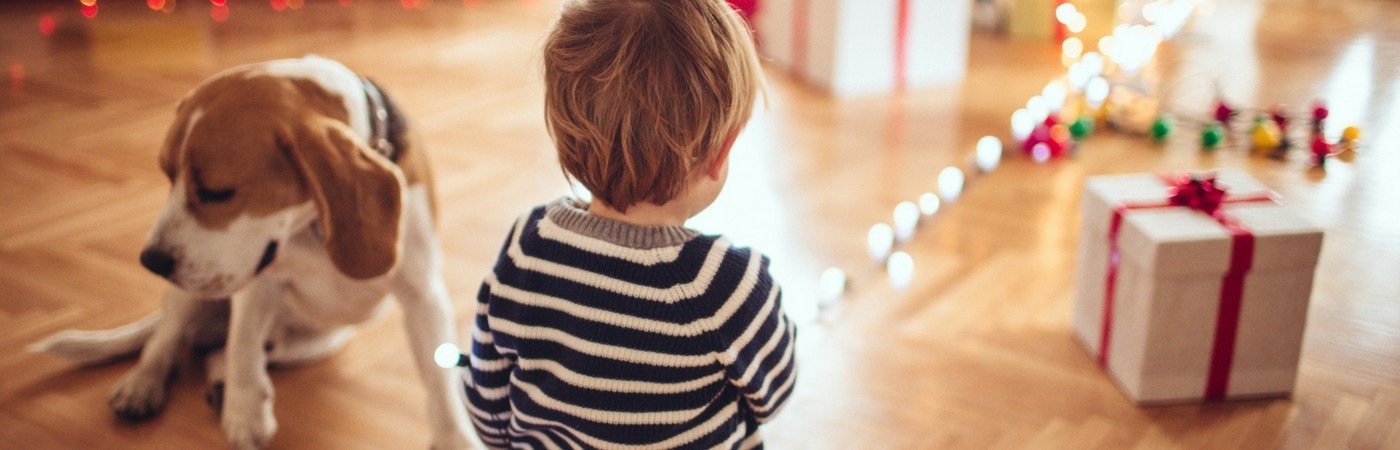
Keep Your Kids (2 legged and 4) safe this holiday season with these 10 tips from Northstar Moving Company!
NorthStar Moving Co-Founder Laura McHolm
There is no ignoring it now. The twinkling trees, tinsel and….attractive trouble are all around. Whether you are singing “Feliz Navidad” or “Dradle Dradle Dradle,” we can all agree this is one of the greatest times of the year, BUT it’s also filled with hidden dangers for your children and pets. In fact, it is one of the most dangerous times of the year for your dog Dasher, your cat Blitzen and your two legged crawlers. So, don’t let all the sparkle distract you, be sure to keep an eye out for festive trouble.
That’s why I called upon two experts to guide us through all of the dangers our holiday décor and holiday foods can create for our little loved ones. First, the child safety experts at Boo Boo Busters talk Santa safety with five key tips to keep your children safe:
- The Christmas Tree: We are all conscious of hanging the fragile or sharp ornaments up top to keep them out of reach of those curious hands, but have you thought about where you place your tree? Positioning is always important, think: fire safety. Keep your tree more than 48 inches away from any open flame (that includes candles and the menorah.). When decorating your perfectly chosen greenery, it’s best to use plastic hooks instead of metal. Lastly, KEEP IT WATERED! A dry tree is a dangerous tree. Follow the instructions for watering the tree so it can last as long as your holiday season lasts. Also, consider buying a real live growing tree in a pot, it’s a greener earth-friendly solution and the tree can become part of your family traditions.
- Frosty’s Scarves : A strangulation hazard is anything that can be made into a loop and placed around a child’s neck, this includes scarves. Since your little elves need to stay warm, let’s take scarves off the strangulation list by making them safe by simply tucking the ends inside your child’s jacket. Oh so fashion forward and the scarf can’t get caught on anything. Whew, problem solved.
- Miniature Décor: Choking hazards are everywhere this time of year; they disguise themselves as decorations and holiday cheer. A good rule of thumb: a choking hazard is anything that can pass through a toilet paper roll holder unobstructed. Now is the time to scan the environment to see what’s around each and every corner. Remember, it’s not always just your house that needs your safety check. Visiting the grandparents, other family and friends who might be inadvertently unaware of what is or isn’t safe for your kids. Say Ho Ho NO! to decorations within your child’s reach. Snow villages, nativity scenes, and light up and display decorations with lots of small pieces, electrical cords and even batteries can easily be pulled out and end up in your cherub’s mouth. Lighted garland adorning the staircase or the mantle where the stockings will be hung with care, can also create dangerous scenarios. Bowls of candies, nuts and little yummy things are often put out for grazing. Even though they are edible, it doesn’t make it safe for a baby or small child. Place these delicious favorites higher than a child can reach. Lastly, although it may not be a choking hazard, put mistletoe on your priority watch list. This pretty little smooch maker may have fun motives but everything else about it says keep away. It’s about as toxic as a plant can get, berries, leaves and all. No one knows what your kids can get into better than you do. So, put your Grinch hat on before the kids see the decorations, then you can put the Santa hat on once the wide-eyed wonder-filled kiddos with busy little fingers enter the scene!
- All That Glows: We all have that part of us that wants to light the house up like Clark Griswald, but let’s try to keep those little admirers in mind when powering up. Secure lights in place with clips, not left dangling where a child can reach. Using staples to attach lights can also be dangerous: they can cut through the cord without you even knowing it and cause a short or spark leading to a potential fire. Take extra care when using extension cords to power up those giant blow-up dradles or reindeer dancing in the front yard. Secure them with stakes so they can’t create a potential tripping hazard. Put the lights on a timer so they turn on when you want them to and turn off around bedtime. Mother earth and your neighbors will both thank you. Nothing like a silent glow-free night.
- Ringing in the New Year: Last but not least, New Year’s Eve! Party favors, noisemakers and poppers are fun (and equally annoying) but can also be very dangerous. Check when purchasing noisemakers and party favors to see if they could be potential choking hazards. Poppers and silly string should be used with adult supervision. Poppers should never be popped in the vicinity of someone’s face and silly string should never be used near an open flame.

Next, Dr. Anthony George, doctor of veterinary medicine and certified veterinary acupuncturist, says to keep these five jolly activities away from your pooches or felines and they will be as merry as you are all holiday season:
- Holiday Foods: Many people like to include their furry friend in the festivities by giving them a ‘sample platter’ of the holiday’s bounty. This act, unfortunately, can introduce a variety of potential risks to pets. Eating fatty and rich foods can lead to stomach upset and diarrhea. In some dogs, the elderly in particular, calorie dense foods can potentially lead to inflammation of the pancreas. Chocolate contains methylxanthine, which can cause a variety of symptoms ranging from stomach upset to tremors, hyperthermia and seizures. The darker the chocolate the more dangerous it can be. Grapes, raisins, onions and garlic are also extremely toxic to dogs. And, if you’re taking acetaminophen for pre and post celebratory aches and pains, bear in mind this medication can pose a tremendous risk to your pets. Commonly found in name brands such as Tylenol and Excedrin, along with many generic cold and allergy remedies, acetaminophen can change the ability of the blood to carry oxygen. If your pet ingests any of these substances, it’s always a good idea to contact your local veterinarian. So keep your pets safe by having them celebrate with their regular diets.
- Festive Plants: Plants and flowers transform any room into a holiday showcase, but also an unforeseen room of danger for curious pets. The usual suspects, poinsettiasand American mistletoe, have been considered potentially toxic to pets in the past. However, today it’s generally considered unlikely that either one would cause significant ill effects unless ingested in great quantity. Lilies, on the other hand, pose a significant risk to cats. These lovely flowers can dress up any holiday flower arrangement, but all parts of the plant are toxic to cats and can lead to kidney failure. Ingesting even a small amount of the leaves, petals, or even pollen can result in severe illness and possibly death. Warning signs include an increase in salivation, depression, loss of appetite, and vomiting. Stay clear of these beauties if you have a feline friend.
- Ribbon: If your dog or cat loves to help you wrap the presents or loves to un-wrap their own present, make sure they don’t run off with the ribbon. These colorful strands can wreak havoc if ingested. Once ingested, the intestines can bunch up on the ribbon in an attempt to pass it. If you should happen to see part of the ribbon ‘exiting’ from the hind end, never pull it out, as this can cause it to cut through the intestines. Absolutely, consult with your veterinarian to aid in its removal, whether it’s through endoscopy, surgically or manually.
- The Many Dangerous Layers of the Tree: The Christmas tree is the centerpiece of many holiday homes. However, if you have a cat you may want to lay off the tinsel as it poses the same threat as ribbon does. Electrical cords from the Christmas lights, as well as other holiday decorations, can be an enticing chew toy for a pup or cat. This playful act can lead to severe mouth burns. The electrical conduction of their heart can even be altered, resulting in the accumulation of fluid in the lungsand difficulty breathing. Take measures to prevent your pet from coming into contact with these electrical temptations. Many trees are also fitted with water containers to keep them fresh. This water could contain fertilizer or become stagnant over time. Prevent your pet from drinking from the tree to avoid potential complications.
- The Impulse Buy: Grandparents, Aunts and Uncles make sure the entire family actually wants a pet before you present one as a holiday present. Please make sure everyone understands that a pet is a gift for life not just for the holidays. Everyone must be ready for the full-time job of getting the pet acclimated to it’s new home. If you’re planning on adding a four legged family member: puppies and kittens aren’t the only way to go. Remember to rescue and adopt any age and/or any breed. Many lovable pets looking for a good home can be found on www.petfinder.com. Avoid adopting exotic pets, primates and reindeer. Make a pet’s life happy this holiday season too by finding it a forever home.

Keep your head above the twinkle and remember this simple checklist. Santa’s basic yule tide rule of thumb: if it looks like it could be trouble then put it on the naughty list and hide it away. Wishing you and your family a wonderful memorable holiday season and an amazing New Year full of safe and happy smiles!
Source: CB Blue Matter Blog
7 Secrets to Selling: Tips from Real Estate Insiders

Coldwell Banker Real Estate professionals weigh in on what you need to know when navigating the real estate process.
Your Home’s November Honey-Do List

This month, we’re especially thankful for home. Home is where the family comes together, where we’re protected from the elements, and where love abounds. Your home’s November Honey-Do list will make sure your home is ready for the holidays, prepared for colder weather and loved inside and out.
1. Winterize your home – For most of the country, November is the time when we can no longer deny that the colder weather has settled in. Now is the time to winterize summer tools and appliances like air conditioner units, grills and lawn mowers. Bring garden hoses indoors and check your windows and doors for drafts.
2. Make a Turkey Game Plan – No coach would head to a big game without a game plan up his sleeve. Likewise, no chef should hit the kitchen without thinking through the menu and timeline first. Determine what menu items you can make ahead, decide what responsibilities you can delegate, and take an inventory of your pantry and china cabinet. Oh, and now’s the time to clean that oven, too.
3. Polish the Silver and Dust off the China – Thanksgiving is a special meal, which deserves the best of your entertaining arsenal. Because we don’t often use our special dishes year round, it’s smart to give them a good deep clean and polish before setting the table on Turkey Day.
4. Give your living room a refresh – With the holidays ahead, your living room is sure to get plenty of use. Give the space a refresh by changing out the window treatments for a new look.
5. Use some pest control – Rodents and other pests are opportunistic and seek warmer environments when the temperatures drop. Be sure that they don’t call your house their home by implementing these 5 surefire tricks to pest control.
6. Clear out the gutters – Avoid drainage problems and damage to your home’s foundation by clearing out the gutters before snow and ice wreaks havoc. Here is an easy how-to guide to cleaning rain gutters on your home.
7. Be ready for snow – Before the first winter storm, it’s a good idea to make sure your snow shovels and/or snow blower are in proper working order. Ready to invest in a snow blower after the brutal winter last year? Here is a buying guide from Home Depot that will help you make an educated purchase.
8. Start tackling the December to do list – The holiday to do list is notoriously the longest of the year. Get a head start by ordering your holiday cards, updating your address book, and making a gift wish list for each of your family members NOW. You can even start stringing twinkle lights on your shrubbery before the deep chill sets in. After all, the most important part of the holidays is taking the time to enjoy our family and friends.
Next month we’ll cover everything you’ll need to know to make your home holiday ready. Until then, Happy Thanksgiving!
Source: CB Blue Matter Blog
Fastest Remodels that Make the Most Impact

Here are a few big-picture renovations you can make in surprisingly little time, whether you do it yourself or hire help.
Guest Post by Lauren White
Remodeling projects can seem like a distant fantasy when days off are usually consumed by errands and chores. What can you accomplish with the slim hours you have to spare? Here are a few big-picture renovations you can make in surprisingly little time, whether you do it yourself or hire help.
Instant Patio
Time: 4-6 hours
Budget: $3,000
Outdoor spaces are deceptively quick and affordable to make. If you have a half-day to spare, you can turn a patch of yard into a gorgeous patio before sundown. The processwill involve digging and leveling the area you need, preparing a base for proper drainage and laying your stones. Once the project is complete, you will have a relaxing outdoor living space to enjoy.
Keep your time down by choosing pavers or bricks that don’t need to be cut. Interlocking patio pavers come in many variations and they eliminate the dilemma of fitting awkward pieces together.
One-Day Backsplash
Time: 2-8 hours
Budget: $30-$600
It only takes a few hours to install a new kitchen backsplash, but it could take less time depending on the material you choose. If you paint the backsplash, it will take mere hours of preparation and application. Painting costs as little as $30. If you use peel-and-stick ceramic tiles or rolls of faux metal, it will take roughly the same amount of time.
If you have more than a few hours, make a stand-out backsplash using an adhesive tile mat and individual tiles. The adhesive mat will ensure that heavy tile materials don’t fall off, and requires less curing time than traditional, wet adhesive. Explore your tile options in HomeAdvisor’s resource center.
Weekend Window Replacement
Time: 2-3 days
Budget: $5,000
High-efficiency windows are a strong investment, whether you are planning to sell or stay. These windows save homeowners anywhere from 10% to 30% in home energy costs. Efficiency is a top priority for today’s buyers, and this project has over 70% return on investment.
Removing old windows, installing heavy panes and finishing up with framing is a complex process. Professionals can do it in a matter of days, where it might take you much longer. Hiring a pro is worth it, because this renovation will put money back in your pocket when it is done right.
72-Hour Countertops
Time: 1-3 days
Budget: $3,000
In most cases, you’ll want to hire a professional to replace your countertops. Installation and cutting needs to be very precise, and most counter slabs weigh up to and over 400 lbs! With the right amount of muscle, you can finish this job in 1-3 days. Some materials and pre-fabricated pieces can even be installed in 3-7 hours.
Upgrading your countertops can do wonders to improve your kitchen and raise your home value. Granite, for example, can handle a lot of wear-and-tear. If your kitchen is like the Union Station of your house, this low-maintenance, high-resistance material is perfect for your counters.
For the adventurous weekend warrior, check out these countertops you can make yourself.
Two-Week Hardwood Floor Refinishing
Time: 2-14 days
Budget: $1,600
Flooring has a big impact on the appearance and value of your home. If your hardwood floors are in bad shape, you’ve probably already thought of refinishing them. Whether you hire a professional or do it yourself, you’re going to need at least two days.In fact, you may need as many as fourteen.
You will need one day for sanding and one day per layer of polyurethane finish. Each layer will need 24 hours to dry. Two to three layers of finish are recommended. If you’re going to stain the wood, add another day for that between sanding and finishing.
This project may take longer, but the results are worth it. Refinishing seals the wood against rot and moisture, and adds appeal for homebuyers. They will be more impressed by a glossy shine than rough, exposed wood. If you’re not sure it’s the right time for your floors, check out these answers to common questions to help you decide.
Investing in your property can mean a faster sale, or will at least give you a few extra luxuries to enjoy. See what you can accomplish with an afternoon or your next three-day weekend, and format your budget using these helpful cost guides.
Lauren White is a freelance writer who enjoys reading, hiking and traveling. She can usually be found on an outdoor adventure with her boyfriend and little sister on the weekends.
References
- www.bhg.com/home-improvement/remodeling/budget-remodels/weekend-home-projects/
- www.houselogic.com/remodel/remodeling-tips-advice/house-remodeling-how-long-does-it-take/
- www.fix.com/blog/tile-kitchen-backsplash-in-one-day/
- www.thespruce.com/easiest-and-cheapest-backsplashes-1821174
- www.popularmechanics.com/home/outdoor-projects/a22394/how-to-build-a-bluestone-patio/
- www.thespruce.com/process-of-installing-replacement-windows-1822901
- www.replacementwindowsfordummies.com/articles/energy-efficient-windows-advantages-and-disadvantages
- www.remodeling.hw.net/cost-vs-value/2017/
- www.valentiflooring.com/blog/hardwood-floor-refinishing-project-how-long-does-it-take
- www.thespruce.com/cost-to-refinish-hardwood-floors-1314853
- www.homeadvisor.com/r/refinishing-hardwood-floors/
- www.rempros.com/estimating-time/kitchen-countertop-replacement.html
- www.diynetwork.com/how-to/rooms-and-spaces/kitchen/how-to-install-a-granite-kitchen-countertop
- www.homeadvisor.com/cost/kitchens/tile-backsplash-install/
- www.homeadvisor.com/cost/outdoor-living/install-a-patio-or-pathway/
- www.homeadvisor.com/cost/doors-and-windows/install-windows/
- www.homeadvisor.com/cost/flooring/refinish-wood-flooring/
- www.homeadvisor.com/cost/cabinets-and-countertops/install-countertops/
Moved In? Now What? – A Post Move Check List
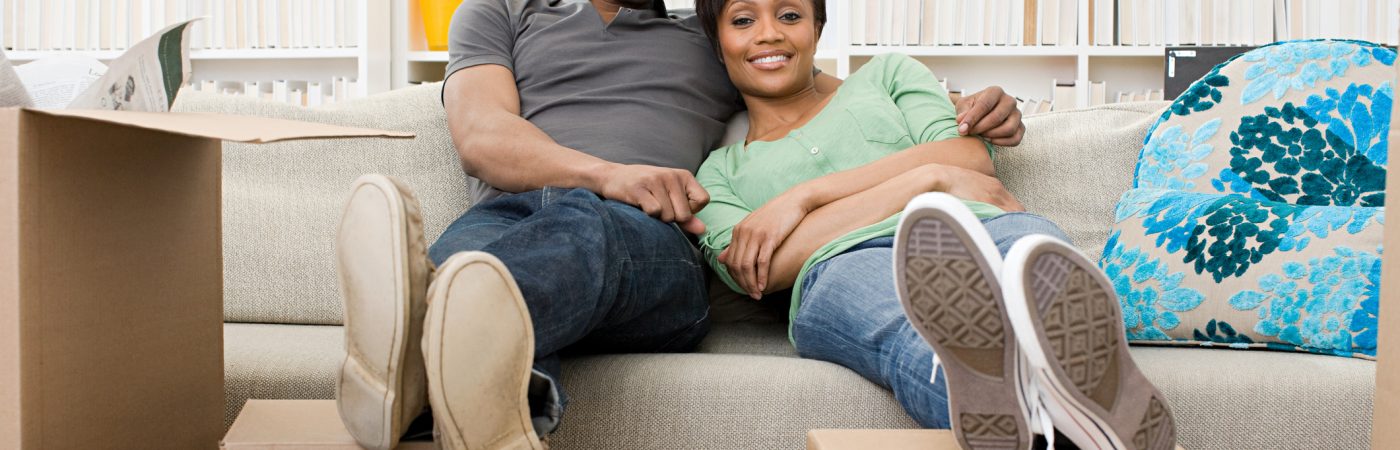
So, it’s been a month since you moved into your new home. The empty boxes are stacked in corners like miniature Leaning Towers of Pisas and you are missing some key pieces of mail. The moving checklist guided you day by day, but now that the moving storm has subsided, how do you complete the settling in process?
Ready for the best news ever!? Unlike your two-month long moving-in check list, there is a short list of tasks that will not only ensure you don’t miss the next People magazine, but will also help Mother Earth and others in need. Too good to be true? You can thank me later. Follow these five steps and you will forget you ever moved.
1. Boxes! Boxes!
To truly feel moved in, the first task is to get rid of all the empty moving boxes. So many of us are guilty of just leaving the empty boxes in the garage or attic to gather dust. Instead be green and save green by asking your moving company if they have a box return program. For instance, NorthStar Moving Company will give you back 25% of the original cost of their boxes if you return them.
Other ways to reuse boxes is to flatten them and put them out on recycling day or use them for storage of keepsakes, holiday décor and other items you only need on occasion. The most creative and inspirational way to reuse moving boxes is to join the Global Cardboard Challenge to celebrate child creativity!
2. Mail Yourself
Does your mailbox seem light? While you may be thankful to not be getting all of your bills you certainly don’t want to miss a due date. Check in with the post office to make sure they have your mail forwarding service set up correctly. Then send a friendly postcard to yourself, address it to you at your old address and wait and see if it gets forwarded to your new address.
3. Update Your Driver’s License & Consider Becoming a Donor
No one enjoys visiting the DMV and the good news is you don’t have to! You can change your address online. You must report your new address within 30 days of your move to the Department of Transportation Registry of Motor Vehicles.
This is also an opportunity to revisit being an organ donor. You can register to become an organ donor on your state’s DMV website as well. The number of donors willing to make organ donations are not growing as quickly as the number of people who need them. 20 people in the United States die each day while waiting for organ and tissue transplants. The number of patients in the U.S. waiting for transplants is currently over 116,000 people. Even more are waiting for much-needed tissue transplants.
While you are on the subject, consider a program to donate your whole body. The organ donor symbol on the back of a driver’s license is different from body donation, they are completely separate programs with entirely different consenting processes. Only 1% of organs donors specify to donate their whole body. There is a great need. You could potentially make a difference in the lives of many people.
4. Survey Your Stuff
After a month of living in your new home you now know what furniture, kitchen tools, artwork and even clothes fit into your new place. Rather than stumbling over the stuff that you don’t need, give it to someone that does need it and will give it a good home.
Create two labels: “donate” and “give to friends & family.” Donate clothing and household items that don’t have sentimental value to your local favorite charity such as Goodwill or Habitat for Humanity’s ReStore for someone else to enjoy.
For the items that are sentimental, keep them in the family by giving them to loved ones. But, don’t just hand it to them, throw a party, a reverse housewarming party! Instead of having your friends bring a housewarming gift, ask them to pick one (or more) of your items and take it home with them. This is a great way to reunite with old friends and meet new friends after your move. Your unneeded things will be in a home where you can visit them often.
5. Vote!
There is no “debate” that every American needs to cast their ballot, so it is vital to register to vote. Your voter registration does not move with you. If you move within your existing county, you must complete a new voter registration form to update your new address. If you move to a different county or state, you must re-register with your new county and/or state.
Visit the EAC website to download and print the National Mail Voter Registration Form. Once you have completed the registration form, mail it to the address listed under your state in the “State Instructions.”
See, in just five steps you are now clear of moving remnants and clutter, sipping coffee with your New York Times and are the shining example of being a responsible citizen. Enjoy your new life!
Moving with a Baby: The Complete Guide for Parents

We have organized the guide into three sections: Before the Move, Moving In and Baby Proofing.
By NorthStar Moving Co-Founder Laura McHolm
On the move with a little mover in tow? Every parent knows having a baby at home is an adventure. Take that everyday baby voyage and mix in moving your home, now your adventure is more like a hike up Mt. Everest! Here’s the good news, if you plan ahead and take simple steps that trek will become a walk in the park (well maybe not, but a manageable stroll up hill.) Before you pack up and gear up for the baby + move exploration, check out this complete guide for parents moving with a baby to ease the stress and enjoy the transition.
We have organized the guide into three sections: Before the Move, Moving In and Baby Proofing. You can think of it like pregnancy, nesting and then labor!
Before the Move
Stick to Routine: Baby’s love and need their routine. Don’t let the moving to-do list and packing get in the way of your regular daily routine. Instead of pulling an all-nighter to pack, try to pack over a long period of time. Use naptime and baby’s early bedtime to get packing done in bits. Baby & parents need their sleep!
Create a Moving Calendar: To keep your head from spinning, it is best to plan your move 8 weeks out. Here is a Moving Day Count Down Calendar to copy, print and hang it up where you can easily refer to it while feeding the little one. This way you can take it day-by-day and get the satisfaction of checking off moving to-dos!
Use Childcare: During the actual moving day, when boxes and furniture are being moved, little ones should be somewhere else. Ask a trusted babysitter, friend or family member to take your bundle of joy for the day. It is also ideal to use childcare for days leading up to your move so that you can get more done on your moving calendar. There are great nanny and babysitting services that help you find qualified childcare.
Talk To Your Current Pediatrician: Your pediatrician is a great resource. If you are traveling long distance, ask them for tips for keeping your baby happy on a plane or long car ride. If you need to find a new pediatrician, make sure you get a copy of all of your child’s medical records to give to your new pediatrician. Get copies of all your child’s prescriptions and have them called into a pharmacy near your new home. Ask your current pediatrician for recommendations on how to find a new pediatrician close to your new home. When finding a new doc, it is recommended to set up a meet and greet appointment as soon as you move.
Pack a Baby Bag: You know the daily drill; pack half the nursery to carry with you wherever you go. Well, this time the baby bag (box or small suitcase) should include all of your needs for three days (if you’re moving a long distance, you may want at least one month of supplies with you rather than on the moving truck). Once you move into your new place, you may not have easy access to diapers, baby food, pacifiers and the important squeaky toy. So be sure to pack everything you need for three days (or more) in one place that you keep by your side for easy access on moving day and the first few days after.
Moving In
Unpack the Nursery First: When moving in you should set up the nursery first. This will allow you to change your baby and easily put them to sleep on the first night in your new home. Arrange the nursery as closely as possible to your previous nursery. The familiarity will help you and your baby in the transition.
Setting Up The Crib: All new cribs on the market today meet the safety standards of the Consumer Product Safety Commission (CPSC) and the Juvenile Products Manufacturers Association (JPMA). When setting up a new crib or reassembling your crib look for the following suffocation and strangulation hazards:
- Sharp or jagged edges
- Missing, broken or loose parts
- Loose hardware
- Cut out designs in the headboard or footboard
- Crib slats more than 2 3/8 inches apart (width of a soda can)
- Corner post extension over 1/16 of an inch high
- Gaps larger than 2 fingers width between the sides of the crib and the mattress
- Drop side latches that could be easily released by your baby
Use Safe Bedding: Soft bedding can suffocate a baby, blocking the baby’s airway during sleep. Babies can suffocate when their faces become wedged against or buried in a mattress, pillow or other soft object. Use a safe crib with a firm, tight-fitting mattress covered with a crib sheet and nothing else in it. To keep your baby warm, use a sleep sack (wearable blanket).
Baby Proofing the New Home
I turned to the uber knowledgeable folks at Safe Kids Worldwide for a Baby Safety Checklist:
Crawl Through Your Home: The first step to a safe home, say the experts at Safe Kids, is to look at the world through your baby’s eyes. See what looks interesting and what can be reached. And I mean it literally – get down on your hands and knees in your new home and check for small things your baby can choke on. You will be amazed at what you discover! If you question if an item is a choking hazard, take an empty toilet paper roll and put the small object in it. If it fits completely into the roll, don’t let children under 3 play with it.
Test Alarms: Have working smoke alarms and carbon monoxide detectors inside all bedrooms, outside all sleeping areas and on every level of your new home. Test alarms monthly and change batteries once a year.
Install Gates: Install stair gates at the top and bottom of stairs. Stair gates at the top must be attached to the wall with hardware.
Secure Furniture: Secure furniture to the wall to avoid tip overs.
Check Windows: When decorating your new place, be sure to use cordless window coverings.
Mindful Unpacking: When unpacking, be sure to lock up medicines, vitamins, cleaning products, pet food, alcohol, poisonous plants, and chemicals (like paint, gasoline, etc.) and store them high out of your baby’s reach.
Your baby’s arrival was certainly the most blissful and incredible life change. Now you get to start the next chapter together in your new home. A home that is safe for your little one to play, grow and explore!
Laura McHolm is an organizational, moving & storage expert and co-founder of NorthStar Moving Company. NorthStar Moving Company is an award winning, “A+” rated company, which specializes in providing eco-luxury moving and storage services. www.northstarmoving.com

")


