
 Facebook
 X
X
 Pinterest
 Copy Link
5 Ways to Start 2018 Right in Your Home

To get your home in tiptop shape for 2018, here are some important and efficient ways to get it ready.
Guest post by Andrea Davis
2018 is almost here! While you might consider making some New Year’s resolutions, you first need to think about your end of the year list. To get your home in tiptop shape for 2018, here are some important and efficient ways to get it ready.
1. Clean, clean, CLEAN!
If you haven’t taken care of the essential house cleaning chores, now is the time. You’ll want to quickly or deeply clean many areas of your home. These include:
- Windows
- Linens
- Floors
- Cabinets/countertops
- Appliances
- Gutters & downspouts
- Air vents
Not only does this give your home a refreshed look, it also keeps you financially savvy going into 2018. Without the proper cleaning, areas like the air vents and gutters can lead to expensive home repair bills.
2. Purge & Recycle
Nobody likes looking at a full closet, especially if you have holiday presents to add. So go through every bit of storage in your home – closets, attic, basement, garage, shed, etc. – and remove what you don’t need. You can either throw it away or recycle it by donating to a local secondhand shop. That way, you have tons of space for next year’s discoveries.
3. Increase Efficiency
If you’re going through bills and notice a marked increase in utility costs, now is the time to plan out an efficient home in 2018. This could be as simple as turning off the lights more often and conserving water. On the other hand, if you have some extra dollars, you might consider improvements like:
- Double or triple-paned windows
- Solar panel(s)
- Upgrade your faucets and water outlets
4. HVAC TLC
One of the most important – and expensive – parts of your home is the HVAC system. It keeps the house warm in the winter and cool in the summer. Because it does so much work, it needs some fine-tuning and maintenance at least every six months. To make sure you avoid an expensive bill in 2018, go through the system. Replace the filter, clean out the vents and make sure it’s all working smoothly. If you aren’t an HVAC pro, you can find plenty in the neighborhood to come for a quick checkup.
5. Review the Exterior
Roofing, landscaping, doors, siding – have you given them a thorough look? All of these are important to a beautiful appearance and optimal safety. You need to check for cracks, holes, overhanging branches and the like. You can always get a home inspector for a more in-depth review, but most of it you can do yourself. Doing a quick circle around the house with some spackle or caulk works at least in the short term.
Conclusion
Going into 2018 means letting go of 2017’s hassles. To feel free of any stress, you should take care of the essentials, including your home. Maintenance and some cheap upgrades could make all the difference personally and financially in the New Year. Don’t feel you have to go all out, or else you’ll be too tired for new tasks. Make sure there’s a nice balance of work and play so you get the best start to 2018.
Source: CB Blue Matter Blog
Fastest Remodels that Make the Most Impact
Here are a few big-picture renovations you can make in surprisingly little time, whether you do it yourself or hire help.
Guest Post by Lauren White
Remodeling projects can seem like a distant fantasy when days off are usually consumed by errands and chores. What can you accomplish with the slim hours you have to spare? Here are a few big-picture renovations you can make in surprisingly little time, whether you do it yourself or hire help.
Instant Patio
Time: 4-6 hours
Budget: $3,000
Outdoor spaces are deceptively quick and affordable to make. If you have a half-day to spare, you can turn a patch of yard into a gorgeous patio before sundown. The processwill involve digging and leveling the area you need, preparing a base for proper drainage and laying your stones. Once the project is complete, you will have a relaxing outdoor living space to enjoy.
Keep your time down by choosing pavers or bricks that don’t need to be cut. Interlocking patio pavers come in many variations and they eliminate the dilemma of fitting awkward pieces together.
One-Day Backsplash
Time: 2-8 hours
Budget: $30-$600
It only takes a few hours to install a new kitchen backsplash, but it could take less time depending on the material you choose. If you paint the backsplash, it will take mere hours of preparation and application. Painting costs as little as $30. If you use peel-and-stick ceramic tiles or rolls of faux metal, it will take roughly the same amount of time.
If you have more than a few hours, make a stand-out backsplash using an adhesive tile mat and individual tiles. The adhesive mat will ensure that heavy tile materials don’t fall off, and requires less curing time than traditional, wet adhesive. Explore your tile options in HomeAdvisor’s resource center.
Weekend Window Replacement
Time: 2-3 days
Budget: $5,000
High-efficiency windows are a strong investment, whether you are planning to sell or stay. These windows save homeowners anywhere from 10% to 30% in home energy costs. Efficiency is a top priority for today’s buyers, and this project has over 70% return on investment.
Removing old windows, installing heavy panes and finishing up with framing is a complex process. Professionals can do it in a matter of days, where it might take you much longer. Hiring a pro is worth it, because this renovation will put money back in your pocket when it is done right.
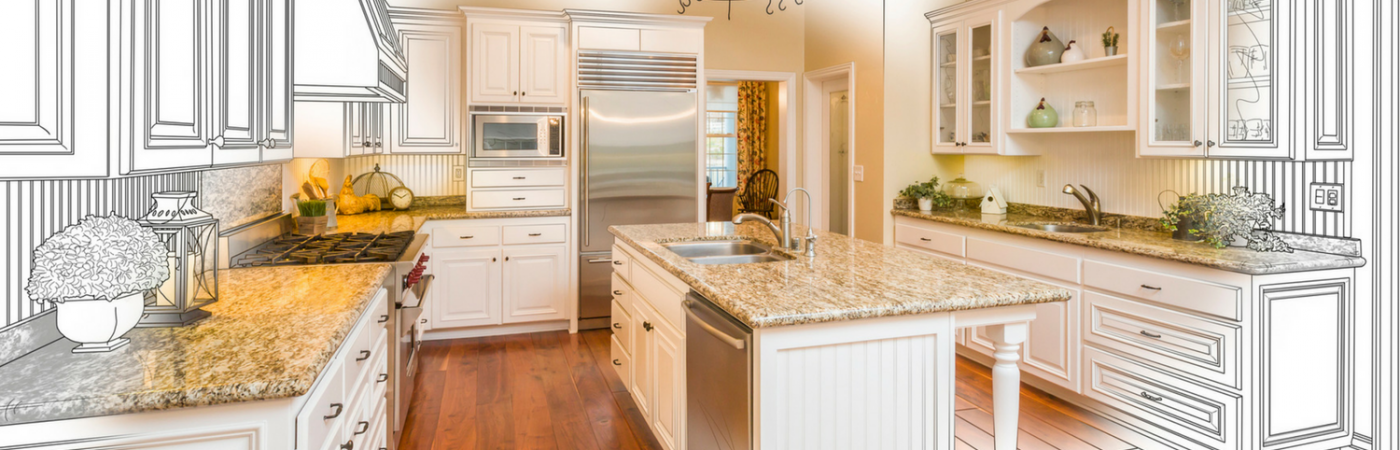
72-Hour Countertops
Time: 1-3 days
Budget: $3,000
In most cases, you’ll want to hire a professional to replace your countertops. Installation and cutting needs to be very precise, and most counter slabs weigh up to and over 400 lbs! With the right amount of muscle, you can finish this job in 1-3 days. Some materials and pre-fabricated pieces can even be installed in 3-7 hours.
Upgrading your countertops can do wonders to improve your kitchen and raise your home value. Granite, for example, can handle a lot of wear-and-tear. If your kitchen is like the Union Station of your house, this low-maintenance, high-resistance material is perfect for your counters.
For the adventurous weekend warrior, check out these countertops you can make yourself.
Two-Week Hardwood Floor Refinishing
Time: 2-14 days
Budget: $1,600
Flooring has a big impact on the appearance and value of your home. If your hardwood floors are in bad shape, you’ve probably already thought of refinishing them. Whether you hire a professional or do it yourself, you’re going to need at least two days.In fact, you may need as many as fourteen.
You will need one day for sanding and one day per layer of polyurethane finish. Each layer will need 24 hours to dry. Two to three layers of finish are recommended. If you’re going to stain the wood, add another day for that between sanding and finishing.
This project may take longer, but the results are worth it. Refinishing seals the wood against rot and moisture, and adds appeal for homebuyers. They will be more impressed by a glossy shine than rough, exposed wood. If you’re not sure it’s the right time for your floors, check out these answers to common questions to help you decide.
Investing in your property can mean a faster sale, or will at least give you a few extra luxuries to enjoy. See what you can accomplish with an afternoon or your next three-day weekend, and format your budget using these helpful cost guides.
Lauren White is a freelance writer who enjoys reading, hiking and traveling. She can usually be found on an outdoor adventure with her boyfriend and little sister on the weekends.
References
- www.bhg.com/home-improvement/remodeling/budget-remodels/weekend-home-projects/
- www.houselogic.com/remodel/remodeling-tips-advice/house-remodeling-how-long-does-it-take/
- www.fix.com/blog/tile-kitchen-backsplash-in-one-day/
- www.thespruce.com/easiest-and-cheapest-backsplashes-1821174
- www.popularmechanics.com/home/outdoor-projects/a22394/how-to-build-a-bluestone-patio/
- www.thespruce.com/process-of-installing-replacement-windows-1822901
- www.replacementwindowsfordummies.com/articles/energy-efficient-windows-advantages-and-disadvantages
- www.remodeling.hw.net/cost-vs-value/2017/
- www.valentiflooring.com/blog/hardwood-floor-refinishing-project-how-long-does-it-take
- www.thespruce.com/cost-to-refinish-hardwood-floors-1314853
- www.homeadvisor.com/r/refinishing-hardwood-floors/
- www.rempros.com/estimating-time/kitchen-countertop-replacement.html
- www.diynetwork.com/how-to/rooms-and-spaces/kitchen/how-to-install-a-granite-kitchen-countertop
- www.homeadvisor.com/cost/kitchens/tile-backsplash-install/
- www.homeadvisor.com/cost/outdoor-living/install-a-patio-or-pathway/
- www.homeadvisor.com/cost/doors-and-windows/install-windows/
- www.homeadvisor.com/cost/flooring/refinish-wood-flooring/
- www.homeadvisor.com/cost/cabinets-and-countertops/install-countertops/
2017’s Most Important Summer Home Maintenance Projects

These projects are what you should be focusing on this summer regarding maintenance on your home.
Being proactive when it comes to your home’s maintenance can save you time and money! Focus on maintaining these 5 areas.
With the bright sunlight and warm temperatures that accompany summer, you may be spending more time outside — and you may be noticing areas of your home’s exterior that need repair. But there’s more reason to tackle your home maintenance projects this summer than simply cosmetic appearance. Maintaining your home will prevent major leaks and damage that may eventually require professional help, usually when its most expensive and inconvenient for you.
Being proactive when it comes to your home’s maintenance can save you time and money, and it makes sense to do it when you’re more likely to be outdoors in the comfortable summer months. Here are five areas of your house that are most important to keep updated.
-
Windows


Start by cleaning the exterior of your windows with hot soapy water and a sponge or squeegee. If you’ll need a ladder, make sure to review safety guidelines.
While you’re washing, inspect each window pane for cracks. Double or triple glazed windows with damaged seals or cracks may need to be replaced. Think back: Have your windows had excessive condensation inside through the winter and spring? That’s another sign that the seal might have been compromised and that your window might need to be replaced.
You’ll also want to inspect caulking and weatherstripping around your windows. Recaulk any spots where the caulk is loose or chipping away, or consider applying new caulk for a tight seal. Summer is a perfect time to do this because the warm temperatures and low humidity will help the caulk set perfectly.
Finally, wash window screens and replace any screens that have rips or holes.
-
Roof
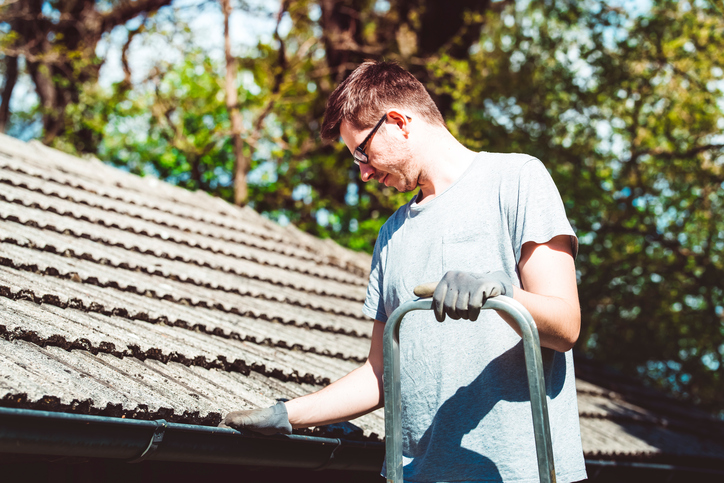

Visually inspect your roof every summer for missing or broken shingles, shakes and panels. Again, if you’ll be using a ladder and climbing up to your roof, make sure you follow safety guidelines. If you have any concerns about using a ladder or moving around on your roof, or if you’re unsteady on your feet, call your roofing company. Most roofers will make inspections and do basic maintenance for you.
While you’re up on your roof, you’ll also want to check flashing and seals around vents, chimneys and skylights. Apply caulk around any areas that haven’t been re-sealed in the past year.
Algae and moss can plague even new and well-maintained roofs. Apply a moss killer designed for roofs or install zinc strips that can help keep algae and moss from taking hold.
Your gutters should be cleaned and checked for holes or other damage. Look for water stains around your gutters and downspouts that indicate a problem.
-
Exterior
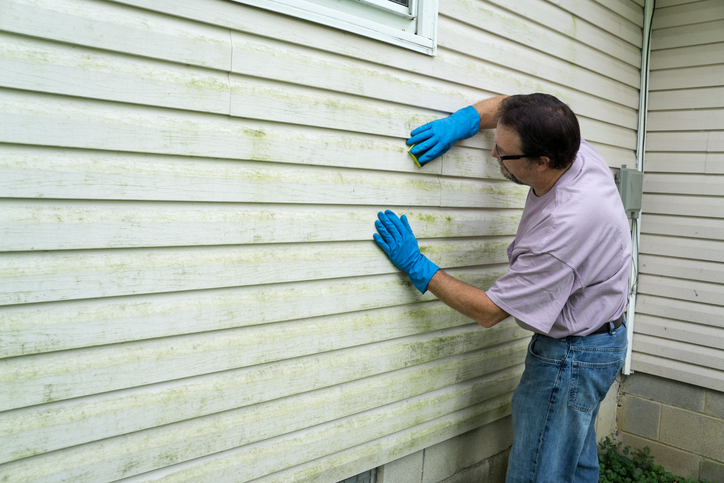

Check high and low over your exterior and look for holes, gaps and cracks in your siding. It’s less expensive to replace siding that is just starting to deteriorate than to wait until it’s broken down completely and impacted your home’s structure, insulation and inside walls.
While you’re walking around your home, look for any signs of pests. Termites and carpenter ants can be devastating to your home’s structure, while ants and wasps can be a nuisance and cause minor damage to your home’s exterior. Check vents and crawl-space access doors to make sure rodents and other wildlife can’t get in.
-
Foundation


Check your foundation for any cracks and signs that there has been a leak, such as water stains. Any small cracks can be repaired, but larger cracks should be inspected by a pro. Once you repair small cracks, re-seal the foundation with a good waterproof masonry sealer.
Pull out any larger plants growing close to your home that might impact the foundation. Besides the risks of roots growing into your foundation, watering plants close to your home can cause water to pool around the foundation and lead to damage.
-
Heating and Cooling
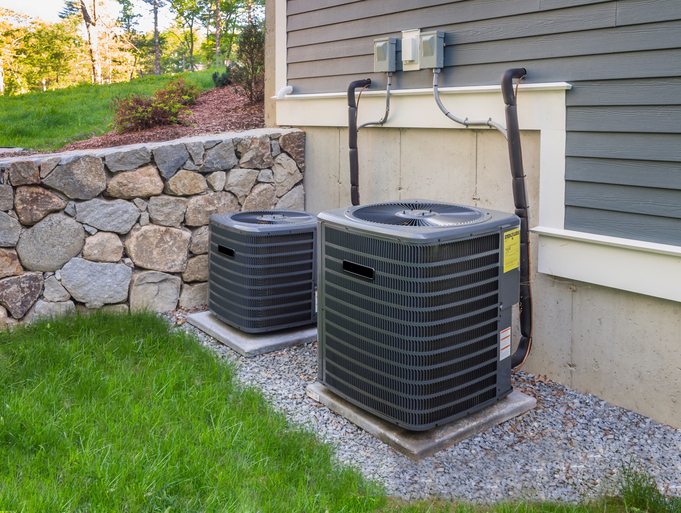

You’re going to want to make sure your air conditioning is ready for the heat ahead, so replace filters and remove and clean your unit’s fan and condenser. Make sure you turn off power to the unit before you tackle any work.
At the same time, your furnace should be checked and readied for use again at summer’s end. Vacuum out the burner and blower cavities, and vacuum and brush the blower blades. Change the filter so the furnace is all ready to go when it’s time to turn it on again.
Your home is a big investment, and it’s important to keep it in good “health.” Spend some of your summer days inspecting and making minor repairs and you’ll reduce your chances of needing a big repair later.
Source: CB Blue Matter
Light in, Prying Eyes out: Benefits of Light-Filtering Window Shades
Light and airy rooms but still worried about people sharing your indoor privacy? Then this is the read for you!
Want to let light in while keeping your nosy neighbors out? Special types of light-filtering window treatments enable you to illuminate your home with natural light while preventing others from viewing your personal space. Ultimately, these window shades may prove to be exceedingly valuable, particularly for homeowners who are searching for high-quality window treatments that are both stylish and practical.
Benefits
In addition to offering maximum privacy from passersby and neighbors, light-filtering window shades provide many benefits, including:
Energy Savings: The U.S. Department of Energy points out properly installed window shades offer some of the “simplest, most effective window treatments for saving energy.”
Improved Insulation: Some light-filtering window shades have been shown to act as both insulation and air barriers, and control air infiltration more effectively than other types of window treatments.
Exceptional Value: Homeowners can enjoy light-filtering window shades that consist of UV-resistant and antimicrobial materials for superb quality, maintaining their value over time.
Eco-Friendly Styles: Some light-filtering window shade options are partly constructed from biodegradable materials.
Unparalleled Convenience: Light-filtering window treatments can be motorized or manual, allowing for ease of use both day and night.
Types of Light-Filtering Window Shades
Light-filtering window shades provide varying degrees of light infiltration. The most popular options include:
Cellular Shades
Cellular shades deliver year-round insulation and privacy. Meanwhile, they are constructed to allow small amounts of light to enter a room. Typically, cellular shades are sold in single or double thickness. They are available in multiple vibrant colors, along with various cell sizes and fabric styles to match your home decor.
Cellular shades also boast immense durability. They include an aluminum headrail and bottomrail and take only minutes to set up in any living space.
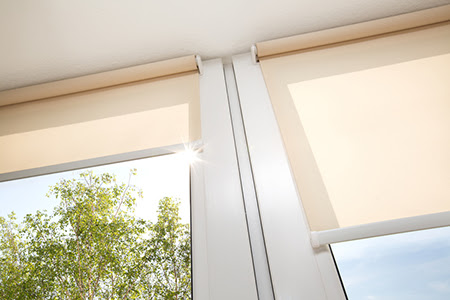
Roller Shades
Roller shades are easy to use and come in a wide range of lifts to complement any home’s decor. Light-filtering roller shades are top choices for many homeowners, as these shades block visibility into your personal space. In addition, blackout roller shades are great choices for those who prefer extra privacy and will help you maximize light control consistently.
Roman Shades
For those who want to add a hint of luxury to th eir decor, there may be no better option than Roman shades. Top-down/bottom-up Roman shades allow you to control whether light will enter from the bottom or from above. The versatile options in fabric range from every color of the rainbow, as well as prints.
If you require additional privacy, select Roman shades that feature a thermal liner. Or, if you need total or near-total darkness (like in a bathroom or media room), Roman shades with a blackout liner may prove to be ideal.
Pleated Shades
Pleated shades are available with light-filtering and room-darkening liners, maximizing light control and privacy needs. With a light-filtering liner, pleated shades can deliver daytime light transmission indoors. To maximize privacy, use pleated shades with a privacy liner, so that only minimal shadows are visible from the outdoors.
On the other hand, a blackout liner offers maximum light obstruction. This liner may serve as a great selection in a child’s bedroom or other settings where complete darkness is needed.
Vertical Cellular Shades
Ready to take your vertical window treatments to the next level? Thanks to vertical cellular shades, you can block harsh sunlight from entering large windows and patio doors.
Vertical cellular shades have been shown to deliver year-round insulation, sound absorption and ultraviolet protection. Moreover, they can include blackout fabric to provide you with the total privacy you need to get a great night’s sleep. Keep in mind that the blackout fabric of vertical cellular shades features an opacity that prevents light from filtering through at all times.
Vertical cellular shades are ideal in climates with extreme hot and cold temperatures and can be specified to stack on either side, split down the middle or stack in the center for added convenience.
Examine your window treatment options closely, and you’re sure to find window shades that match your personal style and budget perfectly, while offering privacy from prying eyes.
Source: RisMedia

")


