
 Facebook
 Twitter
 Pinterest
 Copy Link
The Lazy Guide to Spring Cleaning at Home
After a long winter, nothing feels better than having a clean and sparkling home. But, actually jumping into a deep clean is another story. Here are some simple tips to whip your home into shape without breaking a sweat:
#1 Wall Cleaning
A Magic Eraser is your best bet for tackling walls — it can spot clean anything from splatters to crayon marks. It’s tough enough to reach the cobwebs that collect in the corners of your walls and ceiling. You can also cover the bristles of a broom with a cloth or old T-shirt and use it to knock down any dusty spots.
#2 Carpets and Rugs
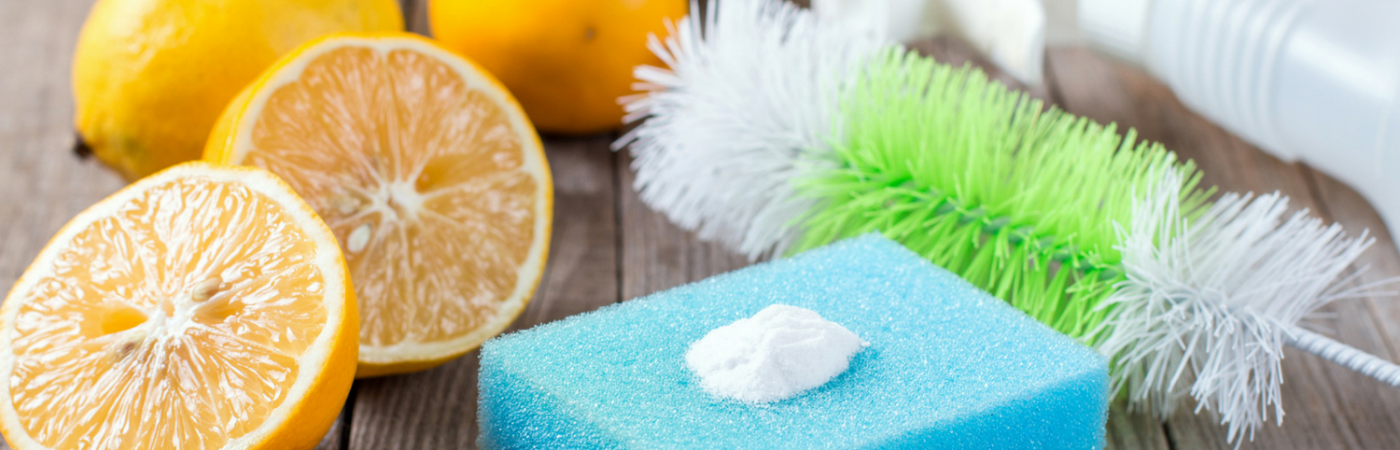
Take a little more time vacuuming the high-traffic areas of your house. (Make sure you don’t forget to spot treat any stubborn stains with a stain-removal product.) If your rug or carpet has lingering odors, sprinkle some baking soda over it and let it sit for a few hours. Vacuum up the baking soda and you’ll find the odors have disappeared.
#3 Mattress Ideas
Give your mattress cover a thorough cleaning in the washing machine — don’t forget to throw in a cup of white vinegar to boost the cleaning process. Sprinkle baking soda on your mattress while you’re washing the cover. You can vacuum it up later when you’re making the bed.
#4 Shower Care
Don’t knock yourself out trying to clean glass shower doors. Add a couple drops of water to your dryer sheets and use them to wipe down your shower doors. You can even let your showerhead clean itself overnight while you sleep. Simply tie a bag filled with white vinegar around your showerhead and let it soak overnight. Remove the bag in the morning for a non-clogged shower experience.
#5 Toilet Scrubbing
Have water stains built up in your toilet? Cola can help you attack these stains with little effort. Just pour some in the toilet, let it sit for several minutes, then flush.
#6 Oven Shine
If you have an oven with a self-cleaning feature, spring is a great time to finally run that cycle. Otherwise, mix baking soda with a bit of water and use it to quickly clean up grease and various other spills inside the oven.
#7 Clutter Solutions
When you don’t have time to clean but you need your house to look presentable, tackling clutter is the quickest way to create the illusion of a clean house. Zip through each room of the house and put anything that doesn’t belong into a basket. This strategy requires very little work and can make a big difference in your home’s appearance.
Conclusion
Although these tips won’t completely eliminate the effort involved in spring cleaning, they’ll make the job a whole lot easier. Spring is a time of new beginnings — if you use even a couple of these ideas, your home will enjoy a clean and fresh start to the upcoming season.
Source: CB Blue Matter Blog
Kitchen Storage Ideas for Your Apartment

An uncluttered counter is essential in a small apartment. It looks attractive, feels more airy, and encourages you to cook, rather than sending you running for the takeout menu. So get creative with kitchen storage ideas, and you can make clean counters a reality.
No Drawers? No Problem!
Some tiny NYC kitchens lack drawers. This may seem like a big problem, but with a few clever kitchen storage ideas, you can work around it. For utensils, you have plenty of options. Mason jars work great. You can do what Heather Clawson of Habitually Chic did, and put them on the counter where they double as an attractive interior design element — but if you’re striving for empty counters, simply put them inside a cabinet. If you don’t want to use mason jars, you can use the kind of utensil caddytypically used for outside dining. It has separate compartments for each type of utensil, making it the perfect storage tool for forks, knives, and spoons.
Nesting Bowls
If you like to cook and bake, you’ll have lots of mixing bowls, ramekins, and dishes. In order to allow them to be organized inside your cabinets and take up as little space as possible, it’s important to look for nesting bowls. Try Williams-Sonoma’s glass or melamine bowls — they’re incredibly useful for cooking while taking up minimal space.
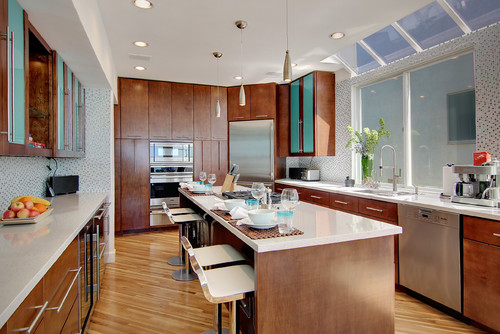
Use Your Oven
Where’s the best place to store big, bulky pots and pans in a tiny kitchen? The oven! This saves invaluable cabinet space in a compact kitchen, and it takes only a few seconds to remove all the pots when you need to use the oven for cooking. If you have the appropriate overhead space, a pot rack can also be a good space saver — but be sure that your pans are attractive enough to be on constant display (copper is always a beautiful, high-quality option).
Maximize Wall Space
Use your wall space whenever possible. You can hang up a magnetic knife rack; you can also hang spices on the wall or the refrigerator, if you get magnetic spice containers. Both options look fun and eclectic, while saving valuable cabinet space.
Create More Counters
When your counter space is sparse, you need to get creative. Here’s an idea: Buy a large wooden or marble cutting board and place it over two of the stove burners. Instant extra counter space! When you’re not using the cutting board for cooking prep, you can put something on it like a French press or a spoon holder. It’s a win-win … but you must be careful of your stove dials! Always be vigilant about not accidentally brushing against them and turning them on while the cutting board is in place.
With these tips, your compact kitchen will be a clean, uncluttered space, perfect for whipping up meals and hosting friends!
8 Space Savers for a Small Bedroom
Not everyone is blessed with endless square footage and expansive master suites in their home. If you find yourself drowning in piles of clothes and surround by belongings, you’re not alone. Here are eight simple tricks to save space and maximize storage in a small bedroom.
1. Fold Out Furniture
Murphy beds and pull-out sofa beds have gotten bad reputations in the past for being clunky and old-fashioned. However, there are many new and stylish ways to integrate a convertible bed in today’s modern home designs, one of which is shown above. Also try installing a fold-out desk against a wall for a small workspace. It can work double-duty as a mini makeup vanity too.
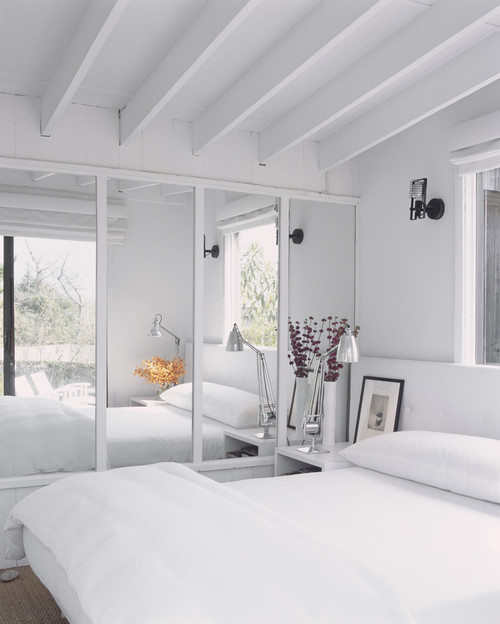
2. Use Large Mirrors
Here’s one of the oldest tricks in the book: mirrors. Mirrors never fail to visually expand and enhance a small space. The effect is strongest when it covers the entire side of a room with floor-to-ceiling or wall-to-wall mirrors. If you have an unsightly open closet situation, you can resolve both problems by opting for mirrored doors to hide the clutter and add visual dimension.
Tip: Another strategy for making a small room feel bigger is to capitalize on as many natural light sources as possible. Not only is natural light beneficial for your health and well-being, it draws the eye outwards and beyond the corners of any small space. Reflect a window in a mirror to bring more light further into a room.
3. Underbed Space and Storage
A lot of potential is hidden in floor space, an area that’s often forgotten and unused in many bedrooms – big or small. If it isn’t already, prop your bed a foot or two above the floor with store-bought bed risers and voila! You’ve found more space. Don’t start cramming everything you can in your newly found space though. Being able to see beneath the bed will make a bulky bed feel light and airy. If you need more storage, purchase wide and shallow drawers that can easily slide under the bed. You can use this space to keep belongings dust-free and easily accessible.
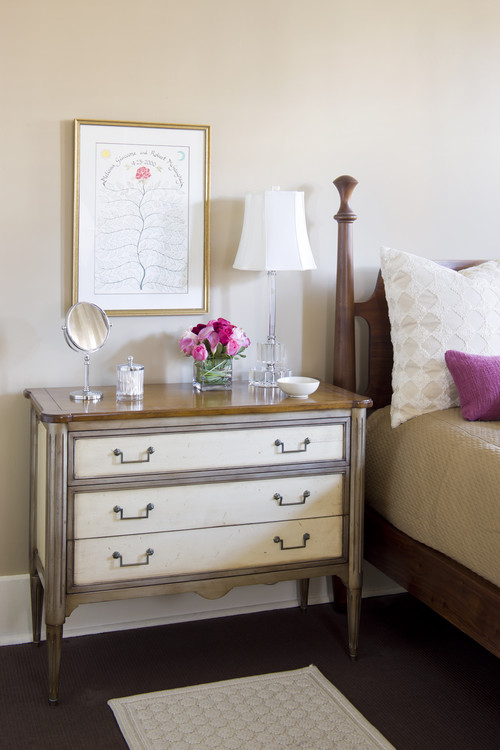
4. Combine Your Nightstand and Dresser
Most people try to buy the smallest furniture pieces possible for a small bedroom, but in certain cases, one large item is much better than two small ones. With an oversized nightstand, you can eliminate the need for a big dresser and keep everything within arm’s reach of the bed. The surface can still hold bedside essentials while the space below can be used for clothing storage.
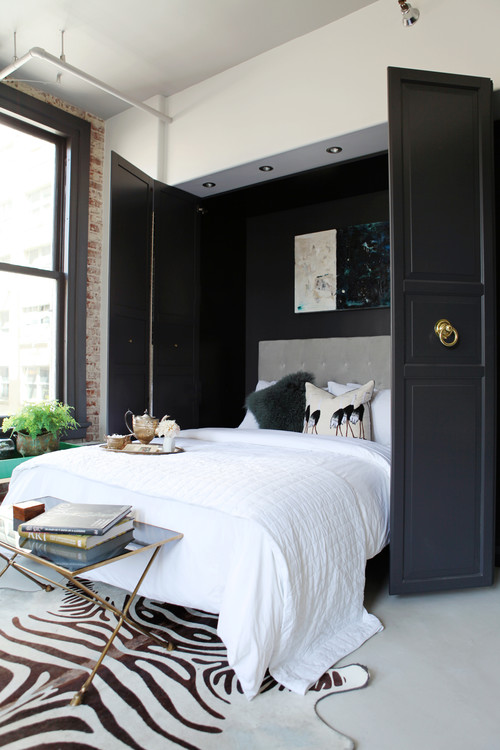
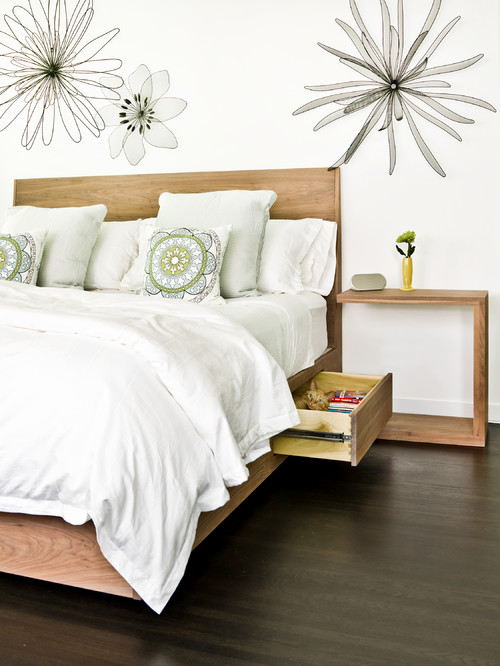
5. Outfit Your Headboard With Storage
Headboards with built-ins make the most of otherwise wasted space. Traditional tufted headboards are gorgeous in all their glory, but block the wall space above the bed from being used for anything else. You can pull out your headboard to create a ledge at the top or purchase a one with storage cubbies built in or around the panel. For the most storage, use a combination of both, as seen in this storage-savvy contemporary bedroom.
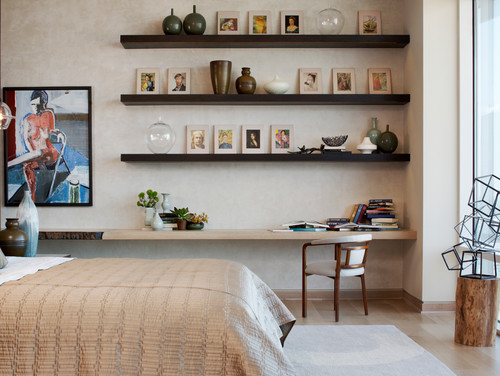
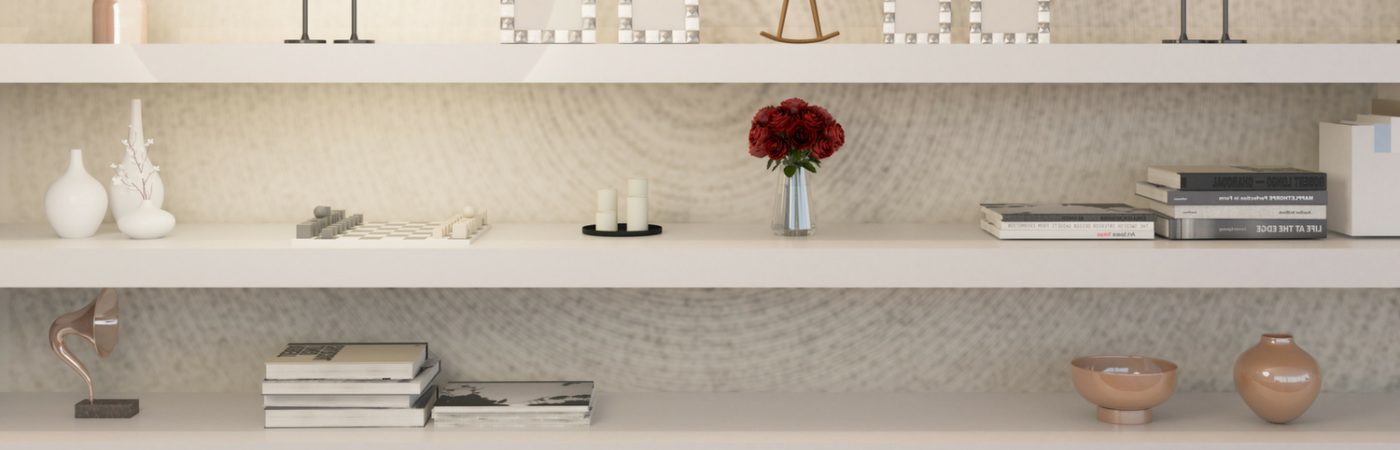
6. Utilize Open Wall Shelves
If you have cherished knick-knacks that you want to put on display but don’t have the surface area to spare, look to your blank walls. Just as easy as hanging a picture frame or piece of artwork, mounting vertical wooden boards is a simple solution for holding your favorite photos or books. In this modern New York bedroom, multiple rows of open shelves above a desk hold countless frames and pottery pieces without using a single inch of floor space.
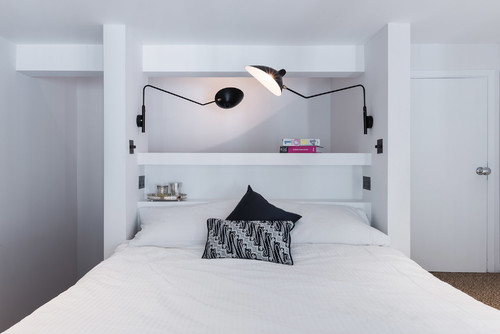
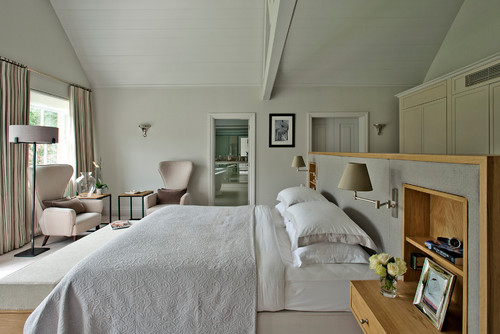
7. Mount Wall Lighting
If you’re struggling to fit a table lamp on your nightstand, look to your walls once more for another space-saving solution. Wall-mounted lights with flexible arms can be pulled to wherever they’re needed most or they can lay flush against the wall when unused. Like lamps, wall lights are come in a variety of sizes and prices.
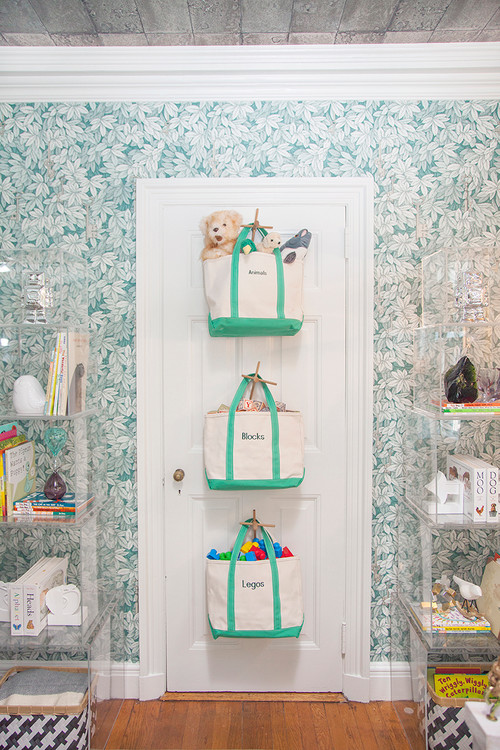
8. Look Behind the Door
Behind-the-door storage seems to have vanished largely from recent home design trends, but if you’re desperate for more space, look no further. You don’t have to confine yourself to classic over-the-door hooks; this space can also be used to hold shoes and coats; hats and scarves; and even makeup and bath supplies. Get creative and customize the back of your door to fit your storage needs.
Source: CB Blue Matter Blog
9 Must-Haves for Low-Maintenance Kitchen Cabinets
Save valuable elbow grease and time with these ideas for easy-to-maintain cabinets.
The heart of the home may also be the toughest room to keep clean. Every surface in your kitchen is susceptible to crumbs, dirt, stains and splatters. This is especially true of cabinets. Fortunately, there are practical ways to keep your cabinet maintenance on the lighter side. With ideas like choosing fewer decorative details and picking the right color, these nine tips will make your cabinets easier to maintain.
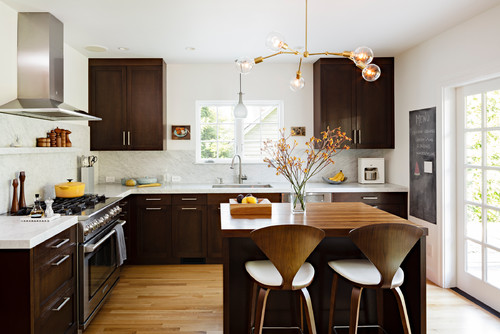
1. Choose a door style with minimal detail. Raised-panel door styles have nooks and crannies that are magnets for dust and dirt. Shaker-style and slab door fronts don’t, so you won’t have to spend time scrubbing every recess of your door fronts.
If you’re designing a traditional kitchen and want a more decorative door style, select a stain or paint that has a glaze. The glaze will fill the doors’ cracks and corners and better hide the dust and dirt that your cabinet doors will collect.
2. Opt for flush cabinet ends. You normally have two options for finishing the ends of your cabinets: flush ends or matching ends. Flush ends (above) are plywood ends that match the color of your cabinets. They are smooth and sleek, which means you can run a cloth over it with a few swipes. They can certainly speed up cleaning.
Matching ends feature a panel with the same style as the door fronts, and while they can bring elegance and character to your kitchen, you face the same maintenance issues with matching ends as you do with raised-panel doors. There’s simply more to scrub.

3. Cut the trimmings. Designer details like crown molding, corbels, decorative legs and light rail molding add more to love but also more to clean, especially ornate styles.
There are other designer touches you can use that require less maintenance. Try a colorful cabinet paint, eccentric lighting or colored bar stools, like in this modern kitchen.
4. Pick a stain instead of a paint. Stains and paints have pros and cons. They can both show crumbs and fingerprints, and paint definitely shows food stains and splatters.
That said, a stain is easier to touch up than paint. You can give a scratched cabinet stain a quick spruce-up with a matching permanent marker. It’s often harder with paint for two reasons. First, it’s hard to find a marker that closely matches a specific paint. Often a touch-up kit from the cabinet manufacturer is needed. Second, paint doesn’t take touch-ups the same way that stains do. You’re more likely to notice a touch-up on paint.
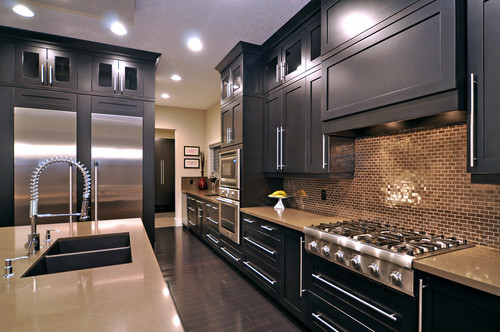
5. Go for a grain with a dark stain. If you’re set on a dark cabinet stain, select a wood species that features the grain, such as oak or hickory. Grains don’t show scratches, stains and crumbs as much as a clean wood species like maple does. It’s also harder to tell that a cabinet stain has been touched up when the surface has grains.
6. Invest in hardware. If you want fewer fingerprints and less wear and tear on your door fronts, purchase door pulls and knobs for all of your cabinets. They help preserve the integrity of your cabinets’ surfaces.
Steer clear of stainless steel and chrome hardware. They show fingerprints and water spots and are harder to clean. Oil-rubbed bronze, satin bronze, polished nickel, brushed nickel and white hardware are the cream of the crop as far as easy maintenance goes. Choose the look that best suits the style of your kitchen.
7. Avoid glass door fronts. They may be windows to your kitchen’s soul, but they’re also extra surfaces to clean. They manage to attract their fair share of dust, dirt and smudges. Dirt can build up easily on glass door fronts that feature mullions. You also have to keep whatever is behind those glass doors tidy.
One benefit to glass door fronts is how inviting they can make your kitchen space feel. Luckily, there’s more than one way to design a warm and welcoming kitchen. If you want a low-maintenance alternative to glass door fronts, stick with lighter cabinet stains like golden browns. They can make your guests feel just as cozy as glass door fronts do.
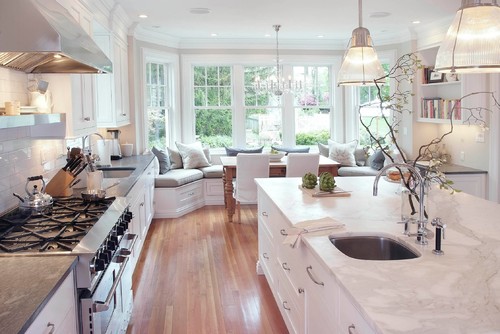
8. Reduce open shelving. Open shelving is a great canvas for displaying your favorite decor and cookware, whether it’s on a wall, on an island or at the end of cabinets. But it takes more time and effort to ensure that these spaces are dusted and organized. The upkeep can become overwhelming along with your daily tasks.
To shorten your to-do list, place your decor on necessary surfaces like dining tables and countertops instead of unnecessary cabinet shelves. You can also use pillows, chairs, bar stools and lighting as decorative touches.
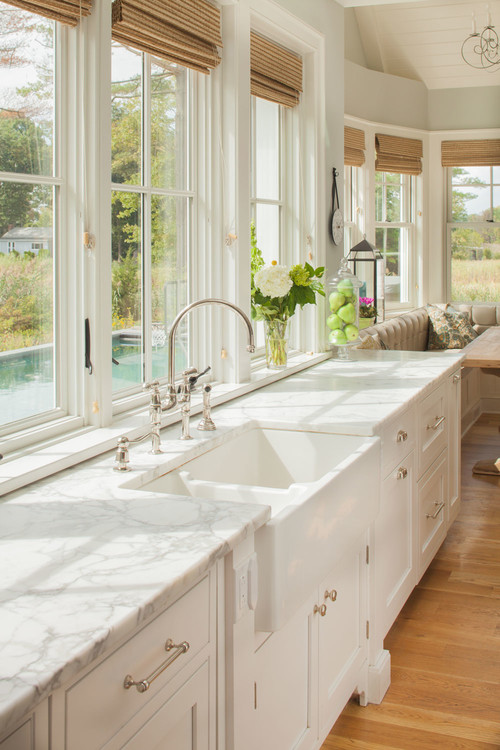
9. Protect your sink cabinet from moisture. This is more of a preventative measure — it will help you avoid issues down the road. There are a couple of ways to help protect your sink cabinet from moisture. You can order the cabinet with an all-plywood construction (most semicustom and prefabricated cabinets are constructed of a mixture of pressed wood and plywood). An all-plywood construction makes the cabinet less penetrable. You can also purchase a cabinet mat, which looks like a tray and is placed at the base of the sink cabinet. It will serve as a moisture barrier and catch any liquid leaks or spills.
More Kitchen Confidential: 10 Ways to Promote Aging in Place | 7 Ways to Mix and Match Cabinet Colors | 11 Islands With Furniture Style | The Case for Corbels | All Good in the Hood
Related Reads:
Choose Shaker Cabinets for Style and Simplicity
Easy-to-Clean Corbels for the Kitchen
Decorate With Eye-Catching Kitchen Lighting
Source: Coldwell Banker Blue Matter Blog
9 Kitchen Color Ideas That Aren’t White
Can’t quite figure out just exactly you are looking for when it comes to that color pop in the kitchen?
These fabulous ideas are worth a look!
Don’t get me wrong: White kitchens are cheerful, clean and classic — it’s no wonder why they’re so popular. But since white kitchens are everywhere, it’s easy to forget that there are other colors that can also look great in this space. Thinking about bucking the trend in your kitchen? Consider one of these options, from alternative neutrals to bright, bold hues.
NEUTRALS
You can’t go wrong with these versatile picks.
Charcoal Gray

If you want a cool neutral that’ll add a bit of drama to your kitchen, look to charcoal. Bright accent colors — or even white, as seen in this kitchen designed by Brian Patrick Flynn — really pop against it.
Greige

A mix between gray and beige, greige is an incredibly versatile neutral for the kitchen that can complement both warm and cool colors. In this space designed by Tobi Fairley, greige cabinets bridge the gap between warmer brass elements and cooler marble accents.
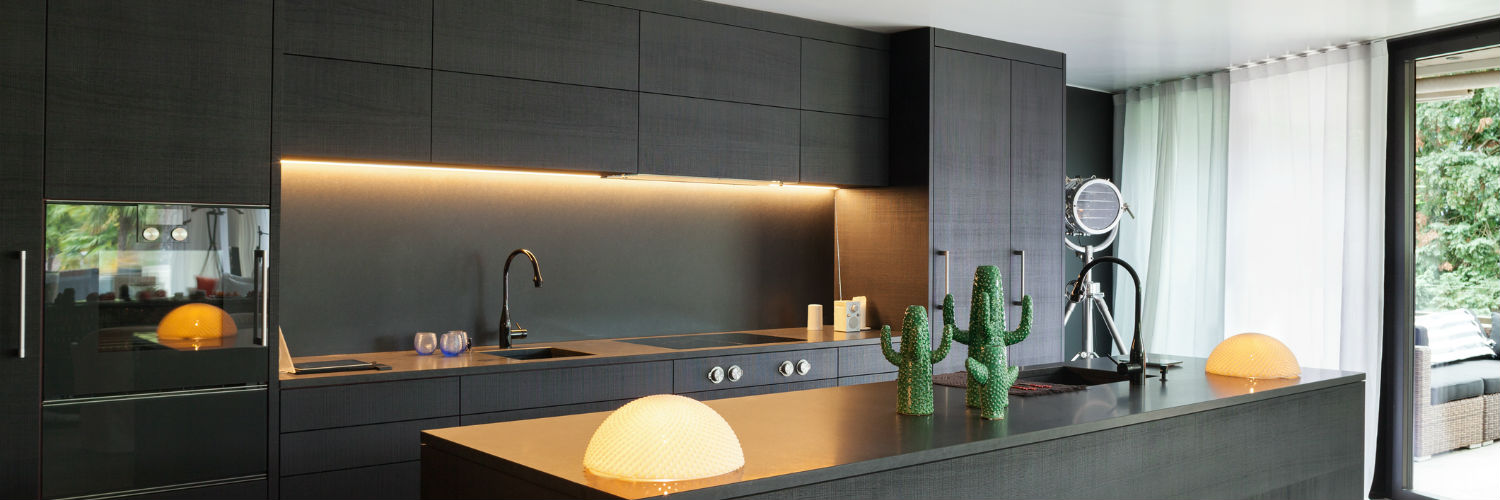
Black

A black kitchen may sound dreary, but it can actually be stunning if done right. Just take this gorgeous room that goes all in with black cabinets, a black vintage stove and a black-and-white tiled floor. If you’re not on board with an all-black kitchen, try adding one black element like a backsplash or a sink.
SUBDUED HUES
Add a touch of color without overpowering your space.
Pale Green

Hints of green in the stone countertops inspired the cabinet color in this country-style kitchen. The soft hue brings coziness to the space, yet still feels bright and fresh.
Butter Yellow
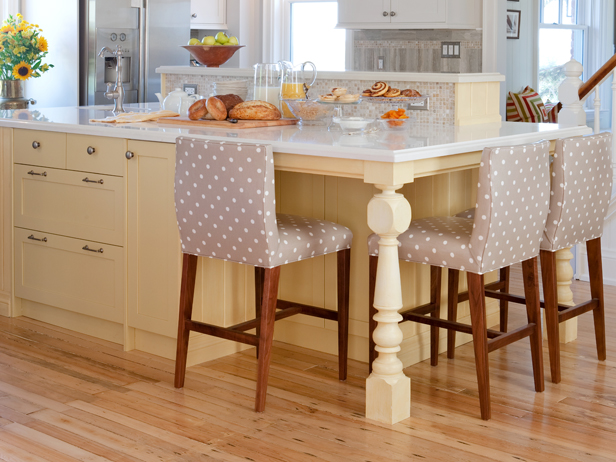
Particularly charming in a cottage- or farmhouse-style space, pale yellow adds a cheerful, sunny touch to a kitchen. Try it with robin’s egg blue or with neutrals, as seen in this kitchen designed by Sarah Richardson.
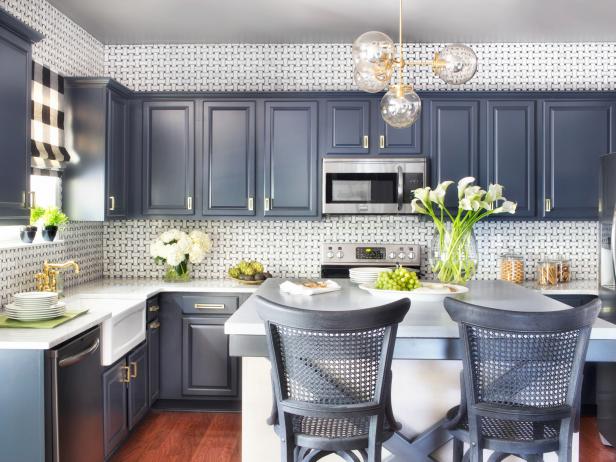
Navy Blue

Navy is practically a neutral — it pairs beautifully with everything from tangerine to turqouise to chartreuse. In the HGTV Smart Home 2014 kitchen, navy cabinets are offset by a black-and-white basketweave backsplash for lots of eye-catching contrast.
BOLD COLORS
Go all in with these daring shades.
Crimson

Want to instantly energize your kitchen? Just add a vibrant shade of red. To keep it from feeling overwhelming, try contrasting it with a cool color, like the blue-gray Brian Patrick Flynn used here. If you’re not ready to commit to red cabinets or walls, incorporate the color in small doses with red countertop appliances, dish towels and other accessories.
Emerald Green

Just a splash of this gorgeous green will make a big impact in your kitchen. In this design, Andrea Schumacher painted only the island, pulling a color from the floral wallpaper to keep the space cohesive. For an ultra-rich look, pair emerald with other jewel tones.
Orange

Orange is thought to stimulate the appetite, making it an ideal color choice for the kitchen. In this space by Jennifer Gilmer, an orange backsplash and zebrawood cabinets add warmth, keeping the contemporary design from feeling cold. Smaller orange accents, such as pendant lights or window treatments, can also liven up a kitchen.
Source: HGTV

")


