
 Facebook
 Twitter
 Pinterest
 Copy Link
Modest Home Updates to “Wow” Buyers & Boost Value
When selling a home in today’s market, it’s important to consider all the options to help make it stand out and appear move-in ready to selective buyers. Which improvements require the least time, effort and expense but will significantly boost your home’s perceived value? To help prioritize, we put together the following list of modest staging solutions/upgrades that will get your property noticed and cost less than the first price reduction that buyers would expect for dated kitchens and baths.

Dining room staged by PJ & Company Staging and Interior Decorating
Freshen Walls With Neutral Color
Our go-to instant fix to brighten and hide dated and damaged walls is neutral paint. It’s amazing to see how a dark red or purple room can be completely transformed with a coat of soft “greige” (a combination of taupe and grey) paint that increases the perceived size of the space, doesn’t distract from the room’s features and acts as the perfect backdrop to modern furnishings and décor.

Kitchen staged by PJ & Company Staging and Interior Decorating
Re-paint Kitchen and Bath Cabinets
To instantly boost a tired kitchen or bath without a costly investment, start by repainting dated and dark cabinets and vanities with bright white paint. Complete the look by pairing with modern hardware – handles, drawer pulls or knobs for added style.

Bathroom staged by PJ & Company Staging and Interior Decorating
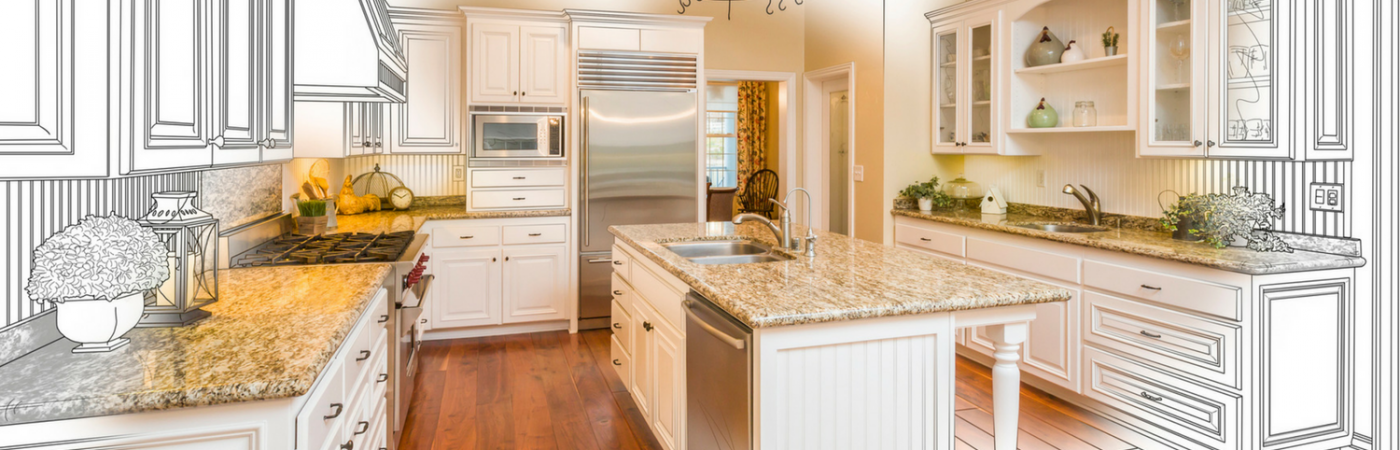
Replace Kitchen & Bath Lighting and Countertops
Lighting is an important design element that can affect the mood of a room more than any other accessory. Adding updated lighting in modern designs and on-trend mixed finishes such as brushed nickel, chrome or soft gold tones will add warmth and sophisticated style. It can also be used to draw attention to certain features in the room such as a beautiful new marble or quartz countertop (as shown in photo above), appliances or high ceilings.
Highlight Key Features
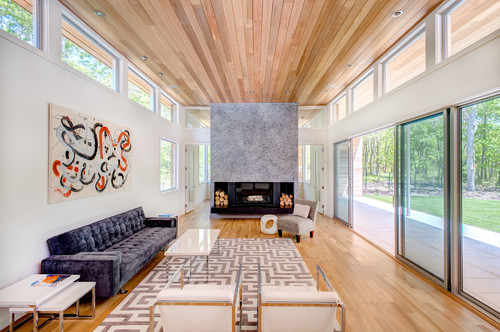
For large windows with attractive molding, remove heavier window treatments or simply frame with floor to ceiling neutral drapes. Remove worn carpeting and expose and polish hardwood flooring. Re-stain stairway steps and railings by painting risers or updating spindles. Enhance a beautiful stone fireplace with molding, mantle or screen.

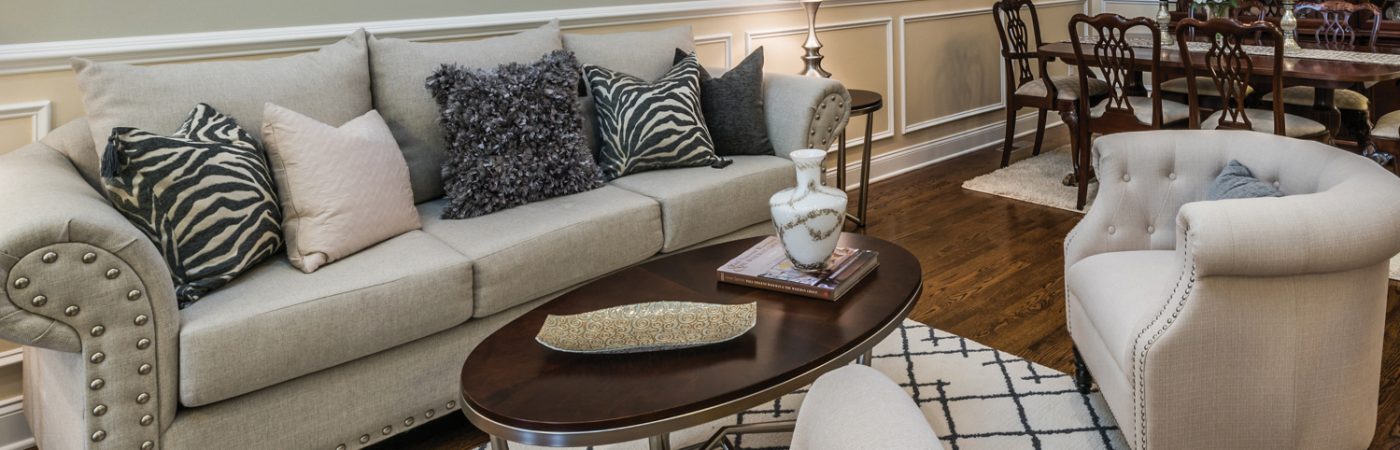
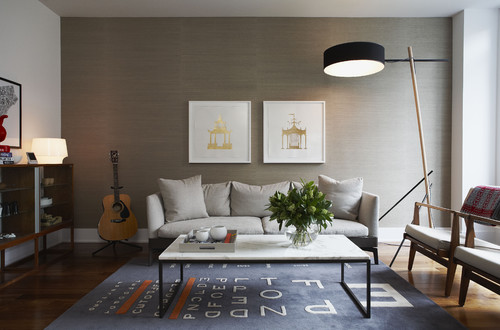
Living room staged by PJ & Company Staging and Interior Decorating
Finishing Touches
Once you’ve invested in cosmetic fixes, be sure to remove dated furniture and accents and replace with more modern style that complement the room (as pictured in living room above). Minimal wall art, vignettes and throw pillows with subtle pops of color and pattern will add depth and warmth so that buyers can emotionally connect and envision living in the home.
Exterior & Curb Appeal
It’s just as important to update the outside of your home to welcome buyers inside. Remodeling magazine’s “Cost vs. Value” report continues to list replacing entry and garage doors, siding and windows as upgrades that provide the greatest return on investment. However, sprucing up the landscaping, making necessary basic repairs, a fresh coat of paint for the front door and some seasonal potted flowers will go a long way to make a great first impression.
For more examples of interior decorating and home staging, visit www.pjstagingdecorating.com.
Source: CB Blue Matter Blog
A Beginner’s Guide to Wonderful Wallpaper
Wallpaper has a longstanding and misunderstood reputation for being obnoxiously bold and a nightmare to apply and remove. However, it has been entirely reinvented with new materials and appropriately renamed as “wall coverings.” You’ll see it popping up again in designs everywhere. Wall coverings serve as a beautiful accent piece in any room and can be as subtle or as fun as you desire. Here’s how to welcome a wonderful wall treatment into your home.
Learn the Basics
Wall coverings come in wide range of patterns, styles and materials. In comparison, paint is uniform and very 2D while wallpaper opens the door to a new dimension to play with. A great first step to deciding if it’s right for you is to browse inspirational home photos and save the ones that appeal to you the most.

Just like paint and fabric, you can order swatches of wallpaper to test on your walls before you commit. Full rolls can cost anywhere between $50 for plain paper versions to $300 for custom made or 3D textured options. It’s highly recommended, even by the most experienced DIYers, to hire an experienced professional for the final installation. And unlike its predecessors, many wall coverings use a safe and easy-to-remove adhesive for painless removal.
Know Your Options
There are thousands of different designs in production for wallpaper, so chances are if you have a particular look in mind, you’ll find it. On the slight chance it doesn’t exist already, you can commission a custom-made pattern or make your own. Traditional paper coverings are still made today, but vinyl wall coverings are also available and are great candidates for high-traffic areas since they’re glossier and can easily be wiped down.
The Williams Morris designs are popular for historic or arts and crafts style homes and floral patterns are a timeless classic. Alternatively, mural-style wallpapers are a great choice for modern art connoisseurs. They can be made to resemble an oversized print or photograph, a landscape or a cityscape of your hometown. Wall paneled paper pays homage to industrial style and can be made to resemble a brick, wood or concrete wall. If you want something more in-the-moment, graphic, geometric and ombre designs are very contemporary.
Textured grasscloth and silk wall coverings have a unique look and bring warmth and a sense of luxury to any space. These coverings are often one uniform color for people wanting a subtler look. Consider the tone and vibe you’re going for and how it looks from different angles, rooms and light when you’re shopping for the perfect fit.
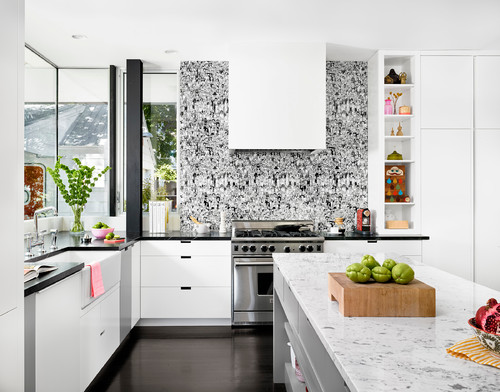
Choose a Location
Wallpaper works great in just about every room of the house, but materials should be thoughtfully chosen. For example, vinyl coverings are a great choice for kitchens and bathroom since they are moisture-resistant and can easily be wiped clean of dirt or food stains. If you want to test treatments in a small area, consider a low-traffic area such as a powder room or laundry room. If you don’t want to line an entire wall from floor-to-ceiling, you can install wallpaper above wainscoting for a half-wall look. Just like paint, wall coverings also make eye-catching accent walls.
Other fun places to try it out include the entry, along the stairwell, on the ceiling or in a nook. Wallpaper disguises wall blemishes, sets spaces apart in an open floor plan and, with the right pattern, enlarges small spaces. Wallpaper can also be applied to items other than walls, such as lining the back of a bookcase or shelving unit, a large cabinet, dresser or armoire for a stunning look.
Source: CB Blue Matter Blog
How to Hide Unsightly Blemishes Around Your Home

What makes a house a home? It’s a hard question to answer, but a large part of it is the years of memories you’ve made in it. Oftentimes that includes the blemishes, flaws and dents on the walls and furniture that serve as lasting impressions of cherished moments and fun times. However, whether you’re selling your home or just making it presentable for guests, there are times you’ll want to camouflage them up. Read on for 10 clever ways to disguise your home’s flaws.

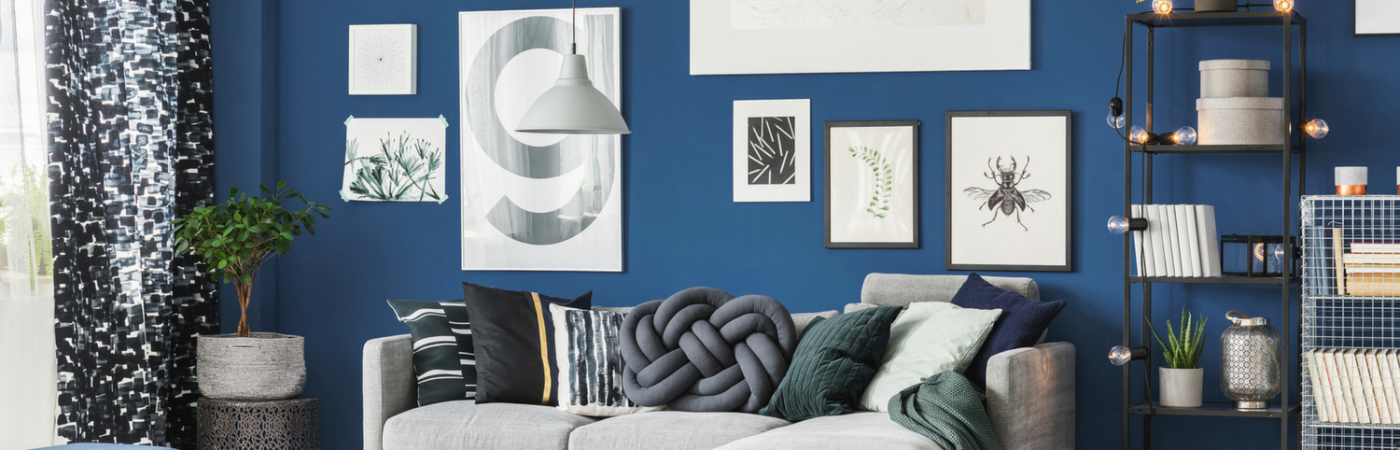
Create a Gallery Wall
Put your inner art connoisseur to work to blend random light switches or bulky thermostats into your design. Strategically place similarly sized artwork around switch plates, outlet covers and wall gadgets to distract the eye. If you want to cover it entirely, mount a canvas painting over it or hang art from a swing arm so you can reach behind it when necessary.
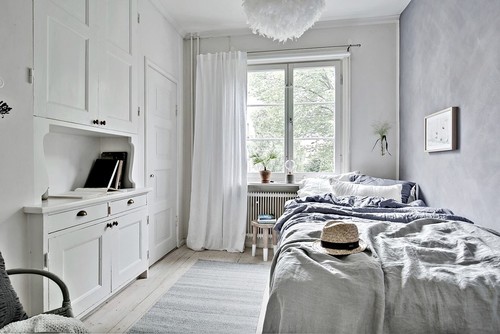
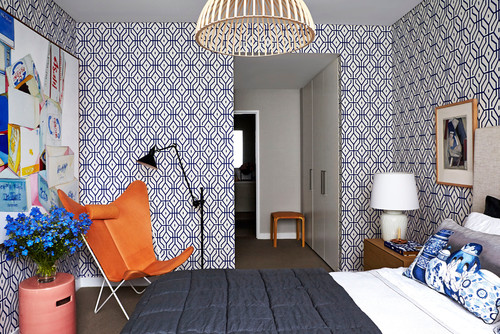
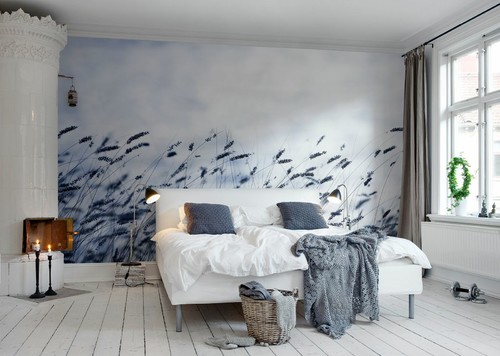
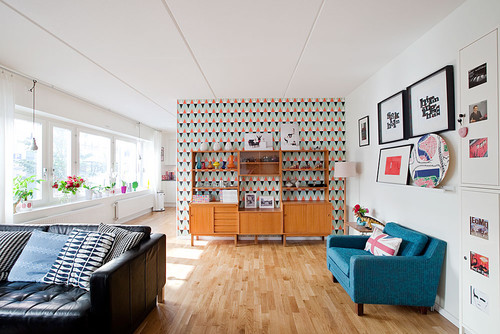
Hang Long Drapes
Window treatments are generally used for, you guessed it, windows, but they certainly aren’t restricted to other uses. Drape big and breezy curtains above to disguise unsightly wall features or awkward off-center windows. Off-white and cream shades are perfect to use now and throughout winter, such as the one seen in this Swedish bedroom that cleverly conceals the radiator and window when pulled closed.
Paint the Wall
This is probably one of the most obvious solutions to drywall chips and paint scratches, but here are some guidelines to help you get it right. Stick to one matte color for the walls, ceiling and trim to downplay the lines between and blend them together. Remember, the glossier the paint finish is, the more it will highlight imperfections.
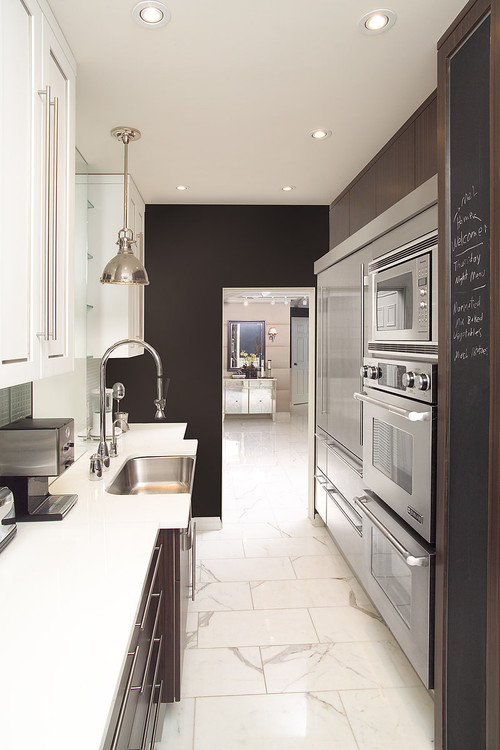
Consider chalkboard paint for a non-glossy texture and an ever-changing wall feature. You can create your own design and erase it as your style evolves or use it to jot down lists and reminders.
Add wallpaper. Use wallpaper to inject personality and fun into any space. Choose from subtle designs to a dramatic mural or anywhere in between. Keep optical illusions in mind when picking patterns. For example, a striped design can make a small space look taller or wider.
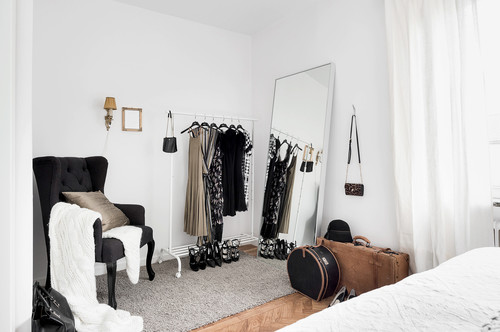
Cover it With Clothes
If you have a scratch on your bedroom wall that just won’t go away, play fashionista and move a shop-style clothing rack in front. Showcase some of your most stylish garments or everyday staples on the rack to lighten your closet’s load.
Lay Down a Rug
Roll out a gorgeous area rug over all the nicks and notches on your floor from moving furniture or dropping heavy items. Especially great for renters, rugs come in a variety of styles, colors and price points to fit your personal preferences without committing to a permanent change.
Rethink the Fifth Wall
This is a bit of a heavier project to take on, but perhaps most rewarding for those left with an infamous popcorn ceiling. Upgrade overhead stucco for a beautiful new feature with paint or paneling. Try white beadboard or wood slats for irresistible rustic charm.
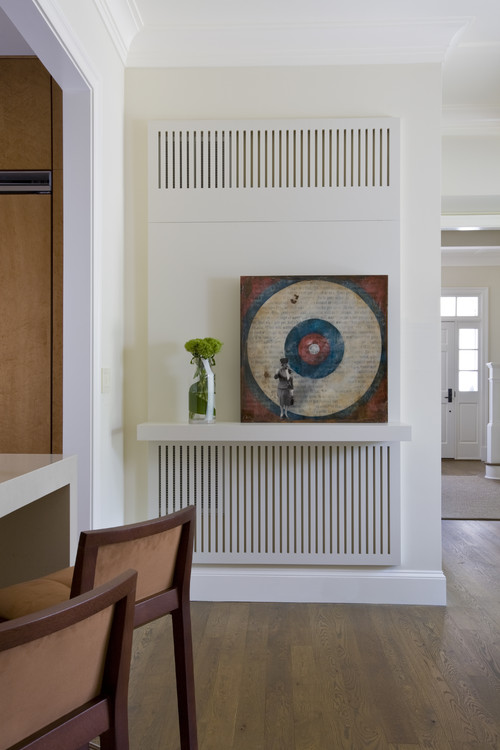
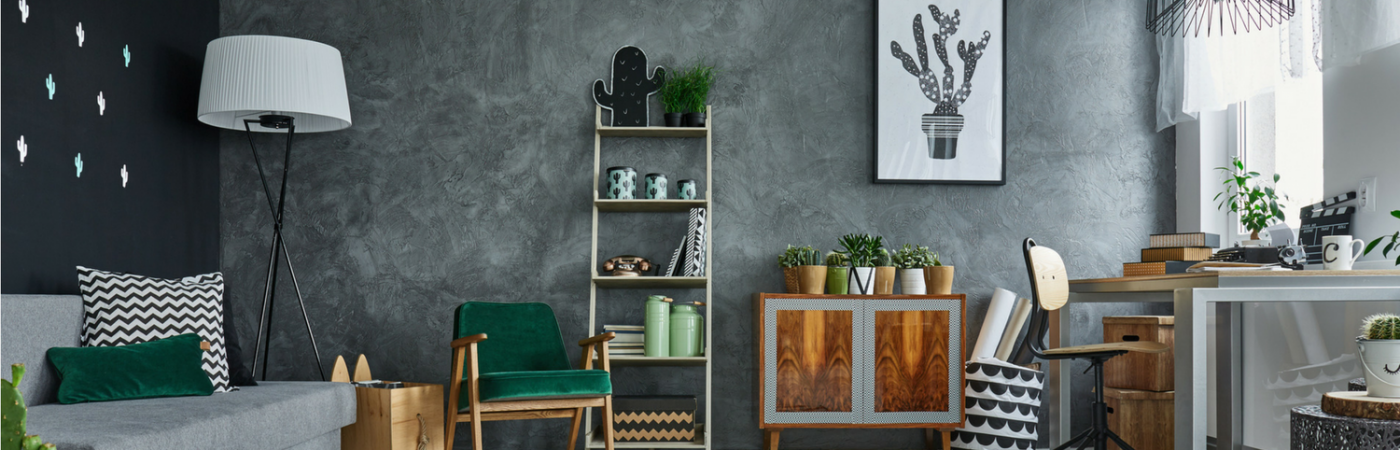
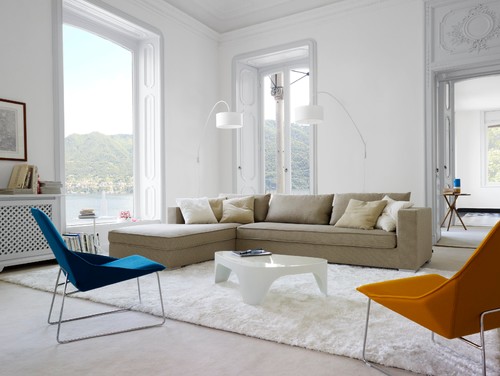
Work Around Wall Vents
Air vents are necessary for cooling, heating and any other home circulation systems, but can be quite unattractive. Conceal them with slotted laser-cut screens that add texture and visual interest. In this D.C. living room, the revamped air return works double duty as a display shelf.
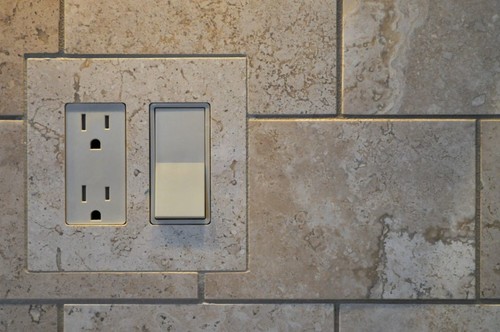
Choose Your Switches Wisely
Light switches and power outlets are must-haves in every home and there’s often no easy way around them. Wherever possible, especially in the kitchen and bathroom, group your electrical outlets together and shop for new switch plates that complement the existing wall. You can blend them into an existing pattern, as seen here, or make them a fun feature with vibrant colors and textured materials.
Embrace imperfections. After all, they’re what makes your house so special. You can capitalize on the look and help them blend in by investing in distressed furnishings, such as rustic coffee tables or stained wood floors. You won’t have to worry too much about future drops or spills and they instantly add built-in age and character to any space.
Source: CB Blue Matter Blog
5 Ways to Start 2018 Right in Your Home

To get your home in tiptop shape for 2018, here are some important and efficient ways to get it ready.
Guest post by Andrea Davis
2018 is almost here! While you might consider making some New Year’s resolutions, you first need to think about your end of the year list. To get your home in tiptop shape for 2018, here are some important and efficient ways to get it ready.
1. Clean, clean, CLEAN!
If you haven’t taken care of the essential house cleaning chores, now is the time. You’ll want to quickly or deeply clean many areas of your home. These include:
- Windows
- Linens
- Floors
- Cabinets/countertops
- Appliances
- Gutters & downspouts
- Air vents
Not only does this give your home a refreshed look, it also keeps you financially savvy going into 2018. Without the proper cleaning, areas like the air vents and gutters can lead to expensive home repair bills.
2. Purge & Recycle
Nobody likes looking at a full closet, especially if you have holiday presents to add. So go through every bit of storage in your home – closets, attic, basement, garage, shed, etc. – and remove what you don’t need. You can either throw it away or recycle it by donating to a local secondhand shop. That way, you have tons of space for next year’s discoveries.
3. Increase Efficiency
If you’re going through bills and notice a marked increase in utility costs, now is the time to plan out an efficient home in 2018. This could be as simple as turning off the lights more often and conserving water. On the other hand, if you have some extra dollars, you might consider improvements like:
- Double or triple-paned windows
- Solar panel(s)
- Upgrade your faucets and water outlets
4. HVAC TLC
One of the most important – and expensive – parts of your home is the HVAC system. It keeps the house warm in the winter and cool in the summer. Because it does so much work, it needs some fine-tuning and maintenance at least every six months. To make sure you avoid an expensive bill in 2018, go through the system. Replace the filter, clean out the vents and make sure it’s all working smoothly. If you aren’t an HVAC pro, you can find plenty in the neighborhood to come for a quick checkup.
5. Review the Exterior
Roofing, landscaping, doors, siding – have you given them a thorough look? All of these are important to a beautiful appearance and optimal safety. You need to check for cracks, holes, overhanging branches and the like. You can always get a home inspector for a more in-depth review, but most of it you can do yourself. Doing a quick circle around the house with some spackle or caulk works at least in the short term.
Conclusion
Going into 2018 means letting go of 2017’s hassles. To feel free of any stress, you should take care of the essentials, including your home. Maintenance and some cheap upgrades could make all the difference personally and financially in the New Year. Don’t feel you have to go all out, or else you’ll be too tired for new tasks. Make sure there’s a nice balance of work and play so you get the best start to 2018.
Source: CB Blue Matter Blog
DIY Ideas to Make Your Home Feel Bigger—Without Construction
Breaking down walls and renovating an entire space is not only time-consuming, but it’s also expensive and, in most cases, requires the help of professionals. Luckily, you don’t have to do major construction to make small spaces feel bigger.
If you’re not up for knocking down walls, focus on small DIY projects that can make your home feel bigger, the following of which are perfect for every homeowner, regardless of skill level or budget. From lighting to ceiling paint, consider how you can open up the space in your home without a sledgehammer and construction team.
Paint the Ceiling
The ceiling and trim have just as much an impact on the look and feel of the room as your furniture, yet they’re easy to overlook when painting. To open up your home without construction, consider how you can tie your ceiling and trim into the rest of the room:
“Homeowners typically leave the trim and ceiling white in their living rooms when painting. Since the trim and ceiling both have as much impact as the walls, it’s important to tie them in with the rest of the space, otherwise they’ll stand out too much,” says Brian Patrick Flynn with HGTV. When your ceilings stand out, the size of the space immediately feels smaller.
Flynn’s suggestion for choosing the best paint colors: “A smart way to use one color consistently throughout a common area is to choose a slightly lighter shade than the wall color for the ceiling and a slightly darker shade for the trim.” Talk with your local hardware or paint store to find the lighter shades that match with your current paint, or start over with a whole new color scheme.
Make it Brighter
A dark room always feels smaller, and this is an easy DIY fix: let in the light, as Coral Nafie, blogger for The Spruce, suggests: “Any room will look larger if it’s well-lit, either by natural light or artificial lighting. Get rid of heavy draperies and open up the windows to let the light of the outdoors into the space.” A few more ways to bring more light into the room include:
- Sheer drapes
- Ceiling lighting
- Replace lamp shades with lighter colors or none at all
If the space has no windows at all, consider the costs for installing one or a few, depending on the size of the room. Take the DIY route and follow this tutorial from This Old House.

Convert the Basement
If you already have a finished, insulated basement, the next step is to turn it into a space where people want to spent time. When you do, your home suddenly feels bigger because you have an entirely new room to use. This added area is great for you now and is will be helpful if you’re thinking of selling soon as well:
“All buyers want the maximum amount of living space they can get for their budget. Converting your basement into a living space is a great way to add additional square footage without having to build anything onto the house,” according to Which Home Improvements Add the Most Value to Your Home.
This DIY project doesn’t have to happen in one weekend. Instead, reduce the stress and cost by making upgrades slowly, over the course of 1 to 2 months. Install carpeting or update the flooring, followed by adding furniture and then some artwork on the walls. Final touches can be added as you find fun items or inspiration strikes.
Enjoy More Space
These simple projects will help you create the bigger home you’d always wanted. Instead of knocking down walls, tackle each project one-by-one for a budget-friendly, hassle-free upgrade. As you play with paint colors, lighting and more, you may even be inspired to tackle more fun DIY projects, and you can get some fun ideas here.
Source: CB Blue Matter Blog
Your Home’s November Honey-Do List

This month, we’re especially thankful for home. Home is where the family comes together, where we’re protected from the elements, and where love abounds. Your home’s November Honey-Do list will make sure your home is ready for the holidays, prepared for colder weather and loved inside and out.
1. Winterize your home – For most of the country, November is the time when we can no longer deny that the colder weather has settled in. Now is the time to winterize summer tools and appliances like air conditioner units, grills and lawn mowers. Bring garden hoses indoors and check your windows and doors for drafts.
2. Make a Turkey Game Plan – No coach would head to a big game without a game plan up his sleeve. Likewise, no chef should hit the kitchen without thinking through the menu and timeline first. Determine what menu items you can make ahead, decide what responsibilities you can delegate, and take an inventory of your pantry and china cabinet. Oh, and now’s the time to clean that oven, too.
3. Polish the Silver and Dust off the China – Thanksgiving is a special meal, which deserves the best of your entertaining arsenal. Because we don’t often use our special dishes year round, it’s smart to give them a good deep clean and polish before setting the table on Turkey Day.
4. Give your living room a refresh – With the holidays ahead, your living room is sure to get plenty of use. Give the space a refresh by changing out the window treatments for a new look.
5. Use some pest control – Rodents and other pests are opportunistic and seek warmer environments when the temperatures drop. Be sure that they don’t call your house their home by implementing these 5 surefire tricks to pest control.
6. Clear out the gutters – Avoid drainage problems and damage to your home’s foundation by clearing out the gutters before snow and ice wreaks havoc. Here is an easy how-to guide to cleaning rain gutters on your home.
7. Be ready for snow – Before the first winter storm, it’s a good idea to make sure your snow shovels and/or snow blower are in proper working order. Ready to invest in a snow blower after the brutal winter last year? Here is a buying guide from Home Depot that will help you make an educated purchase.
8. Start tackling the December to do list – The holiday to do list is notoriously the longest of the year. Get a head start by ordering your holiday cards, updating your address book, and making a gift wish list for each of your family members NOW. You can even start stringing twinkle lights on your shrubbery before the deep chill sets in. After all, the most important part of the holidays is taking the time to enjoy our family and friends.
Next month we’ll cover everything you’ll need to know to make your home holiday ready. Until then, Happy Thanksgiving!
Source: CB Blue Matter Blog
8 Space Savers for a Small Bedroom
Not everyone is blessed with endless square footage and expansive master suites in their home. If you find yourself drowning in piles of clothes and surround by belongings, you’re not alone. Here are eight simple tricks to save space and maximize storage in a small bedroom.
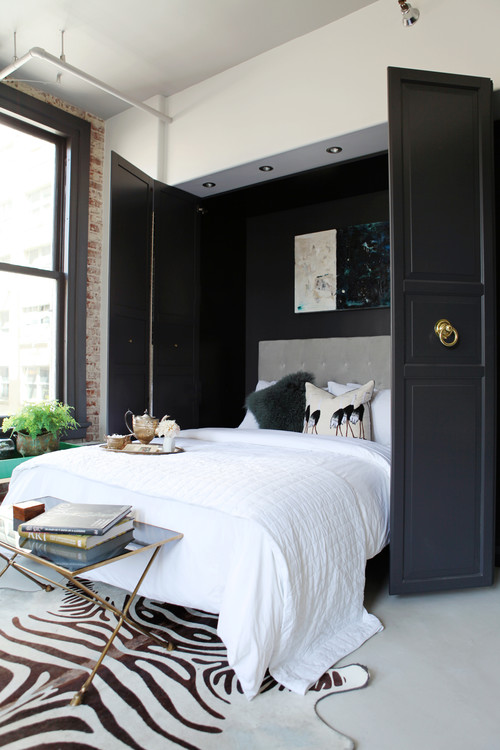
1. Fold Out Furniture
Murphy beds and pull-out sofa beds have gotten bad reputations in the past for being clunky and old-fashioned. However, there are many new and stylish ways to integrate a convertible bed in today’s modern home designs, one of which is shown above. Also try installing a fold-out desk against a wall for a small workspace. It can work double-duty as a mini makeup vanity too.
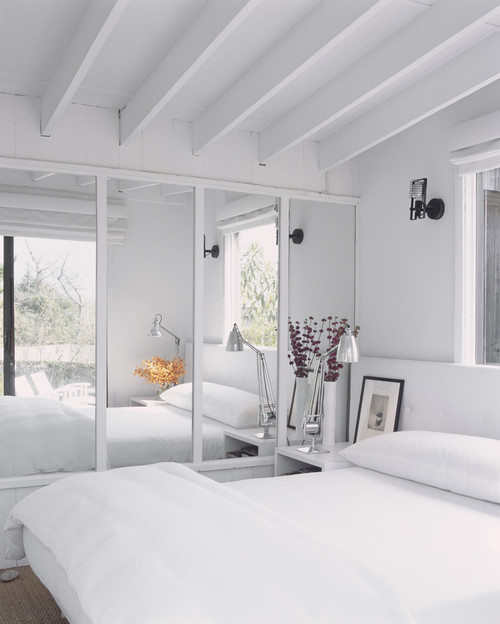
2. Use Large Mirrors
Here’s one of the oldest tricks in the book: mirrors. Mirrors never fail to visually expand and enhance a small space. The effect is strongest when it covers the entire side of a room with floor-to-ceiling or wall-to-wall mirrors. If you have an unsightly open closet situation, you can resolve both problems by opting for mirrored doors to hide the clutter and add visual dimension.
Tip: Another strategy for making a small room feel bigger is to capitalize on as many natural light sources as possible. Not only is natural light beneficial for your health and well-being, it draws the eye outwards and beyond the corners of any small space. Reflect a window in a mirror to bring more light further into a room.
3. Underbed Space and Storage
A lot of potential is hidden in floor space, an area that’s often forgotten and unused in many bedrooms – big or small. If it isn’t already, prop your bed a foot or two above the floor with store-bought bed risers and voila! You’ve found more space. Don’t start cramming everything you can in your newly found space though. Being able to see beneath the bed will make a bulky bed feel light and airy. If you need more storage, purchase wide and shallow drawers that can easily slide under the bed. You can use this space to keep belongings dust-free and easily accessible.
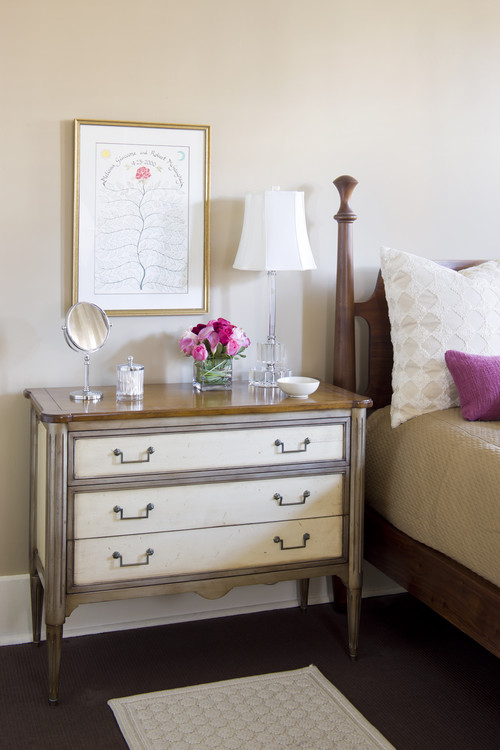
4. Combine Your Nightstand and Dresser
Most people try to buy the smallest furniture pieces possible for a small bedroom, but in certain cases, one large item is much better than two small ones. With an oversized nightstand, you can eliminate the need for a big dresser and keep everything within arm’s reach of the bed. The surface can still hold bedside essentials while the space below can be used for clothing storage.
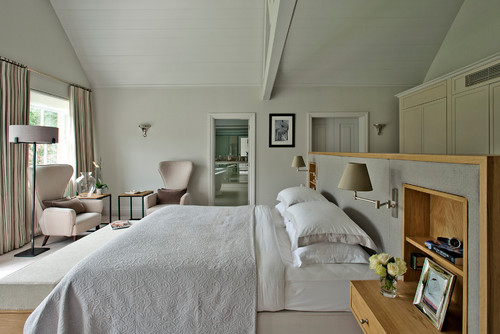
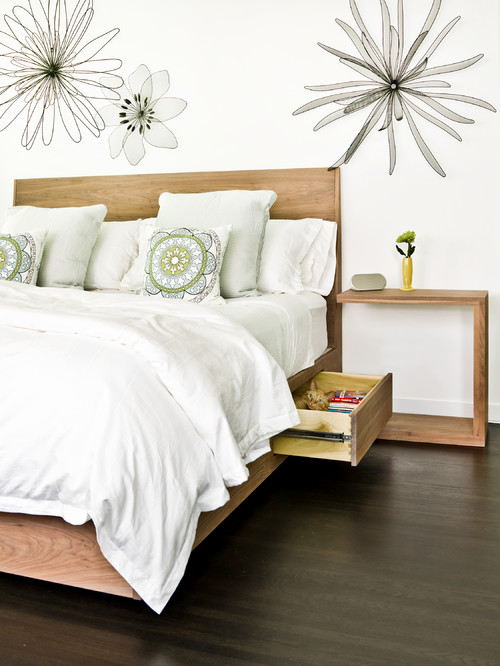
5. Outfit Your Headboard With Storage
Headboards with built-ins make the most of otherwise wasted space. Traditional tufted headboards are gorgeous in all their glory, but block the wall space above the bed from being used for anything else. You can pull out your headboard to create a ledge at the top or purchase a one with storage cubbies built in or around the panel. For the most storage, use a combination of both, as seen in this storage-savvy contemporary bedroom.
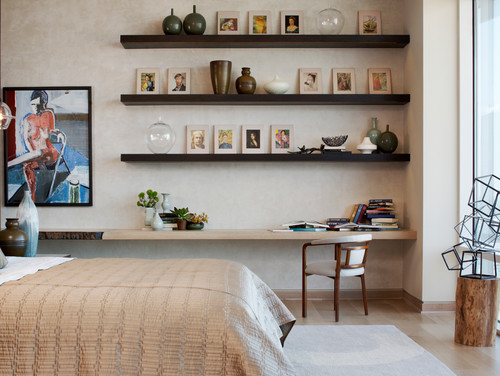
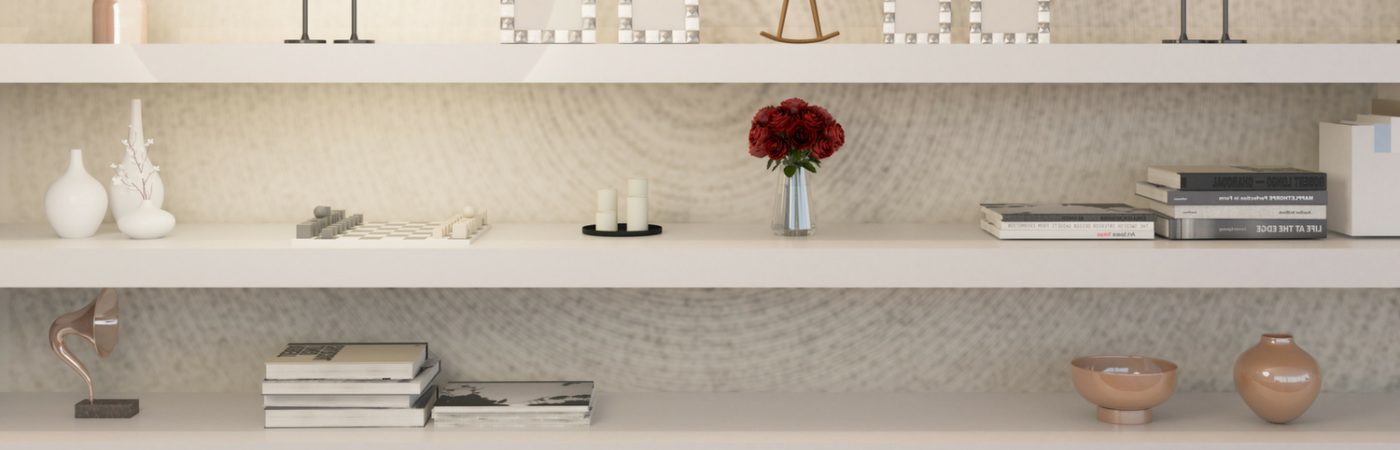
6. Utilize Open Wall Shelves
If you have cherished knick-knacks that you want to put on display but don’t have the surface area to spare, look to your blank walls. Just as easy as hanging a picture frame or piece of artwork, mounting vertical wooden boards is a simple solution for holding your favorite photos or books. In this modern New York bedroom, multiple rows of open shelves above a desk hold countless frames and pottery pieces without using a single inch of floor space.
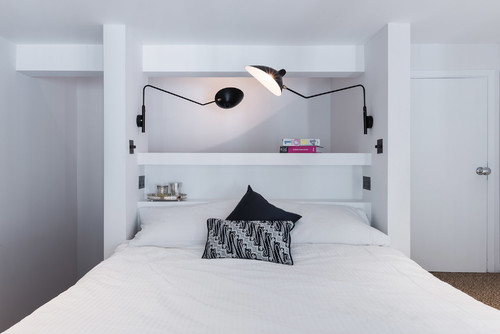
7. Mount Wall Lighting
If you’re struggling to fit a table lamp on your nightstand, look to your walls once more for another space-saving solution. Wall-mounted lights with flexible arms can be pulled to wherever they’re needed most or they can lay flush against the wall when unused. Like lamps, wall lights are come in a variety of sizes and prices.
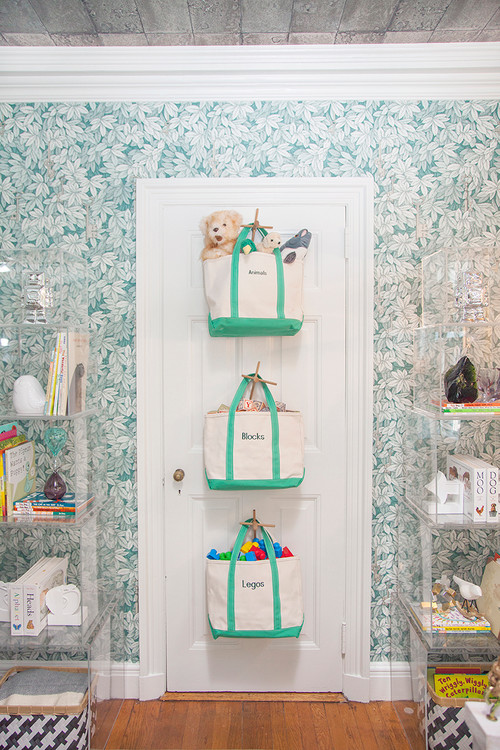
8. Look Behind the Door
Behind-the-door storage seems to have vanished largely from recent home design trends, but if you’re desperate for more space, look no further. You don’t have to confine yourself to classic over-the-door hooks; this space can also be used to hold shoes and coats; hats and scarves; and even makeup and bath supplies. Get creative and customize the back of your door to fit your storage needs.
Source: CB Blue Matter Blog
Fastest Remodels that Make the Most Impact
Here are a few big-picture renovations you can make in surprisingly little time, whether you do it yourself or hire help.
Guest Post by Lauren White
Remodeling projects can seem like a distant fantasy when days off are usually consumed by errands and chores. What can you accomplish with the slim hours you have to spare? Here are a few big-picture renovations you can make in surprisingly little time, whether you do it yourself or hire help.
Instant Patio
Time: 4-6 hours
Budget: $3,000
Outdoor spaces are deceptively quick and affordable to make. If you have a half-day to spare, you can turn a patch of yard into a gorgeous patio before sundown. The processwill involve digging and leveling the area you need, preparing a base for proper drainage and laying your stones. Once the project is complete, you will have a relaxing outdoor living space to enjoy.
Keep your time down by choosing pavers or bricks that don’t need to be cut. Interlocking patio pavers come in many variations and they eliminate the dilemma of fitting awkward pieces together.
One-Day Backsplash
Time: 2-8 hours
Budget: $30-$600
It only takes a few hours to install a new kitchen backsplash, but it could take less time depending on the material you choose. If you paint the backsplash, it will take mere hours of preparation and application. Painting costs as little as $30. If you use peel-and-stick ceramic tiles or rolls of faux metal, it will take roughly the same amount of time.
If you have more than a few hours, make a stand-out backsplash using an adhesive tile mat and individual tiles. The adhesive mat will ensure that heavy tile materials don’t fall off, and requires less curing time than traditional, wet adhesive. Explore your tile options in HomeAdvisor’s resource center.
Weekend Window Replacement
Time: 2-3 days
Budget: $5,000
High-efficiency windows are a strong investment, whether you are planning to sell or stay. These windows save homeowners anywhere from 10% to 30% in home energy costs. Efficiency is a top priority for today’s buyers, and this project has over 70% return on investment.
Removing old windows, installing heavy panes and finishing up with framing is a complex process. Professionals can do it in a matter of days, where it might take you much longer. Hiring a pro is worth it, because this renovation will put money back in your pocket when it is done right.
72-Hour Countertops
Time: 1-3 days
Budget: $3,000
In most cases, you’ll want to hire a professional to replace your countertops. Installation and cutting needs to be very precise, and most counter slabs weigh up to and over 400 lbs! With the right amount of muscle, you can finish this job in 1-3 days. Some materials and pre-fabricated pieces can even be installed in 3-7 hours.
Upgrading your countertops can do wonders to improve your kitchen and raise your home value. Granite, for example, can handle a lot of wear-and-tear. If your kitchen is like the Union Station of your house, this low-maintenance, high-resistance material is perfect for your counters.
For the adventurous weekend warrior, check out these countertops you can make yourself.
Two-Week Hardwood Floor Refinishing
Time: 2-14 days
Budget: $1,600
Flooring has a big impact on the appearance and value of your home. If your hardwood floors are in bad shape, you’ve probably already thought of refinishing them. Whether you hire a professional or do it yourself, you’re going to need at least two days.In fact, you may need as many as fourteen.
You will need one day for sanding and one day per layer of polyurethane finish. Each layer will need 24 hours to dry. Two to three layers of finish are recommended. If you’re going to stain the wood, add another day for that between sanding and finishing.
This project may take longer, but the results are worth it. Refinishing seals the wood against rot and moisture, and adds appeal for homebuyers. They will be more impressed by a glossy shine than rough, exposed wood. If you’re not sure it’s the right time for your floors, check out these answers to common questions to help you decide.
Investing in your property can mean a faster sale, or will at least give you a few extra luxuries to enjoy. See what you can accomplish with an afternoon or your next three-day weekend, and format your budget using these helpful cost guides.
Lauren White is a freelance writer who enjoys reading, hiking and traveling. She can usually be found on an outdoor adventure with her boyfriend and little sister on the weekends.
References
- www.bhg.com/home-improvement/remodeling/budget-remodels/weekend-home-projects/
- www.houselogic.com/remodel/remodeling-tips-advice/house-remodeling-how-long-does-it-take/
- www.fix.com/blog/tile-kitchen-backsplash-in-one-day/
- www.thespruce.com/easiest-and-cheapest-backsplashes-1821174
- www.popularmechanics.com/home/outdoor-projects/a22394/how-to-build-a-bluestone-patio/
- www.thespruce.com/process-of-installing-replacement-windows-1822901
- www.replacementwindowsfordummies.com/articles/energy-efficient-windows-advantages-and-disadvantages
- www.remodeling.hw.net/cost-vs-value/2017/
- www.valentiflooring.com/blog/hardwood-floor-refinishing-project-how-long-does-it-take
- www.thespruce.com/cost-to-refinish-hardwood-floors-1314853
- www.homeadvisor.com/r/refinishing-hardwood-floors/
- www.rempros.com/estimating-time/kitchen-countertop-replacement.html
- www.diynetwork.com/how-to/rooms-and-spaces/kitchen/how-to-install-a-granite-kitchen-countertop
- www.homeadvisor.com/cost/kitchens/tile-backsplash-install/
- www.homeadvisor.com/cost/outdoor-living/install-a-patio-or-pathway/
- www.homeadvisor.com/cost/doors-and-windows/install-windows/
- www.homeadvisor.com/cost/flooring/refinish-wood-flooring/
- www.homeadvisor.com/cost/cabinets-and-countertops/install-countertops/

")


