
 Facebook
 Twitter
 Pinterest
 Copy Link
Container Gardening Upgrades for a Fresh Spring
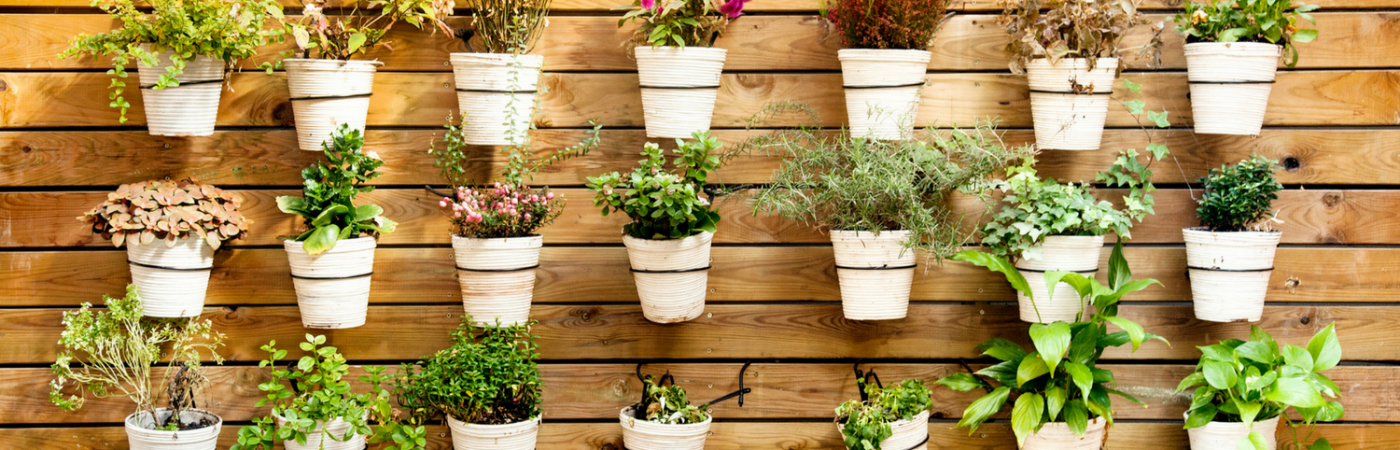
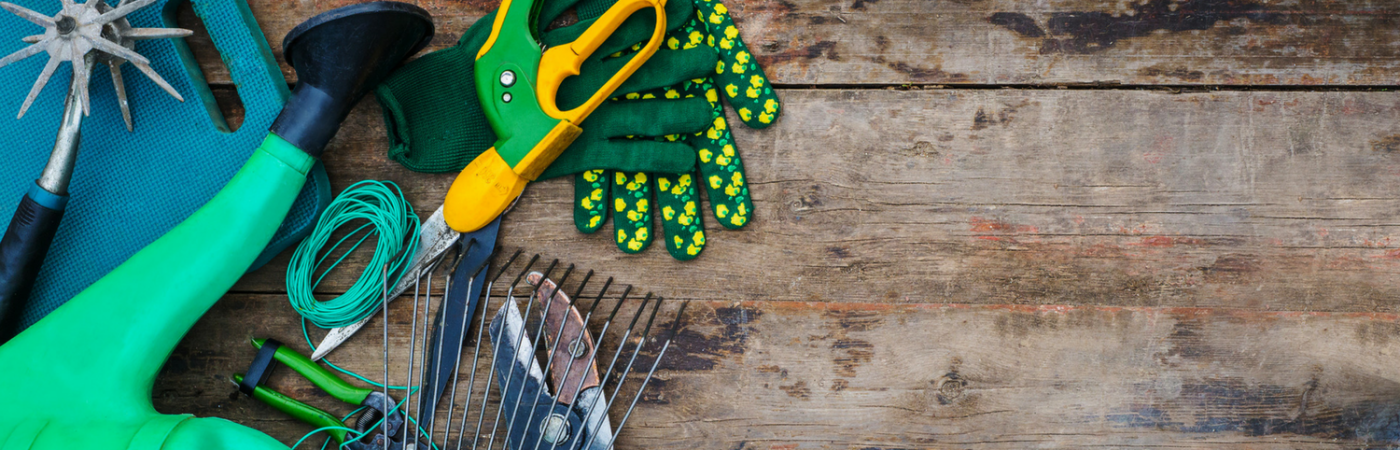
If you’re a gardener, you most likely have some old pots and containers in your garden shed or even your garage. And you probably didn’t get rid of them because you figured you might have a use for them eventually. While prepping for this spring, instead of buying replacements pots and containers, go through the ones you already have stored. With a little imagination and some supplies, your pots will look better than new in no time!
Clay Pots
A good clay pot can be expensive and if dropped, the fall can put a decent size crack in it. If it’s chipped or broken but is still durable, here’s what you can do to fix it:
- You’ll need all-purpose joint compound, spray paint or textured spray paint in a desired color, and fine-grained sandpaper. Clean off the damaged area with the sandpaper. Remove any loose clay as you’re sanding and carefully blow on it to remove the dust. This will let you get a good bond when filling it in.
- Next, using the joint compound, fill in the cracks using a popsicle stick, spreading both inside and outside the pot. Make sure the cracks are well-covered. It dries relatively fast, so spread and smooth it out as you go. It can also be sanded down later if it’s not super smooth. If needed, add more layers until it’s filled. Let it dry for 24 hours and run the sandpaper over it to smooth it out one last time.
- Seal the pot with the spray paint or textured spray paint, let dry, and it’s good to go.
Plastic Pots
Plastic pots are another type of container commonly used for gardening. The problem with these containers is that the weather can cause them to weaken, discolor, and sometimes crack. Have no fear, these containers can easily be fixed and your favorite plastic container can be used time and time again.
- For this you’ll need clear gorilla tape, spray paint, textured stone paint, and fine-grain sandpaper. First, lightly sand all the areas which you’re planning to tape, so the tape has a good grip when applied. Be sure to remove all the dust from the surface of the pot. If you don’t, when you use the gorilla tape, it will form bubbles because it won’t seal. If you apply some rubbing alcohol before applying the tape, the surface will be clean.
- Next, tape both sides of the crack with strips of gorilla tape. Rub it firmly to get a good seal but don’t use more tape than you need. For edges or curves, use small pieces, that can overlap about a ¼ inch. Try to avoid forming air bubbles.
- Finally, spray the pot with the base paint and then spray it in thin layers with stone texture paint. Allow each coat to dry thoroughly. If the paint bubbles, let the paint cure for 24 hours. Spray it with the textured paint if desired for a different look.
Repurpose With a New Design
You can also repurpose an old pot with designs, like adding a mosaic design. You’ll need a terracotta pot, some broken tile pieces, pot shards or vase filler chips, spray paint and glue. Paint the pot with the spray paint and let dry, then gently glue the tile, shards or chips on one by one in the design of your choice.
You can also add a new design by using lace on a pot or container. All you’ll need is lace of the color of your choice and transparent adhesive. Varnish the pot with the adhesive and paste the lace over it. Let dry and use as desired.
As you can see, upgrading your container and pots for spring can be both fun and easy. What ways have you revamped old containers?
Source: CB Blue Matter Blog
The Good and the Bad of DIY Lawn Care
When you have your own home and are responsible for your lawn care, should you do it yourself? There are two sides to DIY, good and bad. On the bad side first, if you don’t know what you’re doing, there can be consequences. But you could consider it as a learning experience too, and it will save you money.
What pros and cons would a homeowner face in this consideration?
The Pros
- You’ll save money with DIY lawn care, sometimes the extra cost of a professional can be expensive. If you’re on a tight budget, it might not be possible to hire one anyway. In fact, the average price for a single lawn mowing service is $43 per service, according to LawnStarter Lawn Care.
- Mowing grass is excellent exercise, and you’ll work up a sweat in no time; especially if you’re using a walk behind mower. Yes, the mower does do a lot of the work, but you still have to hold on to it and guide it. Plus, you have the troublesome spots on the unlevel areas. But it gives you a great workout!
- Many homeowners take pride in caring for their lawn themselves. They know where each patch of crabgrass is and where the last dandelion is hiding. They take pride in the beauty of their green yards and interesting gardens that add so much beauty.
- It encourages interaction with your neighbors as you discuss the best fertilizer and lawn care products. Plus, saying can you help with my brown spot and do you have moles too?
- You will notice more easily things that need your attention. You will find that hole behind a bush that the dog dug trying to escape. Or, whether it’s time to dethatch the lawn or can it wait another week.
- If your lawn is thick, it will need dethatching to permit the grass to breathe. Instead of racking your back though you can rent or buy a power dethatcher. This you can do yourself with very little help except for the raking up of the debris.
- You have more control over how high you want your to be grass mowed. When the temperature starts to rise, the height of your lawn should too. When you mow too low, then you’re opening up the possibility of weeds because weeds need light to sprout. If you have a kid from down the street mow your lawn, you can’t always control the grass height if it’s their lawn mower.
The Cons
- There can be some drawbacks with DIY lawn care such as finding the correct lawn products. Since homeowners don’t usually have the skilled expertise that lawn care companies do or access to commercial grade products, they have to keep on buying different products until they figure out what works the best.
- The results of all your hard work may be mediocre as you struggle with crabgrass and dandelions. Or worse, you could have grubs, and without professional help, you may not be able to control them.
- There are hidden costs of taking care of the lawn yourself which you may not have factored into it. Without professional input, there are some things you could be missing or doing incorrectly. You could be using incorrect ratios when spreading or spraying your lawn. Or, perhaps misusing a pest control product which could harm the environment, your landscape, hardscape; or even your lawn.
- When you do your lawn care, you could have problems storing the containers of product you need for your lawn. You will have to secure weed, lawn, and disease treatments in a place which will be moisture proof and cold weather proof. Plus, if you have children, storing products safely and out of reach can be a big concern.
- You might not have the experience to know if the big brown spot if from Fred, your dog, or because you have some type of fungus growing which is slowing killing your grass. You may not be able to treat this without some kind of professional opinion given.
- If you really gouge your lawn, the professional that you hire to repair it is going to cost real money.
Whether you do your own lawn care or hire a professional, a great lawn is something everyone wants to have.
Jackie Greene is a blogger, gardener, and nutrition enthusiast. She enjoys creating organic meals for family and friends using the fresh ingredients she produces from her backyard homestead.
Which DIY projects have the biggest return on investment? Find out here.
Source: CB Blue Matter Blog
Are You Making These 5 Lawn Watering Mistakes?
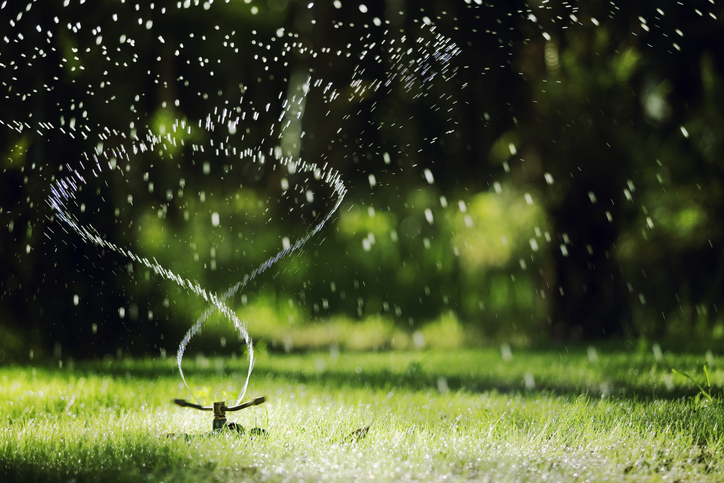
Ahhhh, the sweet smell of cut grass in the air…a true harbinger of summertime. Keeping that lawn green can be tricky without these great tips on watering!
Proper watering nourishes lawns, just as proper hydration nourishes our bodies. Yet too many of us are failing at both. We’re not going to lecture you about drinking more water, well leave that to your doctor or significant other. But we are going to give you a lesson about correctly watering your lawn.
Here are five lawn-watering mistakes that you’re likely making right now and ways you can fix those mistakes.
1. You’re over-watering your lawn.
Many homeowners drench their lawns with water. However, that’s not a wise move. Over-watering can leave your lawn susceptible to fungus and other diseases. It also can cause your lawn to grow too quickly and can wash away costly fertilizers, according to PlantCareToday.com. In addition, drowning your lawn wastes water.
To avoid excessive watering, PlantCareToday.com recommends buying a soil moisture meter. These meters are very simple and valuable tools that you can pick up for $10 or so at any garden center or home store, the website says.
Lawn care experts say most lawns need one inch of water per week. However, that’s merely a rule of (green) thumb, as watering requirements vary according to grass type, climate and seasonal changes. The amount of water required for an established lawn will be determined by its overall health, beauty, and ability to withstand use and drought, says Turfgrass Producers International, a trade group for sod growers.
Related: Spring Lawn Care Tips You Can Do Now
2. You’re under-watering your new lawn.
While your existing lawn may be getting too much water, your newly planted lawn may not be getting enough. Bayer Advanced, a maker of lawn and garden chemicals, says a new lawn is in a critical stage during its first year. Don’t rely solely on rainfall to establish a healthy, deep root system provide supplemental irrigation during the first year of growth, Bayer Advanced suggests.
How much irrigation you do depends on factors such as the type of grass and the climate.
3. You’re not monitoring your irrigation system.
If you’ve set up an automatically timed irrigation system to water your lawn, don’t put it on autopilot.
Irrigation timers are not set it and forget it devices, says Lee Miller, a turf pathologist at University of Missouri Extension. You’re not cooking turkey for Thanksgiving dinner. Sprinklers should be adjusted according to precipitation events.
For instance, if it’s been steadily raining the past two days, your sprinkler system should be off for a while afterward. The San Diego County Water Authority recommends turning off the sprinklers for two weeks after significant rainfall. After a storm, do not begin watering again until the top 1 to 2 inches of soil are dry. Lawns that lose their lush green luster will rejuvenate with the next rain, says Jeff Stephenson, principal water resources specialist at the San Diego Water Authority.
Researchers at Kansas State University found that 65 – 83 percent of homeowners surveyed in three Kansas cities didn’t know how much water their lawn irrigation systems had applied.
In reality, deep and infrequent irrigation makes for deeper root systems, UM’s Miller says.
4. You’re watering your lawn at the wrong time.
The worst time to water your lawn is when you’re probably sound asleep. Watering after dark soaks the lawn overnight; a soggy lawn invites fungus and other diseases to invade your grass.
When’s the best time to water your lawn? Experts says it’s around 4-8 a.m., before many of us have sipped our first cup of coffee.
Watering the lawn early in the morning gives it a good supply of water to survive the heat of the day, according to University of Illinois Extension. Early morning also tends to be when wind speeds are lower and, therefore, when water evaporation is less likely to occur.
5. You’re assuming that you’ve got to water brown grass.
When your lawn is brown, you might think it’s parched. However, it may simply have gone dormant during hot weather or drought conditions. Dormancy is simply a state of reduced water usage where the turfgrass … focuses resources on the roots, the Lawn Institute says. Dormant turfgrass will turn brown and is often considered unsightly, but it will recover when conditions improve.
In other words, brown grass doesn’t necessarily equal dying grass.
The institute says summer dormancy is a normal response to heat and drought, and most lawns can stay dormant for at least three to four weeks without dying.
During the summer, the worst that will happen if lawns are not watered is that weaker parts of the lawn or areas in hot spots will die, according to the Oregon State University Extension Service. When fall returns, lawns can be reseeded and will recover just fine over the winter.
Source: RisMedia’s Housecall

")


