Buyers June 6, 2018

Modest Home Updates to “Wow” Buyers & Boost Value

When selling a home in today’s market, it’s important to consider all the options to help make it stand out and appear move-in ready to selective buyers. Which improvements require the least time, effort and expense but will significantly boost your home’s perceived value? To help prioritize, we put together the following list of modest staging solutions/upgrades that will get your property noticed and cost less than the first price reduction that buyers would expect for dated kitchens and baths.

Dining room staged by PJ & Company Staging and Interior Decorating

Freshen Walls With Neutral Color

Our go-to instant fix to brighten and hide dated and damaged walls is neutral paint. It’s amazing to see how a dark red or purple room can be completely transformed with a coat of soft “greige” (a combination of taupe and grey) paint that increases the perceived size of the space, doesn’t distract from the room’s features and acts as the perfect backdrop to modern furnishings and décor.

Kitchen staged by PJ & Company Staging and Interior Decorating

Re-paint Kitchen and Bath Cabinets

To instantly boost a tired kitchen or bath without a costly investment, start by repainting dated and dark cabinets and vanities with bright white paint. Complete the look by pairing with modern hardware – handles, drawer pulls or knobs for added style.

Bathroom staged by PJ & Company Staging and Interior Decorating

Replace Kitchen & Bath Lighting and Countertops

Lighting is an important design element that can affect the mood of a room more than any other accessory. Adding updated lighting in modern designs and on-trend mixed finishes such as brushed nickel, chrome or soft gold tones will add warmth and sophisticated style. It can also be used to draw attention to certain features in the room such as a beautiful new marble or quartz countertop (as shown in photo above), appliances or high ceilings.

Highlight Key Features

For large windows with attractive molding, remove heavier window treatments or simply frame with floor to ceiling neutral drapes. Remove worn carpeting and expose and polish hardwood flooring. Re-stain stairway steps and railings by painting risers or updating spindles. Enhance a beautiful stone fireplace with molding, mantle or screen.

Living room staged by PJ & Company Staging and Interior Decorating

Finishing Touches

Once you’ve invested in cosmetic fixes, be sure to remove dated furniture and accents and replace with more modern style that complement the room (as pictured in living room above). Minimal wall art, vignettes and throw pillows with subtle pops of color and pattern will add depth and warmth so that buyers can emotionally connect and envision living in the home.

Exterior & Curb Appeal

It’s just as important to update the outside of your home to welcome buyers inside. Remodeling magazine’s “Cost vs. Value” report continues to list replacing entry and garage doors, siding and windows as upgrades that provide the greatest return on investment. However, sprucing up the landscaping, making necessary basic repairs, a fresh coat of paint for the front door and some seasonal potted flowers will go a long way to make a great first impression.

For more examples of interior decorating and home staging, visit www.pjstagingdecorating.com.

Source: CB Blue Matter Blog

decoratinginterior decoratingphotographyprojectsreal estateUncategorized July 26, 2017

DIY: Decorating Your Home With Photos

Photographs…your real time window to the past…even better than a memory in your head. Decorate with them? Absolutely!

Decorating with photos is an awesome way to spice up your home in a really dramatic way without spending a whole lot of money. Don’t worry if you haven’t got a lot of money; your own photos are probably better than anything you’d buy.

Dial up the gorgeous drama of your Northern California home with a fun photo decor DIY project. Photographs, like art, can help us express ourselves in many different ways. They can help us play up our sentimental side, make important statements, and complete the canvas of our homes. Learning how to decorate with photos, as simple as it sounds, can be quite daunting once you put your mind to it. How exactly should you go about it? Should you hang provocative art in your living room where everyone can see it? Is it cheesy to hang photos of your entire family on your fridge? What’s the right thing to do?

The Right Way Is Your Way

Don’t worry that you’ll end up decorating with photos that people may think are cheesy or that are too much. Photographs are an expression and extension of yourself, so you’re hanging and displaying them to express your vision. Of course, if you have children regularly visiting your home, you don’t want to hang something for mature audiences only in a room where everyone gathers. You know who you invite into your home; use your judgment.

Use Your Own Photos

There are photographic gems you probably aren’t even aware of (or even remember exist) buried inside your very own camera or flash drives. Photos of vacations past, a child’s birthday party, a lonely street at night — any of these could be striking or thought-provoking enough to make perfect wall art. You don’t have to use the whole image; maybe it’s a detail of an image that’s frame worthy. If you don’t have the scene you’re looking for, create it: Your child’s feet as they leap off the ground; your grandmother’s smile the instant she bursts into laughter upon hearing an off-color joke; your cat’s profile as she watches a bird outside the window. The possibilities are literally endless.

Display Them In Innovative Ways

You can rarely go wrong with square or rectangular black frames backed by white matte when it comes to framing your pictures, but there are many different ways you can display your photos. Attach a series of photos individually on metallic clips and hang them from a metal wire grid that takes up your entire wall. Put some vintage photos inside of old mason jars. Blow up a favorite photo to life-size stats and hang it front and center in your main living area or passageway.

Source: CB Blue Matter


decoratingDIYgadgetsinterior decoratingmaximizing spacephotographyreal estatestagingUncategorized June 29, 2017

Hacks to Hang Anything On Your Wall

Banged up thumbs, crooked frames, and things that go crash in the night?  Here’s how to do it RIGHT!

Who knew sticking stuff on the wall could be such a process? Keep your stud finder at the ready, friends! I’ve rounded up our top tips and hanging hacks to help you through the tedious task of decking out your walls. From stylish storage and pendant lights to extra heavy and delicate decor — every step-by-step you could possibly need is right here.

Hang Heavy Stuff

A heavy, antique mirror takes more than a hammer and nails. Get the full how-to for hefty hangings below.

Hang Lights

Set a romantic tone in your bedroom by adding a chandelier or pendant lights with this must-know DIY.

Hang Crown Molding

Add dimension and a craftsmen quality to any space with crown molding. Here’s how to do it.

Hang Wallpaper

Make a statement with zero dreaded air-bubbles or clumped-up lumps in sight.

Add Hanging Storage

Hanging storage reigns supreme as one of the best ways to make the most of any space.

Hang Curtains

Do not get this wrong, people. Transform your home from drab to designer with properly positioned drapes.

Hang a Pot Rack

Is it just me or does a hanging pot rack make a kitchen feel more legit? Add this chef-like quality into your kitchen.

Create a Gallery Wall

Not sure you’re doing the whole gallery-wall thing correctly? Here’s everything you need to know to pull it off like a pro.
 Source:  HGTV
curb appealdecoratingDIYinterior decoratingprojectsreal estatestagingtrendsUncategorized May 16, 2017

8 Steps You Need to Know Before Redecorating Your Home

Breaking out the paintbrushes, fabric samples and hitting Home Goods and Pinterest for some good ideas?  Here are some 8 steps you need to know before you get started!

Here’s how to prioritize your game plan for your room makeover.

If you have a DIY decorating project on your horizon but don’t know where to start, here’s a practical guide to help you navigate the process.

1. Commit to a Budget and Timeline

First, figure out your total project budget. If you skip this step, you’ll likely spend much more than you anticipated and make poor purchasing decisions you’ll later regret.

Also pick a date to complete your project by, even if you don’t have a looming reason to do so. Creating a complete-by date will fuel your project so it can take flight. Completing one stage of a project informs the next and the next. Otherwise, approaching your project piecemeal will delay completion, if you even complete it at all.

By Mitchell Parker 

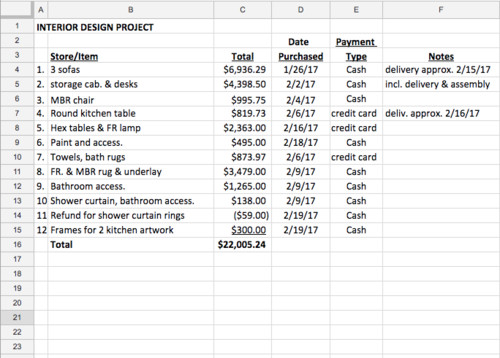
Set up a good system to keep track of your expenditures. I use an Excel spreadsheet, but even a spiral notebook can work for smaller projects. The key is to keep it updated.

Here’s an example of how I keep a running log of project expenses. While the main goal is tracking the total amount spent, I also indicate the store (which I left off here because stores will vary based on your location and preference), method of payment, general description and any notes, such as delivery fees — useful information that may come in handy later.

Keep all of your receipts together in one location. You can refer to them easily for warranty information and returns, if needed. I use a small zip pouch made for holding pens and pencils while I’m out shopping. After I return and enter them into the spreadsheet, I stapled each receipt to a piece of paper and store that neatly in a project folder.

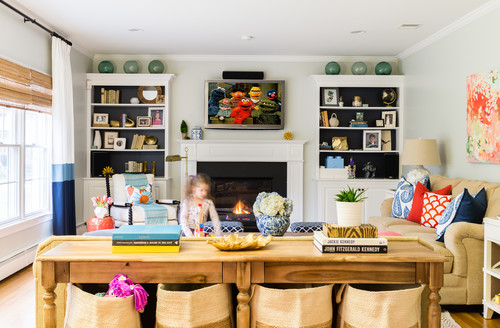
Photo by Dina Holland Interiors 

2. Evaluate Your Needs and Lifestyle

Separating wants and needs is a hard one. Prioritize your needs by first creating a list of the furniture and accessories you envision going into your space. List any work you want to do, like painting or wallpapering, too. Then rate each item 1 through 5, with 1 indicating an absolute must and 5 reflecting a nonnecessity. Reorder the items on the list with the necessities at the top and the more wishful items at the bottom. Involve other family members in this process. They may identify overlooked items.

Also, be honest about your family’s lifestyle requirements today instead of at some far-off idyllic future date. For example, if the kiddos use your family room as a playspace, include toy storage on your list. You may have some child safety needs too. Also note any special concerns about pets, such as shed fur or the potential for furniture to get clawed.

3. Decide What Stays and What Goes

Based on your list, identify any pieces of furniture or accessories that you absolutely want to keep in the space. Remove the pieces you don’t plan to reuse; consider donating them if they’re in good shape or selling them online or through a local consignment store.

4. Draw a Preliminary Furniture Plan

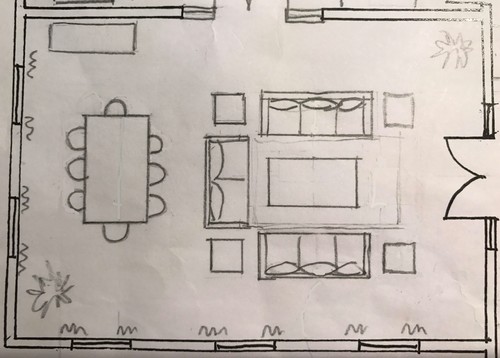
If your project is small, this step may not be necessary. However, if you’re buying new furniture or just considering a new configuration, it’s extremely helpful to try out pieces in different locations to see what fits and what doesn’t. The last thing you want is to end up with a too-big piece of furniture. You’ll need a tape measure or laser measuring tool to measure your space and a scale ruler to draw it to scale. A simple sketch illustrating only the outside dimensions is all that’s necessary.

If you don’t have these items or don’t feel comfortable with drawing to scale, an alternative is to “draw” the outlines of furniture with masking tape on your floor or cut furniture-size shapes out of butcher paper to maneuver around on the floor.

Don’t forget about circulation space. Ideally, you’ll want to keep 18 inches between the edge of the sofa and the coffee table. Maintain 36 inches for comfortable general circulation. Since you may not have found specific furniture pieces yet and don’t have detailed furniture dimensions, you may need to revise the size of some furniture pieces as your project progresses. Nonetheless, this exercise is a good starting point.

Also measure your entrance door and the pathway to the room, including building elevators if you live in a high-rise. Bring these notes with you when shopping. If there are any delivery dimension concerns, you can address them then and there.

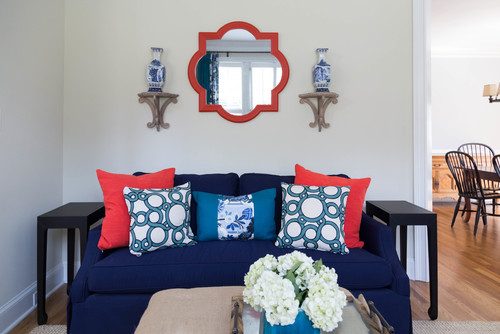
Photo by Colordrunk Designs

5. Concentrate on Big Items First

Focus first on the big-impact items, then concentrate on smaller accessories. Too often people get hung up on a small detail that can derail the flow of the bigger items. The idea is to work from large to small.

Find furniture. Unless you’re lucky to find the furniture you want in stock, most furniture takes eight to 12 weeks for fabrication. However, even in-stock furniture may not be delivered right away. If available, get a swatch of the upholstery or finish sample to help with other room selections.

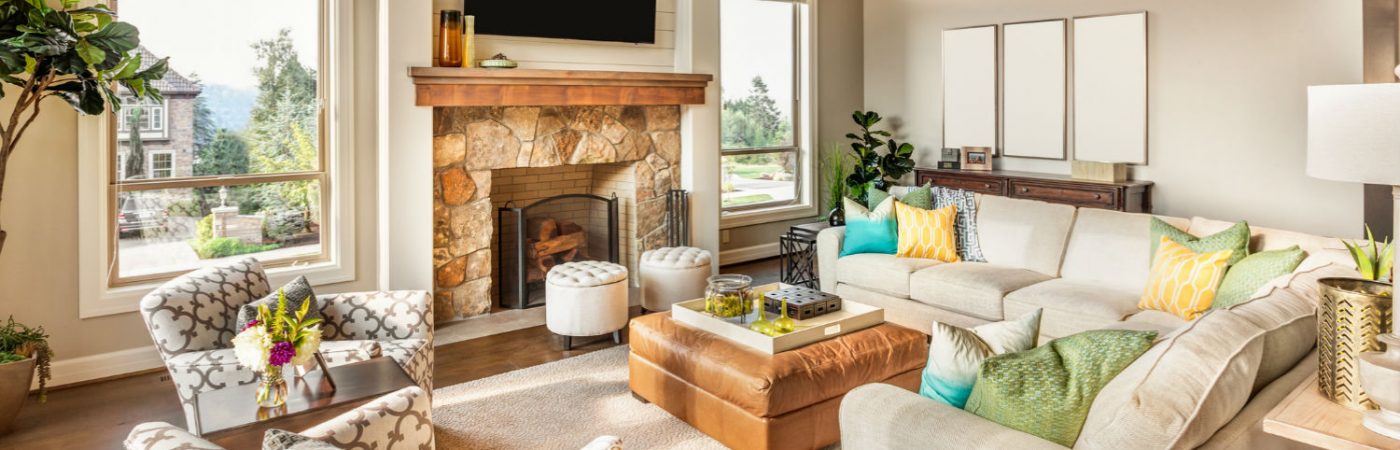
Unless you’re comfortable working with a complex color palette, minimizing your scheme to two colors, as in the space here, will make shopping easier — and your space will look sharp and put-together.

Work the walls. Compared with any other design material, wall paint gives a room the most bang for your buck. I find it easiest to select a wall paint color or wallpaper after the furniture is selected. You have much more leeway with paint color choices than furniture upholstery. Plan to get your space prepped and painted prior to the furniture delivery.

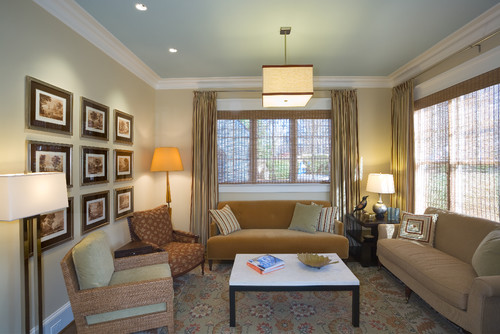
Photo by Sroka Design, Inc. 

Hit the ceiling. Color instead of conventional white on the ceiling is another cost-effective attention-grabber, especially if you have crown molding to separate it from the walls, like in this living room.

6. Move Toward the Mediums

After you’ve figured out your furniture layout and color scheme, focus on finding the midscale items that will pull your space together, such as an area rug. Your scaled drawing will also come in handy to see how prospective rugs will work with your furniture layout.

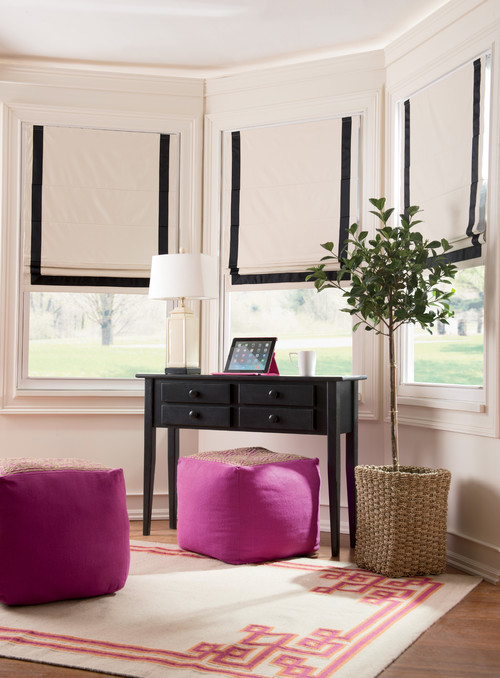
Photo by Country Curtains

Window treatments like Roman shades and drapery can offer lots of style compared to run-of-the-mill Venetian blinds. They can minimize less-than-perfect windows and help save on energy bills, too. New window treatments don’t have to cost an arm and a leg, either. Ribbon-trimmed cordless shades like the ones shown here here can be ordered online for $100 to $125.

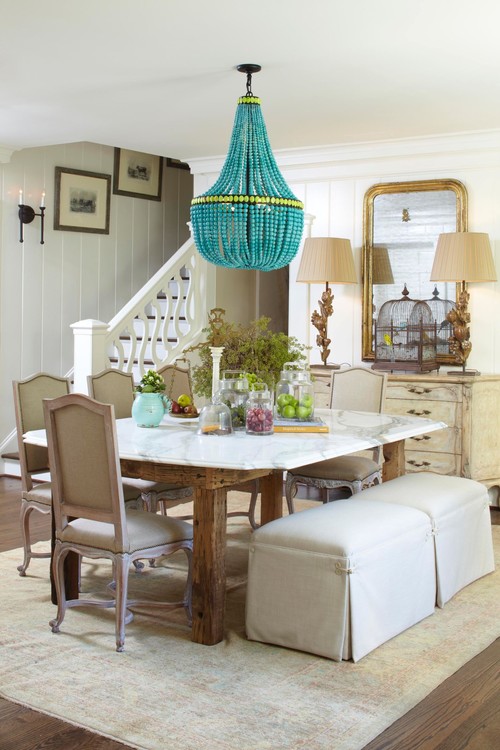
Photo by Meg Adams Interior Design 

A feature light fixture, like the one in this dining room, can become a stunning design focus.

7. Save the Small Stuff for Last

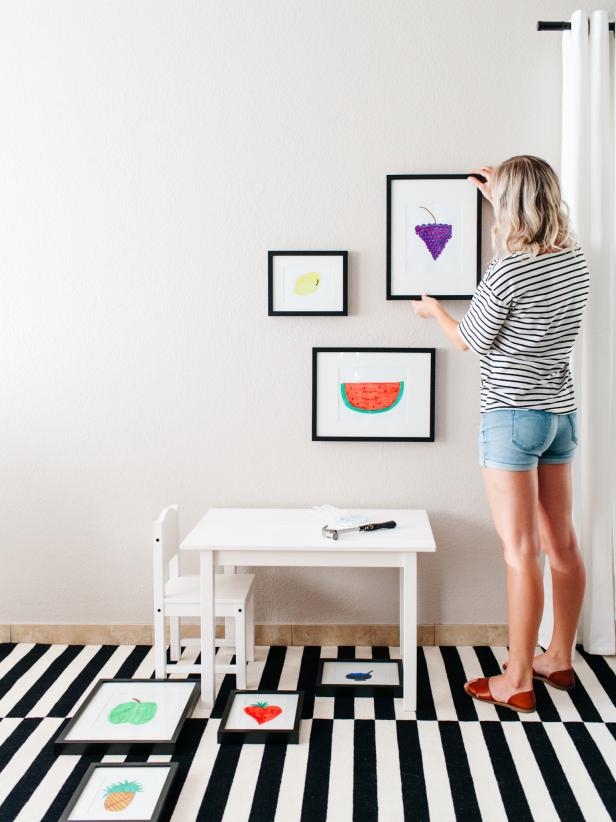
Fill in your scheme with decorative accessories toward the end of your project. You’ll be able to see what areas need attention and have a better sense of scale, especially with artwork. With the furniture in place, you’ll also have easy access to key dimensions, like the clearance between shelves.

I also like to shop for table lamps, particularly lamps that will sit behind a sofa, after the furniture is delivered so I can see how all the heights work or don’t work together. Cord lengths and switch locations are also easier to evaluate when the furniture is in place.

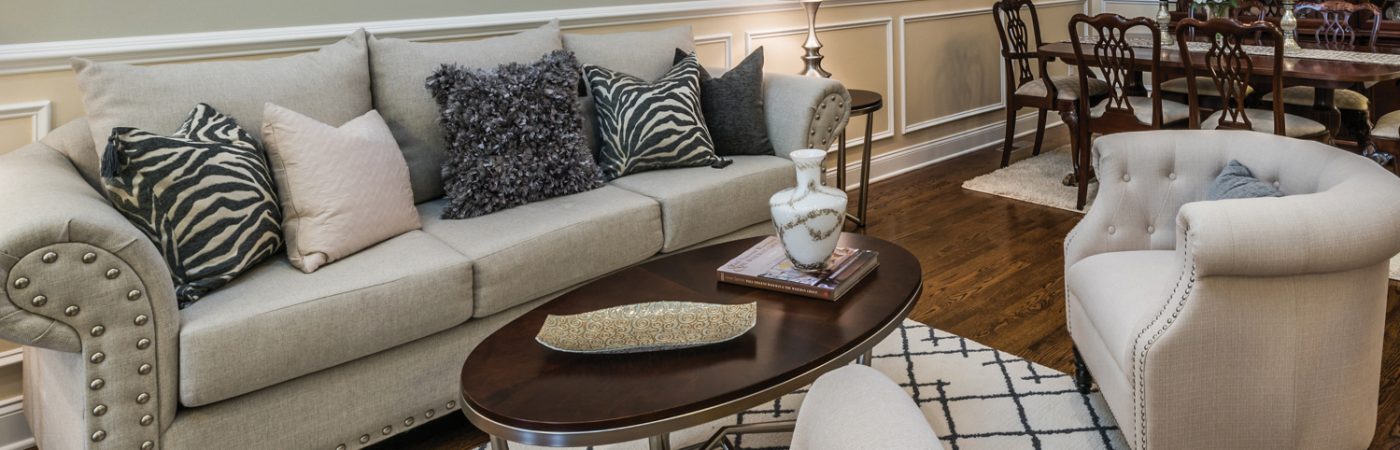
Photo by Larette Design 

8. Leave Room for the Unexpected

You may come across something surprising in your decorating journey that has special meaning or even adds a bit of humor, like these Hulk hand bedpost toppers. Don’t discount originality or quirkiness; it’s what makes your home truly yours.

Source:  CB Blue Matter / RisMedia