backyardoutdoors March 1, 2018

Container Gardening Upgrades for a Fresh Spring

If you’re a gardener, you most likely have some old pots and containers in your garden shed or even your garage. And you probably didn’t get rid of them because you figured you might have a use for them eventually. While prepping for this spring, instead of buying replacements pots and containers, go through the ones you already have stored. With a little imagination and some supplies, your pots will look better than new in no time!

Clay Pots

A good clay pot can be expensive and if dropped, the fall can put a decent size crack in it. If it’s chipped or broken but is still durable, here’s what you can do to fix it:

  • You’ll need all-purpose joint compound, spray paint or textured spray paint in a desired color, and fine-grained sandpaper. Clean off the damaged area with the sandpaper. Remove any loose clay as you’re sanding and carefully blow on it to remove the dust. This will let you get a good bond when filling it in.
  • Next, using the joint compound, fill in the cracks using a popsicle stick, spreading both inside and outside the pot. Make sure the cracks are well-covered. It dries relatively fast, so spread and smooth it out as you go. It can also be sanded down later if it’s not super smooth. If needed, add more layers until it’s filled. Let it dry for 24 hours and run the sandpaper over it to smooth it out one last time.
  • Seal the pot with the spray paint or textured spray paint, let dry, and it’s good to go.

Plastic Pots

Plastic pots are another type of container commonly used for gardening. The problem with these containers is that the weather can cause them to weaken, discolor, and sometimes crack. Have no fear, these containers can easily be fixed and your favorite plastic container can be used time and time again.

  • For this you’ll need clear gorilla tape, spray paint, textured stone paint, and fine-grain sandpaper. First, lightly sand all the areas which you’re planning to tape, so the tape has a good grip when applied. Be sure to remove all the dust from the surface of the pot. If you don’t, when you use the gorilla tape, it will form bubbles because it won’t seal. If you apply some rubbing alcohol before applying the tape, the surface will be clean.
  • Next, tape both sides of the crack with strips of gorilla tape. Rub it firmly to get a good seal but don’t use more tape than you need. For edges or curves, use small pieces, that can overlap about a ¼ inch. Try to avoid forming air bubbles.
  • Finally, spray the pot with the base paint and then spray it in thin layers with stone texture paint. Allow each coat to dry thoroughly. If the paint bubbles, let the paint cure for 24 hours. Spray it with the textured paint if desired for a different look.

Repurpose With a New Design

You can also repurpose an old pot with designs, like adding a mosaic design. You’ll need a terracotta pot, some broken tile pieces, pot shards or vase filler chips, spray paint and glue. Paint the pot with the spray paint and let dry, then gently glue the tile, shards or chips on one by one in the design of your choice.

You can also add a new design by using lace on a pot or container. All you’ll need is lace of the color of your choice and transparent adhesive. Varnish the pot with the adhesive and paste the lace over it. Let dry and use as desired.

As you can see, upgrading your container and pots for spring can be both fun and easy. What ways have you revamped old containers?

Source: CB Blue Matter Blog

decoratingreal estate December 18, 2017

Carve Out a Personal Retreat for Yourself at Home

The holidays are always a stressful season filled with family and friends and loaded with work and travel obligations. Having a personal haven at home to unwind and restore your mind, body and soul is key to staying sane and on top of it all. Even if you’re renting or moving soon, it’s important to have a space to de-stress on busy days. Make the most of your nooks and crannies at home with these ideas for a rejuvenating retreat.

Set Your Focus and Intentions Upfront

Decide what’s most important to you and what you want to achieve in these personal sessions. It doesn’t have to be an ambitious goal; a simple wish to rest is perfectly valid. Alternatively, you can use this time for spiritual exploration or to work on your craft. Jot down your thoughts in a journal before, during and after the experience, and keep it nearby to reflect on in future sessions.


Make it Yours

However nice a personal corner is, it won’t mean much unless you can connect with it on a deeper level. Place special mementos around the area that are extremely significant and meaningful to you. These could be pictures of your loved ones and favorite places, or trinkets you’ve collected throughout your life and travels. Store a couple of your favorite books nearby, light candles, start an aromatherapy diffuser and brew a hot pot of herbal tea to add to the ambience – whatever speaks to your heart.


Turn on the Tunes

The right music has the power to immediately energize or stabilize your mood and take you to a place of idyllic tranquility. Before indulging in a personal retreat session, put together a playlist of your personal soundtrack or download a relaxing podcast. Invest in a white noise machine to set the mood if words are too distracting to you.


Layer it Up

If the only free space you have left is a spare corner of a room, don’t fret. Turn it into a cozy comfort zone by adding as many pillows and throws as your heart desires. They will immediately warm up any space and serve up a whole lot of style. Winter is the perfect season to snuggle up with lots of layers, especially if your retreat space ends up being your bed, as many are.


Practice Meditation or Yoga

Once you’ve set up your space and are all ready to go, you may begin to think “now what?” and you certainly aren’t alone. Having moments of silence are key to self-reflection but can also get boring fast. A wonderful way to combat this is to set up an activity such as meditation or yoga that keeps you focused while also allowing for room to unwind and relax. Lay down a yoga mat and get started with a couple of beginner stretches.


Go Outside

If your home is simply too stuffy, step outside for a breath of fresh air. Bonus points if you have a lush garden to retreat to. Hang a hammock or set up camp beneath a shady tree for a place to call your own. Being surrounded by greenery and basking in natural sunlight will immediately elevate your mood and induce relaxation. Furry friends are always welcome too, like the cat seen on this Australian patio.


If you’re in a highly urbanized neighborhood, you can still reap Mother Nature’s benefits by taking a stroll to a nearby park. If you’d rather keep it all indoors though, pull up a chair near a sunny window and add a few low-maintenance houseplants. Succulents are great for first-timers and come in a variety of eye-catching arrangements. This welcome addition of life amidst the bleak winter landscape will keep you happy and healthy this season.

Source: CB Blue Matter Blog

Celebratedecoratingholidaysinterior decoratingreal estate December 4, 2017

How to Decorate Like a Christmas Elf on a Budget

It’s beginning to look a lot like Christmas!!! Break out that rubbermaid and dust off your ornaments because it’s time to decorate your home like the elf that I know you are. Here are five affordable and totally adorable ways to decorate your home with Christmas ornaments.

Christmas Shadow Box

Adding Christmas Cheer to your home couldn’t be more easy than this easy DIY Christmas Shadow Box idea.


Christmas Ornament Wreath

This project may look difficult but in just four easy steps you will be humming jingle bells. Learn how here.

Window Display

Show your neighbors that you are ready for a Holly Jolly Christmas with this simple hanging ornament idea.

In a Glass Vases

Remind your family it is the Most Wonderful Time of the Year with these easy Vase ideas.

As a Tree

Your guests will be rockin’ around the Christmas Tree when they see this adorable DIY Ornament Tree craft.

Source: CB Blue Matter Blog

Celebratecleaningcookingdecoratinginterior decoratingreal estatestagingThanksgiving November 8, 2017

Get Thanksgiving Holiday Prep Started Early


It’s time to pack up those spooky Halloween decorations and transition your home for the next fall holiday. Whether you’ll be hosting a family get-together or celebrating with friends, start planning now to ensure a stress- and disaster-free Turkey day. Here’s how to organize your party supplies and details for a beautiful feast this year.

Finalize Your Guest List

First things first, sit down with your friends and family to make a final decision on who you’ll be inviting over this year. Make and mail invitations now so your guests will have enough time to coordinate their own plans and get back with a timely RSVP.


Make a Menu or Hire a Caterer

Jot down recipes, shopping lists and cooking schedules today if you’re planning to make a home-cooked favorite or two this year. You’ll want to stock up on ingredients before your local grocery store sells out. If you’re not very kitchen-savvy, begin browsing local caterers’ menus before the best get booked.

While you’re at it, be sure to clear space in your pantry and fridge to hold the bounty of food before cooking day. If you have extra time, your oven and cookware supplies could probably use a nice cleaning.

Do a Walk-Through of Your Home

It’s important that you take your time as you pass through every room. Make note of anything unsightly that your guests might notice and take the next couple of weeks to fix scuffed paint spots, flickering lights or fraying furniture. Clear the coat closet and entryway, spruce up your post-feast lounging areas and prep guests rooms or kids’ areas as needed. Also take a good look at your dining space as you move on to the next tip.

Decide What You’ll Need to Rent or Buy

Can your dining room accommodate one long table for everyone or will you have to split up into two areas? Do you have enough chairs and table settings? Gather your own entertaining supplies and see if you can make-do or if you’ll need to buy or rent extras for this holiday season.

Plan Out Your Table(s)

This step is a bit early, but you can start visualizing the table or sketch it out on paper. Start planning an ideal seating chart, so couples aren’t awkwardly separated and family feuds aren’t reignited. You can make changes as RSVPs arrive.

Consider what your statement centerpiece will be this year as well as how you’ll be coordinating the plate settings and name cards to match. If you’re going with a nature-themed piece, it’s best to wait to order flowers now to prevent early wilting, but make sure to reserve one ahead of time with a local florist.

Start Decorating!

This is the most fun step of all and you can really let your style shine in any way you desire. Choose a general theme for the home and shop for matching decorations. Make sure you add some of this season’s classics, such as warm candles along the mantel or an inviting fall wreath on the front door.

Source: CB Blue Matter Blog

backyarddecoratingoutdoorsreal estateseatingstagingUncategorizedviews July 26, 2017

Summer Fridays: Outdoor Seating Areas That Wow

This isn’t your Grandmother’s veranda!  Take a peek at these great outdoor seating spaces. Enjoy!

If you have to sit, you might as well do it outside and during summer! Here are a few of our favorite outdoor seating areas from homes for sale on coldwellbanker.com

In limited web research, I’ve gleaned that on average, we’re seated for an astonishing 7.7 hours per day. Those almost 480 daily seated minutes are mostly spent at our desks as we type away diligently, in our cars as we sit in traffic, and on our couches as we binge watch our “shows” – because you know, it’s the golden age of television…we have a duty to watch these things.

Today I boldly proclaim that it is summer and if you have to sit, you might as well do it outside! You can catch up on Game of Thrones another day! Do you smell that? It’s called non-recycled air. Enjoy it while the weather is great. Here are a few of our favorite outdoor places to sit from homes listed for sale on coldwellbanker.com.

$22,800,000 – Kailua, Hawaii

Locals call this house Hale Palekaiko, or House of Paradise –  and for good reason. The home is located on world renowned Kailua Beach, but who would want to leave home when your home is basically a resort?

$9,750,000 – Santa Barbara, CA

This exquisite home in Santa Barbara transports you to the Mediterranean. Kick back with some local red wine, some good friends and enjoy those sweeping mountain views. This is how you summer!

$1,050,000 – Las Vegas, NV

As the saying goes, what happens in Vegas stays in Vegas…well if I were to ever visit this awesome 37th floor residence and all the amenities the building offers – I’d stay in Vegas too. Forever.

$6,888,000 – Bellevue, WA

Take your pick. Sit on one of the numerous terraces and balconies as you look out at your three acre kingdom, or get closer to the action by taking to the pool and patio areas to soak up some Vitamin D.

$5,850,000 – Roslyn Harbor, NY

What’s better than an all-brick restored roaring 20s estate resting on over 3.9 pristine acres of land? Not much. One of my favorite parts of this seriously hip turn of the century home is this seating area surrounded by lush gardens and vegetations all around.

Source: CB Blue Matter


decoratinginterior decoratingphotographyprojectsreal estateUncategorized July 26, 2017

DIY: Decorating Your Home With Photos

Photographs…your real time window to the past…even better than a memory in your head. Decorate with them? Absolutely!

Decorating with photos is an awesome way to spice up your home in a really dramatic way without spending a whole lot of money. Don’t worry if you haven’t got a lot of money; your own photos are probably better than anything you’d buy.

Dial up the gorgeous drama of your Northern California home with a fun photo decor DIY project. Photographs, like art, can help us express ourselves in many different ways. They can help us play up our sentimental side, make important statements, and complete the canvas of our homes. Learning how to decorate with photos, as simple as it sounds, can be quite daunting once you put your mind to it. How exactly should you go about it? Should you hang provocative art in your living room where everyone can see it? Is it cheesy to hang photos of your entire family on your fridge? What’s the right thing to do?

The Right Way Is Your Way

Don’t worry that you’ll end up decorating with photos that people may think are cheesy or that are too much. Photographs are an expression and extension of yourself, so you’re hanging and displaying them to express your vision. Of course, if you have children regularly visiting your home, you don’t want to hang something for mature audiences only in a room where everyone gathers. You know who you invite into your home; use your judgment.

Use Your Own Photos

There are photographic gems you probably aren’t even aware of (or even remember exist) buried inside your very own camera or flash drives. Photos of vacations past, a child’s birthday party, a lonely street at night — any of these could be striking or thought-provoking enough to make perfect wall art. You don’t have to use the whole image; maybe it’s a detail of an image that’s frame worthy. If you don’t have the scene you’re looking for, create it: Your child’s feet as they leap off the ground; your grandmother’s smile the instant she bursts into laughter upon hearing an off-color joke; your cat’s profile as she watches a bird outside the window. The possibilities are literally endless.

Display Them In Innovative Ways

You can rarely go wrong with square or rectangular black frames backed by white matte when it comes to framing your pictures, but there are many different ways you can display your photos. Attach a series of photos individually on metallic clips and hang them from a metal wire grid that takes up your entire wall. Put some vintage photos inside of old mason jars. Blow up a favorite photo to life-size stats and hang it front and center in your main living area or passageway.

Source: CB Blue Matter


backyardBBQdecoratingEntertainmentfamilygrilllandscapinglawnPoolsPrivacyprojectsreal estatesummerUncategorized July 8, 2017

8 Ways to Make Your Backyard a Summer Paradise

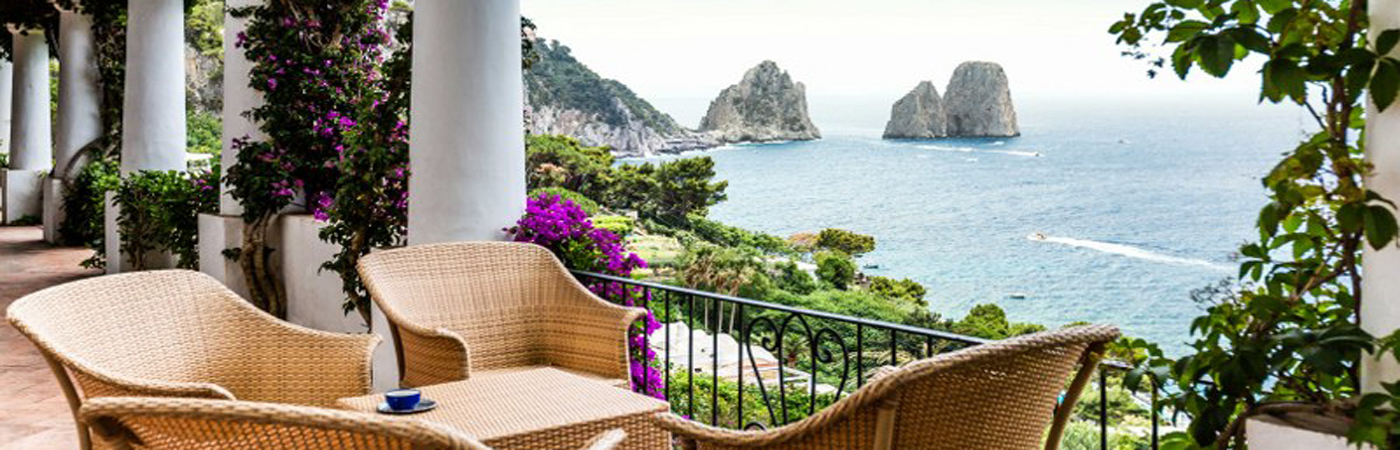
Your backyard should be your summer sanctuary…your perfect place away from the rest of the world. Here’s how!

Summer is the season to be outdoors. It’s the perfect time for backyard barbecues, neighborhood socials, and late-night evenings on the patio. You don’t need to travel to a luxurious and exotic location to enjoy spending time outdoors. Make your own backyard a summer paradise with these eight simple suggestions.

Inspect and Update Wooden Decks
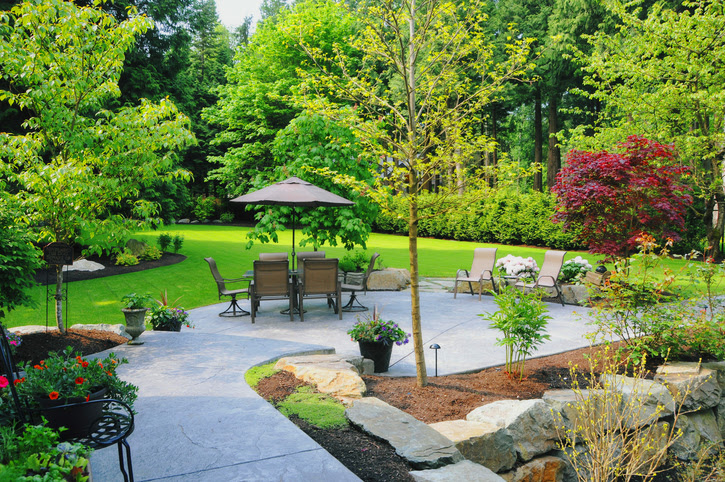
To make your backyard a summer haven, take some time to inspect and update your deck. Wooden patios and decks can be warped by cold weather, so you’ll want to replace loose or missing slats as needed. Sand, stain, and seal your deck once you’ve made sure it’s structurally sound. If you have a stone patio, check for missing pieces and update as needed. Once this is complete, you’ll have a shiny and appealing deck you can decorate with patio furniture—creating a relaxing sitting area for summertime.

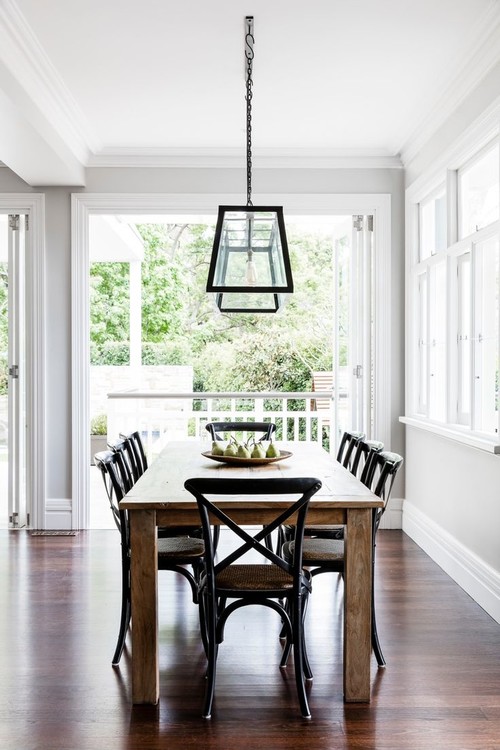
Purchase Patio Furniture and Essentials
Once you have a designated patio or deck space, you’ll want to add some patio furniture so you can sit down, mingle with friends and family, and relax. Consider purchasing weatherproof patio furniture that is both comfortable and durable. Patio furniture can be exposed to harsh, seasonal weather, so you’ll want to make sure it lasts for years.

Get the basics, including some lounge chairs, an umbrella, a hammock, and an outdoor table so you can enjoy meals or games outside. In addition to patio furniture, you may want to buy or build an outdoor fire pit. It’s a simple feature that adds so much to your backyard. Sit around the fire and socialize, roast marshmallows or even cook dinner on your own backyard fireplace.

Add Colorful Cushions and Pillows
You’ll want to add a splash of color to your patio so it’s eye-catching and sings of summertime. Buy some bright-colored, comfortable throw pillows and cushions to spice up the furniture. The bright colors and fun patterns will entice people to sit down, relax, and enjoy your backyard paradise.

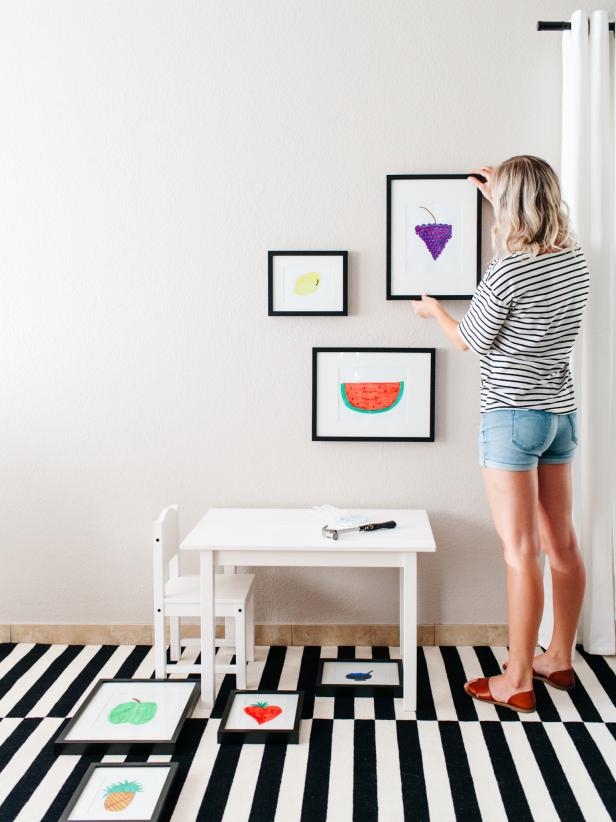
Get a Rug for the Patio
Consider adding a rug to the patio or deck area to make the space feel cozier. Outdoor rugs vary in material, size, and shape and are generally made to last in all types of weather. They make a great addition to your space, and can also protect your deck.

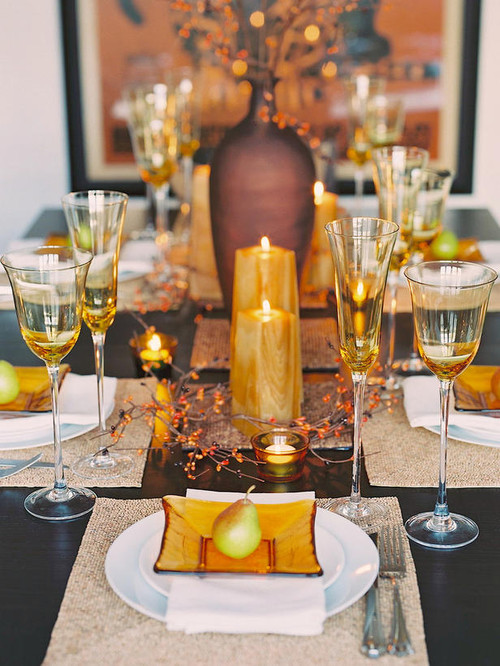
Install Outdoor Lighting
Nothing is more magical than twinkling lights against a royal-blue evening sky. Add strands of tea lights or other innovative lights to create a fairytale effect in your backyard. In addition to the decorative lighting, you’ll want to consider adding sensor or smart lights to your backyard for added security. Smart lights are a great way to ensure the backyard is lit—you can even control smart lights with your smart phone.

Make the Backyard Private
You may love your neighbors, but that doesn’t mean you want them always peeking into your backyard. Be creative when thinking of ways to ensure better backyard privacy. One easy way to create a private, secluded backyard paradise is to install a fence. Not only does it ensure privacy, but it is an essential safety measure. Install a strong, secure fence to create a private and safe backyard.

Update Your Landscaping
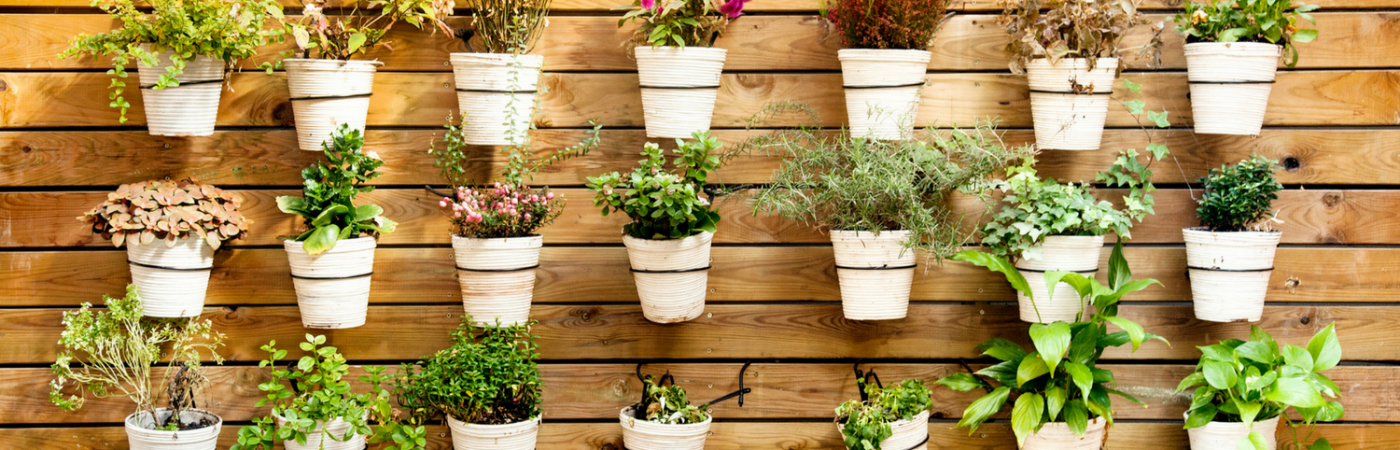
Landscaping can make or break your backyard. It’s essential to take time to update your landscaping to create an outdoor paradise. You don’t need extravagant plants or trees to make your backyard grand. Take some time to cut back unruly trees and bushes, pull the weeds, water and trim the lawn, and plant flowers around the yard. These simple updates will make a world of difference. You’ll have your own secret garden in no time!

Secure Outdoor Belongings
Once you’ve created a magical backyard space, you’ll want to take the necessary precautions to safeguard your belongings. Make sure your garden tools and supplies are in a locked shed—away from kids, pets, and burglars. Take time to assess the backyard for any security breaches. This will keep your family safe and protect your backyard, patio, and deck from major damage.

Summer is a wonderful time to relax and enjoy being outdoors. Update your own backyard and you’ll have access to a private paradise any time you want.

Source: RisMedia


decoratingDIYgadgetsinterior decoratingmaximizing spacephotographyreal estatestagingUncategorized June 29, 2017

Hacks to Hang Anything On Your Wall

Banged up thumbs, crooked frames, and things that go crash in the night?  Here’s how to do it RIGHT!

Who knew sticking stuff on the wall could be such a process? Keep your stud finder at the ready, friends! I’ve rounded up our top tips and hanging hacks to help you through the tedious task of decking out your walls. From stylish storage and pendant lights to extra heavy and delicate decor — every step-by-step you could possibly need is right here.

Hang Heavy Stuff

A heavy, antique mirror takes more than a hammer and nails. Get the full how-to for hefty hangings below.

Hang Lights

Set a romantic tone in your bedroom by adding a chandelier or pendant lights with this must-know DIY.

Hang Crown Molding

Add dimension and a craftsmen quality to any space with crown molding. Here’s how to do it.

Hang Wallpaper

Make a statement with zero dreaded air-bubbles or clumped-up lumps in sight.

Add Hanging Storage

Hanging storage reigns supreme as one of the best ways to make the most of any space.

Hang Curtains

Do not get this wrong, people. Transform your home from drab to designer with properly positioned drapes.

Hang a Pot Rack

Is it just me or does a hanging pot rack make a kitchen feel more legit? Add this chef-like quality into your kitchen.

Create a Gallery Wall

Not sure you’re doing the whole gallery-wall thing correctly? Here’s everything you need to know to pull it off like a pro.
 Source:  HGTV
decoratinginterior decoratingPaintreal estatestagingUncategorized June 6, 2017

The Paint Colors That Sell—and the Ones That Don’t

Paint can make or break a room…here are some handy tips before you pick up the old paint brush!

Paint colors play a crucial role in successfully selling a home, having the power to influence a homebuyer’s decision to make an offer or move on and the best colors, according to a new Zillow  analysis, are blues and grays.

Homes with bathrooms that have soft blue walls (e.g., periwinkle, powder blue), specifically, sold for $5,440 more than expected in the analysis, as well as homes with a “greige” (beige/gray) exterior, which sold for $3,496 more than homes with brown or tan stucco exteriors. Homes with dark navy blue and/or slate gray front doors also sold for more: $1,514.

Certain colors, though, have the opposite effect, lowering sale prices by a few thousand dollars or more. In fact, homes with bathrooms that have white walls sold for $4,035 less than expected, while homes with darker walls (e.g., brick red, terracotta) sold for $2,031 less than expected.

“Color can be a powerful tool for attracting buyers to a home, especially in listing photos and videos,” says Dr. Svenja Gudell, chief economist at Zillow. “Painting walls in fresh, natural-looking colors, particularly in shades of blue and pale gray, not only make a home feel larger, but also are neutral enough to help future buyers envision themselves living in the space. Incorporating light blue in kitchens and bathrooms may pay off especially well, as the color complements white countertops and cabinets a growing trend in both rooms.”

The analysis considered over 32,000 photos of sold homes across the U.S.

Source: RisMedia