
 Facebook
 Twitter
 Pinterest
 Copy Link
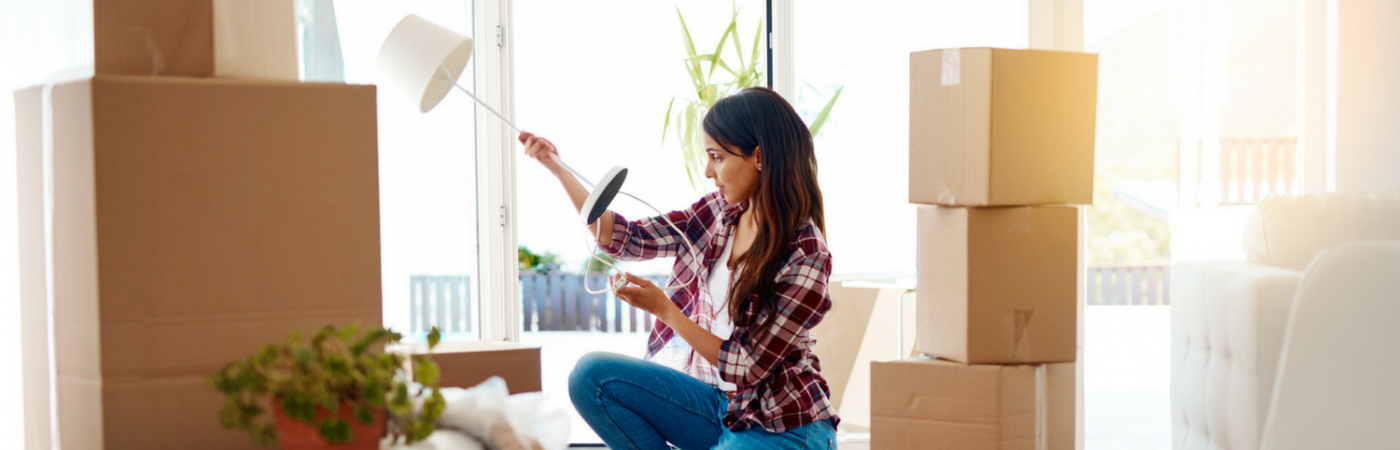
Moving Day Count Down: A Weekly Checklist

Did you know May is National Moving Month? May is the kick-off to the busiest moving season. In fact, nearly 40 million of us move in the summer and begin to plan in May. If you are one of those on the move this season, we want to help you plan. Unlike the popular perception, moving doesn’t need to be a stressful and overwhelming process! The key is to plan ahead and then the to-dos of moving are very manageable.
Okay, so what are the to-dos and when do I do them? Here you go, use this expert two-month moving calendar to keep you organized. Simply follow these steps and check them off one-by-one. The insider secret to a stress-free move: stay in the know and know what is ahead!
EIGHT WEEKS TO GO:
Start the process of selecting a mover.
Check your mover’s record with the BBB, on Yelp and other social review sites. A great reputation is the best way to choose a mover.
If you’re being relocated by your company, verify what the company relocation policy covers and what responsibilities fall on your shoulders.
Start to inventory your belongings: Decide which items to donate, recycle, to take and which items (if any) need to go into short-term or long-term storage.
Your tape measure is your new BFF – measure all the rooms in your new home, include layouts of doors, closets and windows. Measure all the furniture that is going with you and create scaled cutouts to place in a scaled layout for each room. Once you have finalized a room layout that works, photocopy your final layout for each room. Give a copy to the movers on moving day and tape a copy to each room.
FOUR WEEKS TO GO:
Mail change of address cards or change your information online:
- Post office
- Social security
- Insurance companies
- Credit card companies
- Credit bureau and/or other creditors
- Employer (to forward W2s)
- Car registration
- Broker
- Mail order accounts
- Department of motor vehicles
- Magazines
- Friends and relatives
Arrange to clean furniture, drapes, etc. in your new place if necessary.
Gather personal records (medical, dental, etc.)
Arrange to transfer children’s school records
Gather all pet’s vet records and make sure all pets are micro chipped and it corresponds to a cell number that goes with you on your move.
Order new tags and licenses with new address.
Check homeowner’s insurance policies to see if moving is covered. Be sure your new home is protected by transferring fire, theft and other
personal-property insurance.
Start to pack.
THREE WEEKS TO GO:
Make arrangements to discontinue current utilities and schedule the start-up of new utilities:
- Telephone service
- Telephone listings
- Cable TV
- DSL/Cable/Phone line for internet access
- Electricity (check for refund)
- Gas (check for refund)
- Fuel oil
- House cleaners
- Babysitters
- Dog walkers
- Gardeners
- Pool service
- Diaper service
- Water
- Water softener
- Parking
Have appliances serviced for shipment.
TWO WEEKS TO GO:
Arrange to transfer local bank accounts. Speak to your bank and find out about new checks being printed, etc. Don’t forget your safety deposit box contents.
Ask doctors, dentists and veterinarians for medical records.
Cancel newspaper delivery.
Refill all prescriptions. Get prescriptions transferred to new pharmacy closer to new home.
Make arrangements to move children and pets. Do you need a babysitter for a day or two? A pet sitter?
Confirm that mover will move houseplants; if not, make arrangements. Houseplants, usually, cannot be moved by a mover, especially on long distance or out of state moves.
Start to disassemble any shelving, closet systems, etc. that you plan to take.
If you need one, hire a cleaning crew to clean your empty place to get your deposit back. Will your new place need a cleaning crew before move in too?
ONE WEEK TO GO:
Pack in separate boxes the items necessary for first days in new home: Label “LOAD LAST.” And label where to put each of those boxes in your new home: “top of kitchen counter.”
Medicine (always keep prescriptions on you)
Comfortable clothes
Linens and towels
Toothbrushes and toiletries
Paper goods
Disposable plates and silverware
Foil and wax paper
Plastic containers
Microwave
Vacuum cleaner
Garbage bags
Tool kit
Step ladder
Extension cords
Light bulbs
Cleaning items (mop and pail, broom and dust pan, etc.)
Each member of the family should also pack a suitcase with what they need for a few days while you’re getting settled into your new place.
Don’t forget cell phone chargers, medications and favorite teddy bears.
If the movers are packing all or part of your goods, call to schedule and confirm the details. Make sure your mover knows how much packing you expect to do yourself and how much you expect them to do.
Plan to use up most food items before the move. If you have any leftover food on moving day, donate it to Move For Hunger.
TWO DAYS TO GO:
Defrost and dry refrigerators/freezers to be moved.
Gather valuables and important documents from jewelry cases, safe deposit box, etc. to take with you in car. Do not pack these items with your other belongings.
MOVING DAY:
Moving Out
Arrange to be on hand for last minute details and to give directions to movers.
Leave the whole day for your move. Don’t plan to go back to work, arrange a dinner date, etc.
Have payment for movers on hand. Avoid having to run out to bank, ATM, etc.
Have tips ready for everyone who is assisting you: cleaning crew, doormen, nanny, dog sitter, movers, etc.
Before leaving, check each room and closet. Check garage, basement and attic.
When you leave, turn off lights, close windows and lock doors.
Moving In
Supervise placement of boxes and furniture. Refer to your premade layout. Scotch tape a copy of the layout to each room’s door.
Check for damages. Inspect large items; look for boxes that are crushed or open. Inform the moving foreman and review the claims procedure with him.
Go back to the truck. Make sure nothing was left behind. Check all the compartments where fragile items are often kept for their protection.
Settle in to your new place, take photos for friends and family. A new chapter in your life has just begun! Let the new adventure begin!
Top 10 Damaged Items When Moving & How to Protect Them
Nearly 40 million of us move in the summer and begin to plan in April. If you are moving this season, we want to help you protect your precious belongings and make your move a smooth one!
Before you start to pack, make a game plan. Which of your items are fragile? What will you need to pack them? We’ve seen some folks pack themselves so, unfortunately, we know which household items are most likely to break and typically aren’t packed properly. We have compiled a list of the top 10 items damaged when moving. It’s surprising what items make the list. Not only have we complied the most breakable list, we’ve included tips on how to protect them properly so you can “break” this pattern.
1. Drinking Glasses
It is no surprise glasses are the #1 breakable. But, with simple steps you can ensure they arrive in one piece.
Protect: One of the key factors to keeping your glasses and wine glasses from breaking or getting crushed is using the proper box. Use a “dishpack” box that has double thick walls for extra protection. Place a glass on packing paper horizontally. Grab a corner of the packing paper and roll the glass into the paper. Make sure to tuck the sides of the paper in, like you would do wrapping a burrito. Repeat 3-5 times (depending on thickness of glass) with more sheets of packing paper. Make sure to label your glass burrito: “Wine Glass” so it won’t get tossed aside with the packing paper during the unpacking process. Cushion the bottom of box with crumpled packing paper. Place the wrapped glasses vertically (yes, you read that correctly: VERTICALLY) in one layer in the box. They are much more secure vertically. After completing the first layer, place packing paper on top. Repeat these layers until the box is full. Fill all remaining space with crumpled packing paper.
2. Plates
The biggest moving crime — plates are often placed in boxes without enough packing paper. You don’t want to hear the dishes rattle in the box!
Protect: To keep plates from breaking, first wrap each plate in packing paper. Repeat 3-5 times with more sheets of packing paper until the plate is properly secured & cushioned. Label your little plate package: “Plate.” Again, use a secure dishpack box. Always, use plenty of tape on the bottom and tops of every moving box, just don’t use one strip of tape, use multiple strips and run the tape both directions to make sure that box is secure. Before placing any of the wrapped plates in the box, cushion the bottom of box with crippled packing paper. Then place the wrapped plates VERTICALLY in one layer in the box. After completing one layer, place packing paper on top. Repeat these layers until the box is full. Once the box is full, fill any remaining space with crumpled packing paper.
3. Artwork
Glass artwork often breaks because there is not enough cushioning in the moving box and the top of the box is left with a gap. The top of the box then collapses and the piece of art breaks.
Protect: To protect artwork from breaking use a picture box. Line the bottom of the box with crumpled paper. Place the glass art in the box, then stuff front, back and along the top with paper and or eco-bubble wrap. You want to be sure the box is completed packed with paper (top, bottom and sides) with no air gaps.
4. Lamp Shades
Lamp shades are an awkward shape and large, making it difficult to pack. If not packed properly, they can easily be dented or torn.
Protect: Wrap the lamp shade in eco-bubble wrap, covering every inch. Then fill the interior cavity of the lamp shade with packing paper (do not use newspaper as the print may rub off onto your lamp shade). Fill the box with enough packing paper to keep the shade from shifting around inside. Do not place anything on top of the shade, not even soft items such as linens. Use only packing paper to secure the lamp shade from shifting.
5. Liquid Cleaning Supplies
Many times homeowners pack bottles of liquid cleaning supplies without sealing them properly. This causes leaks and damages things inside and outside of the box. Do not pack or move flammable supplies!
Protect: First, remove the cap from each bottle and place a small piece of plastic wrap over the opening. Then tightly screw the cap back on. Use tape again to secure the cap to the bottle. Begin placing the cleaning products in a small book size box and check the weight as you go. You don’t want to pack the box too heavy. When the box is full and not too heavy, place packing paper all around the bottles to keep them from shifting. And, this is important, remember on every box be sure to use more than one strip of tape on the bottom and top of the box and run the tape in multiple directions. When a box is not taped properly, boxes can open at the bottom and spill on the floor. Always, label every box with its contents, room in the new home where the box should go and directional arrows pointing up. Repeat the label on each and every side of the box. You will hate us for this tip while you’re writing and rewriting the same thing over and over again and love us later when you have stacks of boxes and don’t have to turn boxes around to find out what’s what.
6. Wine & Liquor Bottles:
Again these bottles can easily leak or break, and damage items in and outside of the box.
Protect: Use a divided/cell box you can get free from a specialty wine shop or liquor store, or purchase a cell kit from a moving store. Use smaller boxes so they are easy to lift and carry. Again, be sure you double and even triple tape the bottom of the box. If you’re packing opened bottles, ensure they are properly sealed by tightening the caps. Tape the caps on to the bottles. Roll each bottle in packing paper with 3-4 layers of paper. Secure the wrapping with tape and make sure there are no loose ends. Label the bottle: “Bordeaux.” Finally, place the bottle into the box. If there’s any space or gaps between the bottle and the divider, fill it with paper. Make sure the box is not too heavy.
7. Mirrors
The big mistake with mirrors is that people pack them in picture boxes without any eco-bubble around the mirror. If the front of the mirror faces the wall of the box without protection, it will break.
Protect: Use a flat box or have your movers pack the mirrors in a custom wood crate to provide extra protection. If you’re doing the packing, line the flat box with crushed packing paper to create a padded bed for the mirror. Wrap the mirror completely in multiple sheets of paper or eco-bubble. Tape the wrapping tightly around the mirror and place the mirror in the box. Fill any gaps with more crumpled paper. Only pack one mirror to a box.
8. Glass Pictures
Glass picture frames are easily broken if not packed in the right box. We want to keep those precious memories in one piece!
Protect: Use a picture box. Line the bottom of box with crumpled packing paper. Wrap each picture frame in packing paper or eco-bubble and pack each frame in the box vertically. Stuff packing paper in between each picture and on top, making sure nothing will shift.
9. Stereo & Audio Equipment:
The reason stereo and audio equipment gets damaged is folks stack a few components in the same box and they do not put any layers of padding in-between the pieces of equipment.
Protect: If possible, pack your stereo equipment in their original cartons. If you did not keep their original boxes, use a dishpak box. Remember, dishpaks are specially designed boxes to handle and protect fragile items. If you can’t find dishpaks, use double corrugated boxes. After double taping the bottom of the box in the both directions, pack the bottom of each box with crumbled packing paper for padding. Wrap each electronic component separately in eco-bubble. Pull the wrap over and tape it all together. Make sure the item is completely covered. Place it up right, vertically in the box. Repeat this process for the next big item then place it vertically in the box next to the first item. Do not stack! Stuff packing paper in open spaces and on top for extra cushion.
10. Books:
This one is a surprising one, but if books are packed improperly they can actually get damaged. When books are placed too tight together the edges get folded and covers get damaged. Also, if books are packed with too many air pockets/gaps inside the box they can shift during transportation and get damaged (smashed corners, wrinkled covers, etc).
Protect: Use a book box. Place books flat, horizontally and stack them with the heaviest books on the bottom and the paperback books on top. Be sure not to make the box too heavy. Pack paper on top and sides if there are any air gaps.
With these steps your move will be unbreakable! Remember, you can always do some of the packing yourself and leave the rest to the professionals.
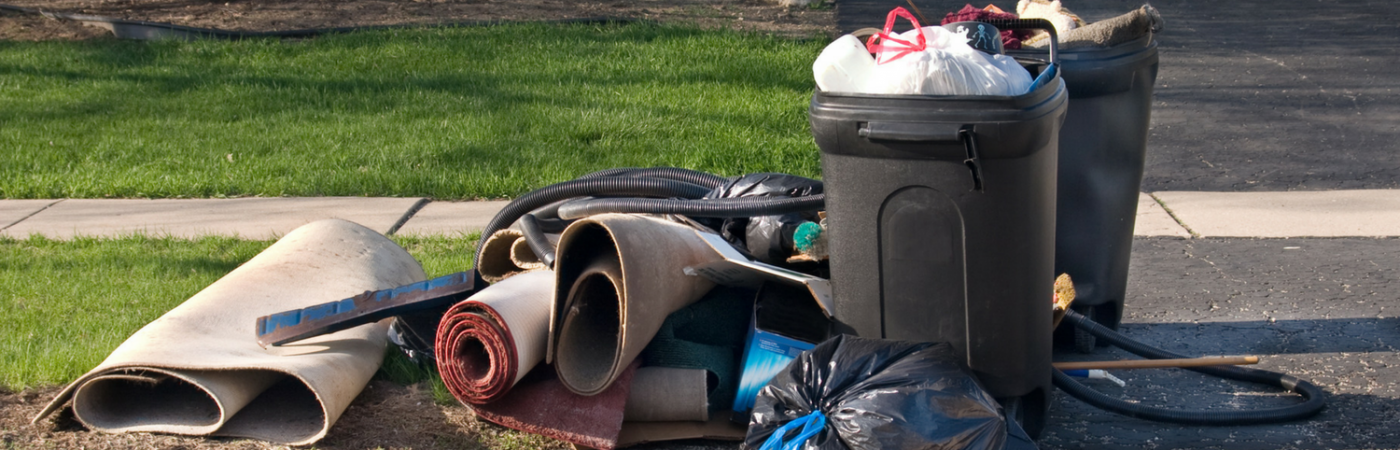
Moving Day: Five Simple Ways to Reduce Waste & Save Green
The start of a new year brings the same old resolutions: get organized, get in shape and eat healthier. What if we all look beyond ourselves and add find new ways to be kinder to Mother Earth to our list? The impact would be pretty fantastic, a re-energized movement to preserve our one and only beautiful earth.
One simple way to fulfill that resolution is to be eco-conscious on moving day. Moving is one of the most wasteful times in a household. We finally get around to cleaning out those over stuffed closets, basements and garages. It’s the time we toss out those old clothes, electronics, magazines, bikes, etc. On top of the major weeding out of our belongings, we use tons of boxes and packing materials; and create piles and piles of waste that contribute to our landfills. Let’s just face the fact: moving time equals major trash time.
The great green news is there are simple steps you can take during a move to reduce your waste. Being eco-conscious on moving day will save you some green in your wallet too!
Follow these 5 steps to make Mother Nature & your wallet proud:
Use Eco-Friendly Moving Supplies
From boxes, packing paper to bubble, there are now green 100% recyclable materials to keep our neighborhoods cleaner and greener. Yep, there is even biodegradable eco-bubble, pop away guilt free.
ECO-BONUS: Save money by asking your moving company for used boxes made of recyclable materials. You can get used boxes at a discount and some moving companies will even give you a refund for returning your used boxes at the end of your move. Pop! Pop! Cha-ching!
It’s Not Just for the Movies
Instead of the foam popcorn and peanuts, use real popcorn to pack fragile items! Just pop and fill the gaps in your boxes to secure and pad fragile items. Cheap and earth friendly!
Give Back
Finally, the garage and closets actually are getting cleaned out. Hurray! Now is the time to get rid of what you don’t really need: the growing collection of tuna and soup cans in the pantry; the many, many sport teams t-shirts; go-go boots; your 10 year old’s toddler clothing, etc. But, don’t just toss them out. Donate unwanted furniture to the Habitat for Humanity Restore and clothing and household items to your local favorite charity such as Goodwill for someone else to enjoy.
ECO-BONUS: Reuse your moving boxes to donate your items. Simply visit GiveBackBox.com to learn how to use your used boxes to ship your donations off to a charity. Lastly, if you have any unopened leftover food on moving day, donate it to Move For Hunger. Don’t forget to keep your moving and donation receipts to save green on your taxes next year!
Be Kind to Your Electronics
You may no longer want your lemon-yellow microwave, but don’t just put it on the curb or throw it in a dump. If you do, it will likely be shipped off to unregulated third world environmental disaster dumping grounds instead of being recycled in facilities that follow U.S. environmental regulations. Contact a domestic e-waste recycler so your old computers, microwaves and other electronics are recycled domestically, under environmental laws, rather than being shipped off to be processed by highly toxic and polluting techniques.
Hire an Eco-Conscious Moving Company
Use your “green” to influence and encourage green habits by hiring companies that use environmental-friendly practices. Make sure your moving company is bright green by asking: Does the staff recycle? Are the offices and warehouse designed to be energy efficient? Do they use biodiesel to run their trucks? Do they use 100 % recyclable materials? Do they sell used boxes? Do they buy them back at the end of the move? Chances are if they care about the earth, they care about their customers too! It’s a great big green win – win!
Pat yourself on the back; you’re making Mother Earth smile and future generations will thank you!
Laura McHolm is an organizational, moving & storage expert and co-founder of NorthStar Moving Company. NorthStar Moving Company is an award winning, “A+” rated company, which specializes in providing eco-luxury moving and storage services.
Source: CB Blue Matter
Moved In? Now What? – A Post Move Check List
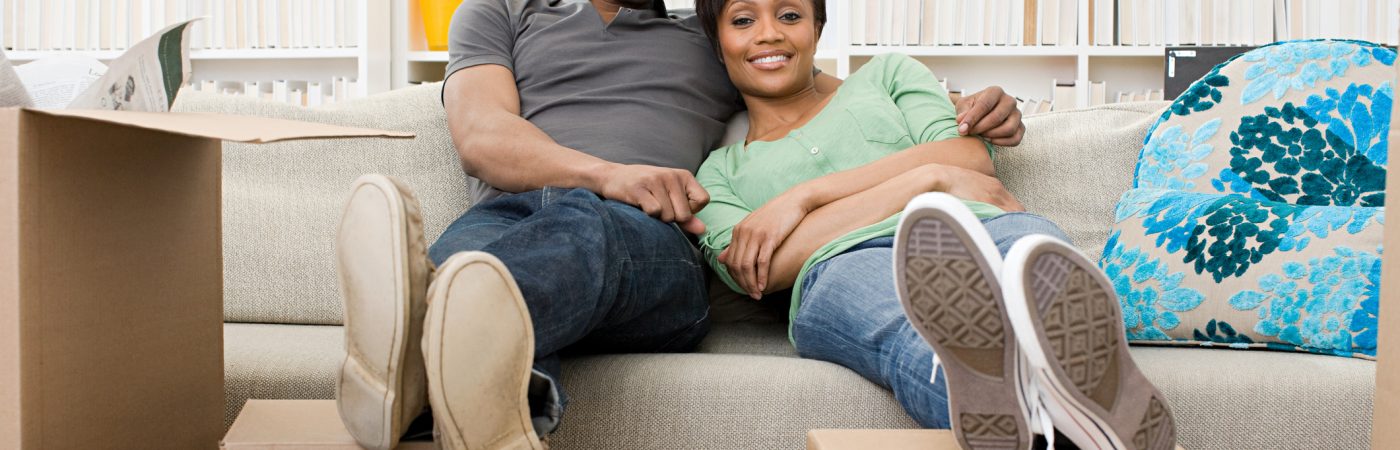
So, it’s been a month since you moved into your new home. The empty boxes are stacked in corners like miniature Leaning Towers of Pisas and you are missing some key pieces of mail. The moving checklist guided you day by day, but now that the moving storm has subsided, how do you complete the settling in process?
Ready for the best news ever!? Unlike your two-month long moving-in check list, there is a short list of tasks that will not only ensure you don’t miss the next People magazine, but will also help Mother Earth and others in need. Too good to be true? You can thank me later. Follow these five steps and you will forget you ever moved.
1. Boxes! Boxes!
To truly feel moved in, the first task is to get rid of all the empty moving boxes. So many of us are guilty of just leaving the empty boxes in the garage or attic to gather dust. Instead be green and save green by asking your moving company if they have a box return program. For instance, NorthStar Moving Company will give you back 25% of the original cost of their boxes if you return them.
Other ways to reuse boxes is to flatten them and put them out on recycling day or use them for storage of keepsakes, holiday décor and other items you only need on occasion. The most creative and inspirational way to reuse moving boxes is to join the Global Cardboard Challenge to celebrate child creativity!
2. Mail Yourself
Does your mailbox seem light? While you may be thankful to not be getting all of your bills you certainly don’t want to miss a due date. Check in with the post office to make sure they have your mail forwarding service set up correctly. Then send a friendly postcard to yourself, address it to you at your old address and wait and see if it gets forwarded to your new address.
3. Update Your Driver’s License & Consider Becoming a Donor
No one enjoys visiting the DMV and the good news is you don’t have to! You can change your address online. You must report your new address within 30 days of your move to the Department of Transportation Registry of Motor Vehicles.
This is also an opportunity to revisit being an organ donor. You can register to become an organ donor on your state’s DMV website as well. The number of donors willing to make organ donations are not growing as quickly as the number of people who need them. 20 people in the United States die each day while waiting for organ and tissue transplants. The number of patients in the U.S. waiting for transplants is currently over 116,000 people. Even more are waiting for much-needed tissue transplants.
While you are on the subject, consider a program to donate your whole body. The organ donor symbol on the back of a driver’s license is different from body donation, they are completely separate programs with entirely different consenting processes. Only 1% of organs donors specify to donate their whole body. There is a great need. You could potentially make a difference in the lives of many people.
4. Survey Your Stuff
After a month of living in your new home you now know what furniture, kitchen tools, artwork and even clothes fit into your new place. Rather than stumbling over the stuff that you don’t need, give it to someone that does need it and will give it a good home.
Create two labels: “donate” and “give to friends & family.” Donate clothing and household items that don’t have sentimental value to your local favorite charity such as Goodwill or Habitat for Humanity’s ReStore for someone else to enjoy.
For the items that are sentimental, keep them in the family by giving them to loved ones. But, don’t just hand it to them, throw a party, a reverse housewarming party! Instead of having your friends bring a housewarming gift, ask them to pick one (or more) of your items and take it home with them. This is a great way to reunite with old friends and meet new friends after your move. Your unneeded things will be in a home where you can visit them often.
5. Vote!
There is no “debate” that every American needs to cast their ballot, so it is vital to register to vote. Your voter registration does not move with you. If you move within your existing county, you must complete a new voter registration form to update your new address. If you move to a different county or state, you must re-register with your new county and/or state.
Visit the EAC website to download and print the National Mail Voter Registration Form. Once you have completed the registration form, mail it to the address listed under your state in the “State Instructions.”
See, in just five steps you are now clear of moving remnants and clutter, sipping coffee with your New York Times and are the shining example of being a responsible citizen. Enjoy your new life!
Pare Down and Declutter By Knowing How Much Stuff Is Enough
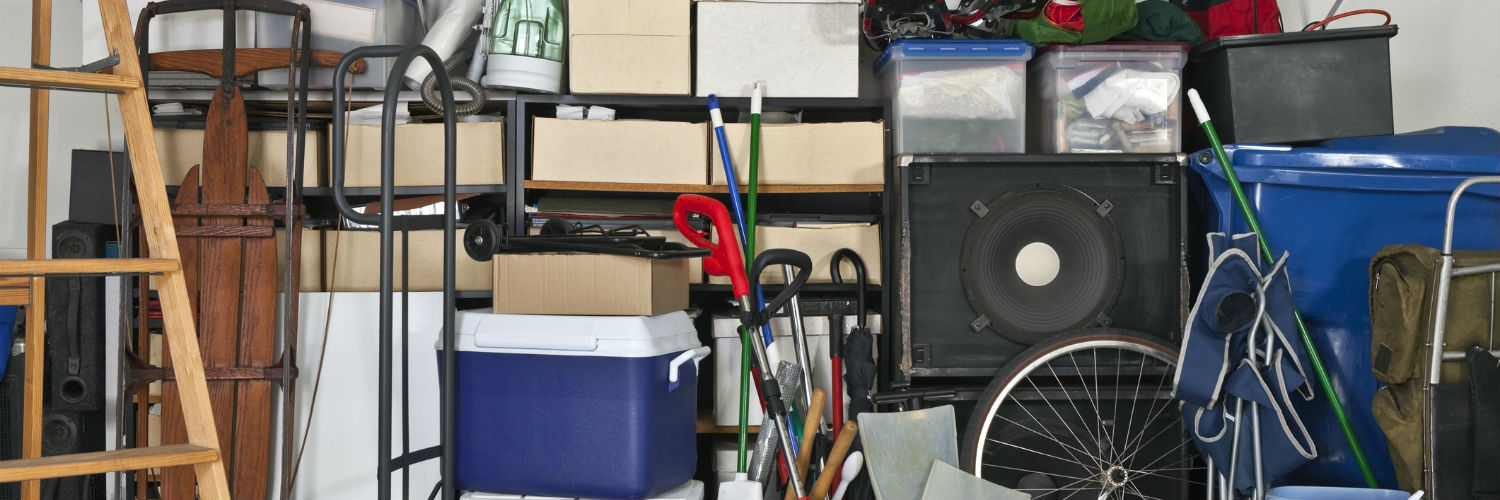
So you want to pare down your belongings. But how much, exactly, do you get rid of? And how can you prevent stuff from simply piling up all over again? Part of the solution to a lasting clutter-free existence may lie in numbers. As in, the number of pairs of shoes, towels, place settings and so on that you decide to keep in the house. By deciding how many items in each category of stuff you really need, those numbers become a sort of fail-safe, preventing your home from free-falling into its formerly cluttered state. Check out these ideas on how to get started, then share your own numbers in the Comments.
The “sometimes” dilemma: What to do if you use something but only occasionally? Fancy china and highly specialized cookware come immediately to mind. If you really do love to have these things when the occasion calls for it, and you have storage space for them, by all means keep them. Just be intentional about what and how much you are keeping, and know why. Try to avoid keeping large sets of anything purely out of guilt — if you’ve inherited something you don’t want, see if someone else in the family wants it, sell it or donate it to charity.
More tips on what to do with sentimental pieces
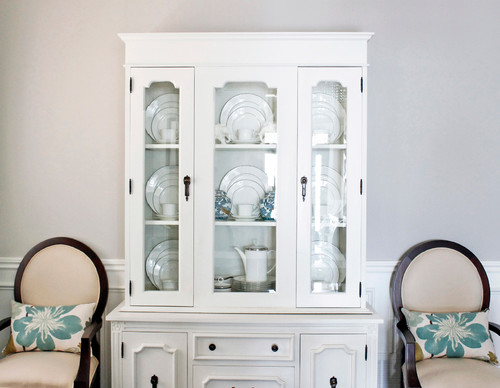
How much to keep? Set a space limit. One way to keep rarely used items in check is to limit the amount of storage space you afford them. Instead of allowing your entertaining arsenal to multiply indefinitely over time, taking over not only cupboards but basement shelves and the attic too, decide on one space to store these items in and stick with it. For instance, keep all china in one nice china hutch — if you acquire more down the road, give away or sell something to free up space.
The Rule of Three: One in the wash, one in the cupboard, one in use. You may have heard this one before, but it bears repeating because it really works. It can be difficult to come up with what seems to be a rather arbitrary number of items to keep, but sticking with one for the shelf, one to use and one to wash keeps things simple. I follow this rule for sheets (per bed) and towels (per person).
What about guests? Unless you are running a boarding house, two sets of sheets for each guest bed and two sets of towels per guest are plenty.
The seasonal exception: Even minimalists may want to keep extra stuff on hand to rotate in depending on the season — and that’s whether or not there are chilly winters.
It can be a nice change of pace to bring out thicker blankets in warmer hues for the winter and light, airy linens in summer. But that doesn’t necessarily mean you should double the number of sets you have, if some sets work well year-round. For instance, you could decide to keep one set of sateen sheets for year-round use, two sets of flannels for winter and two cool, crisp sets for summer.
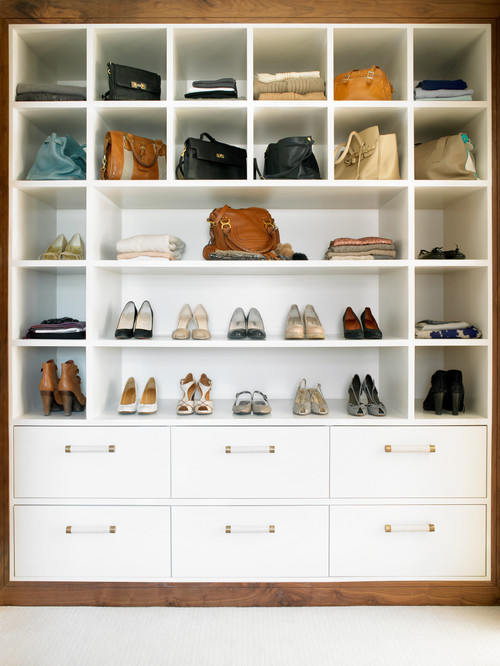
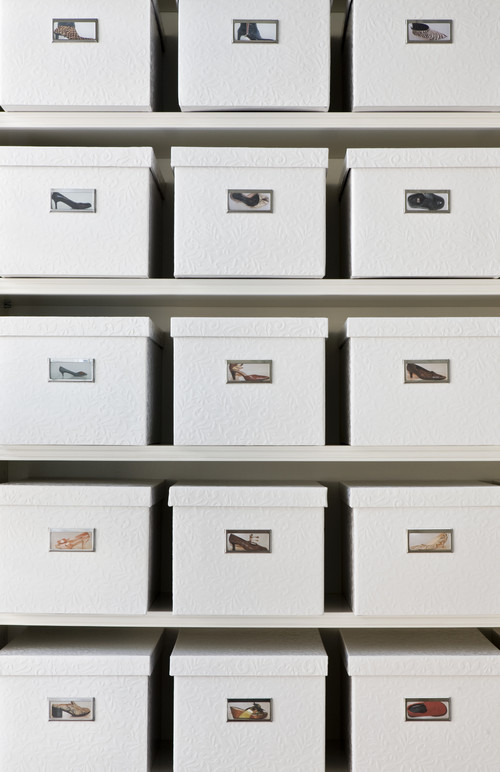
Special case: Clothes. Clothes and shoes may be the most personal (and difficult) category of stuff to put limits on. That said, even those with intense attachments to their wardrobes can find it worthwhile to do a proper inventory.
After figuring out that you actually have 100 pairs of shoes or 20 nearly identical black tops, you may decide to bring that number down … or you may not, but at least you will be informed.
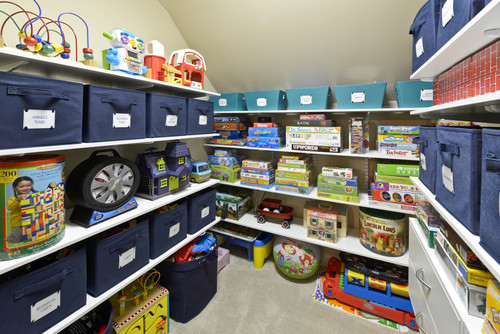
Special case: Kids’ stuff. When a child’s room is overflowing with stuff, it’s hard to focus on any one thing, and pretty soon all of those lovingly chosen toys become just part of the mess. Setting space constraints is a smart way to handle this situation. Dedicate certain shelves, plus perhaps a toy closet (for toys not currently being used in the rotation) for your child’s belongings, and keep it at that. When a bin or shelf begins to overflow, or you notice that stuff is piling up on the floor (because it has nowhere else to go), take that as a cue to give something away.
The everyday stuff: Count it out. Do you know how many basic plates, bowls, cups and wineglasses you own? If you’re not sure, go count them — you may be surprised at just how many pieces of “everyday” tableware you have. Of course it’s nice to have enough of everything that the whole household can eat a meal or two and not worry about getting everything washed and dried, and you’ll want extras on hand for bigger casual dinners with family and friends if you host that sort of thing, but you won’t likely need more than that.
Not everyone wants to stick with one set of white dishes (although for simplicity’s sake, that’s surely an easy way to go). But you can still set a limit at a certain number of sets. If you go over your number, it’s time to start culling.
Special case: Tupperware. What is it about plastic containers that makes them seem to multiply when you’re not looking (but hardly ever with a matching lid)? Start by removing any lids that don’t have mates, then count what you have left. Most of us probably have too many food storage containers — really, how many leftovers are you likely to wrap up at any given time? Three? Four?
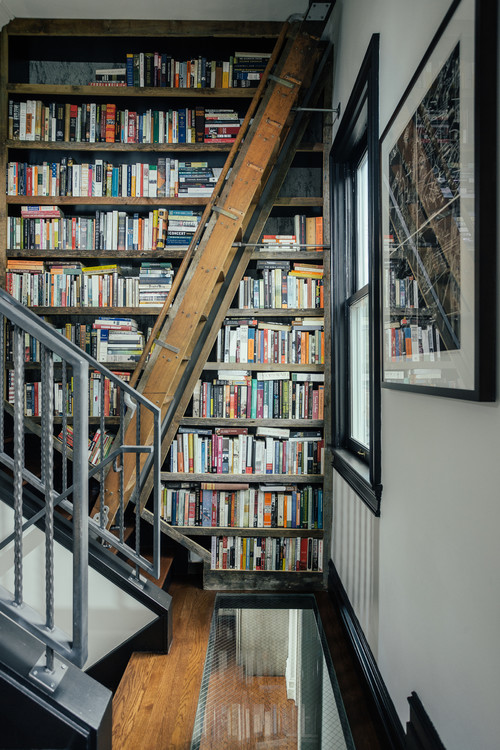
Special case: Your passions. Book lovers, athletes, outdoorsy types, musicians, crafters … you know who you are. And more important, you know how easy it is to collect more and more stuff to support your passion.
Being aware of exactly what you already own is a good first step toward reining in your collections — perhaps your yarn stash is in such disarray, you end up buying yarn you already have.
But it’s also a good idea to start paying attention to what you actually use. If you treasure your books, notice which ones you actually pick up from time to time — I realized a while ago that I rarely pick up novels after I’ve read them, so I decided to let go of most books in that category.
Pain-free ways to declutter your library

Just because you have the room to store it doesn’t mean you should. Extra space is deceptive. If you are blessed with large closets and ample storage space, you may be thinking you’re off the hook — but the truth is, everyone can benefit from paring down a little. Having fewer belongings means less time spent cleaning, moving and mending them; less time looking for things; and generally less to worry about. And if you ever need to downsize in the future, the process will be far less gut wrenching if you have already chosen to live with less stuff.
Set your own rules. The point of this ideabook is to help you gain awareness of what kind of and how much stuff you need, so you can tailor your stuff to fit your life. And no one else can really do that for you. It may take a while to figure out exactly the right amount of stuff for you, but once you do, it’s bound to make your life a little easier.
Tell us: What are your numbers? How many sets of sheets, dishes or pairs of shoes are enough for you?
Related Reads
Keep All Fancy Dinnerware in a China Cabinet
Dedicate a Toy Box for All the Kids’ Stuff
Get Help From Local Professional Organizers
Source: Coldwell Banker Blue Matter Blog

")


