
 Facebook
 Twitter
 Pinterest
 Copy Link
Top 5 Easy Houseplants You’ll Grow to Love
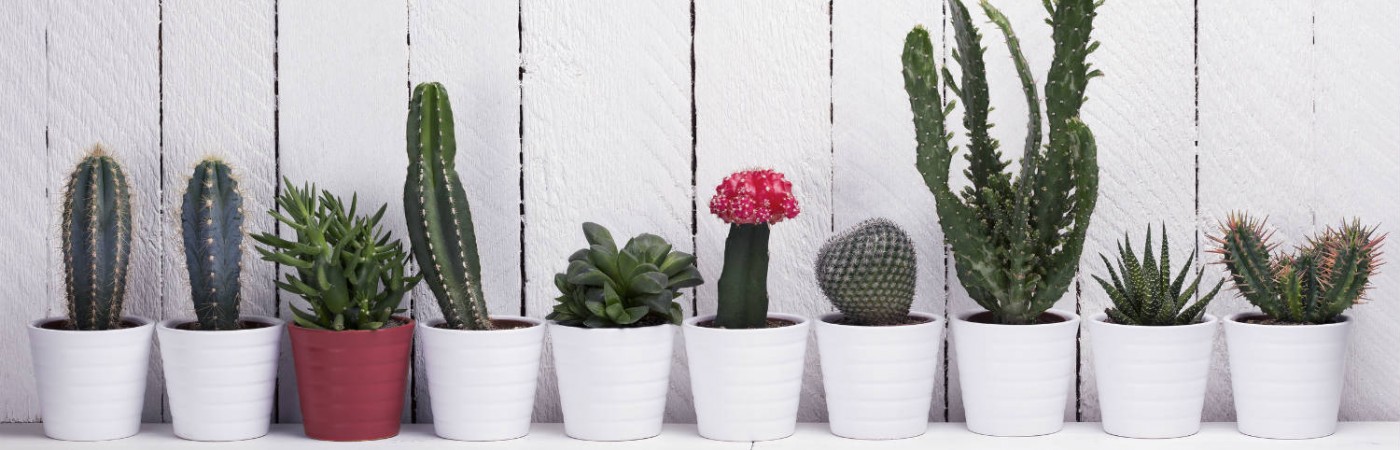
Add a touch of green to your home. Indoor plants brighten up any room and they can also help purify the air in your home. Here are five low maintenance houseplants and instructions on how to grow and take care of them—no green thumbs required!
1. English Ivy
Caring for ivy plants is easy and rewarding. English Ivy is known to grow effortlessly. It can even thrive under fluorescent light. Place your English Ivy on your bookshelf and let the vines grow for a dramatic effect.

2. Jade Plant
Jade is a popular succulent because it requires little care. It needs moderate lighting. You can water the plant when the top soil is dry to the touch. If you are feeling creative, try mixing up different kinds of succulents for a terrarium garden.

3. Air Plants
As the name suggests, these plants don’t even need soil to survive! Each leaf of an air plant absorbs water and nutrients. Air plants need bright indirect light and they need to be soaked in a bowl of water for 30 minutes once a week. Show off your air plants on a piece of driftwood for a rustic look or in a hanging terrarium for a minimalist look.

4. Areca Palm
Turn any room into a paradise with Areca Palms (aka Butterfly Palms). Areca Palm usually reaches a height of 6 feet when it is grown indoors. It requires bright indirect sunlight and it should be watered biweekly or when the soil dries out.

Photo credit: @almostmakesperfect
5. Basil
These fragrant herbs grow indoors just as well as they do outdoors. Just make sure they get plenty of sunlight and water them often. The best part of growing a basil plant is that you can eat it! Garnish your favorite pasta dish or make a delicious basil cucumber gin.

Starting Fresh: How to Buy a New Home Construction

What could be more exciting than living in a brand new home? The blank slate can be thrilling: living in a place no one has lived before, a home with fresh paint, untouched carpets, and even fresh grass that no one has trodden!
While most of the homes bought and sold are preexisting, more and more buyers are interested in new house construction. There’s no doubt moving into a newly built home is exciting. But this sort of transaction comes with its own set of challenges as well.
Find out all the basics of what you’ll need to know to get started.
Understanding the Types of New Construction Homes for Sale
There are a few different types of new construction homes you might consider. They fall into three main categories:
- A home that is pre-built according to design templates
- A semi-custom home: the bulk of the house is built and you have the option to pick a few design elements, finishes, and extra upgrades
- A fully custom home: you have input on the design from the ground up
If you’d love to be involved in every stage of the building process, an entirely custom home could be a great fit. On the other hand, if you’re ready to move right in and don’t want to bother with all the design details, buying a pre-built home is likely the better option.
Select the Specs of Your Home
Now that you know what kind of new house construction you’re interested in, you want to determine some details about the home of your dreams. Here are a few things to consider:
- Location: Is it as close to (or far from) the city as you prefer? Will you have a reasonable commute (if that’s a must-have)?
- Budget: Will this home fit into your budget—especially if you have the option for upgrades?
- Size: Does the home have the size and number of rooms you need?
- Neighborhood: Is it still under construction? Do you have ample lawn space or privacy? Are there specific desired amenities such as a swimming pool?
Many new construction homes for sale are in subdivisions. It’s a good idea to drive down and investigate them on your own and see if it has what you’re looking for.
Also, you want to be sure to find out as much as you can about the builder. Start by looking online: search for any reviews, complaints, or lawsuits. This simple step can help you avoid a lot of potential headaches down the road!
Find a Real Estate Agent
Most builders have an agent, but remember that this agent is there with a goal to sell the property. Before you speak with any builders, hire your own real estate agent to make sure your needs and desires are the number one priority.
Another advantage of taking this path is that your agent may have other insights that the builder would not. An agent will know all the unique processes and challenges of how to buy a new construction home better than anyone.
Work with a Lawyer
More often than not, a new construction home will have a more complicated contract than your typical house sale. There are all sorts of details you’ll need to know such information on warranties on the home itself and appliances within the home.
With the amount of paperwork involved in buying a new home, it’s always a good idea to run all the paperwork past a lawyer familiar with real estate language.
Don’t Forget the Home Inspection
Just because the home is a new build doesn’t mean you should skip getting a home inspection. Some new homes can have their own set of problems to watch out for. Insist on getting a comprehensive home inspection before you even begin the price negotiation.
Talk to your real estate agent today to start ironing out all the details of buying a new home.
Top 10 Damaged Items When Moving & How to Protect Them

Nearly 40 million of us move in the summer and begin to plan in April. If you are moving this season, we want to help you protect your precious belongings and make your move a smooth one!
Before you start to pack, make a game plan. Which of your items are fragile? What will you need to pack them? We’ve seen some folks pack themselves so, unfortunately, we know which household items are most likely to break and typically aren’t packed properly. We have compiled a list of the top 10 items damaged when moving. It’s surprising what items make the list. Not only have we complied the most breakable list, we’ve included tips on how to protect them properly so you can “break” this pattern.
1. Drinking Glasses
It is no surprise glasses are the #1 breakable. But, with simple steps you can ensure they arrive in one piece.
Protect: One of the key factors to keeping your glasses and wine glasses from breaking or getting crushed is using the proper box. Use a “dishpack” box that has double thick walls for extra protection. Place a glass on packing paper horizontally. Grab a corner of the packing paper and roll the glass into the paper. Make sure to tuck the sides of the paper in, like you would do wrapping a burrito. Repeat 3-5 times (depending on thickness of glass) with more sheets of packing paper. Make sure to label your glass burrito: “Wine Glass” so it won’t get tossed aside with the packing paper during the unpacking process. Cushion the bottom of box with crumpled packing paper. Place the wrapped glasses vertically (yes, you read that correctly: VERTICALLY) in one layer in the box. They are much more secure vertically. After completing the first layer, place packing paper on top. Repeat these layers until the box is full. Fill all remaining space with crumpled packing paper.
2. Plates
The biggest moving crime — plates are often placed in boxes without enough packing paper. You don’t want to hear the dishes rattle in the box!
Protect: To keep plates from breaking, first wrap each plate in packing paper. Repeat 3-5 times with more sheets of packing paper until the plate is properly secured & cushioned. Label your little plate package: “Plate.” Again, use a secure dishpack box. Always, use plenty of tape on the bottom and tops of every moving box, just don’t use one strip of tape, use multiple strips and run the tape both directions to make sure that box is secure. Before placing any of the wrapped plates in the box, cushion the bottom of box with crippled packing paper. Then place the wrapped plates VERTICALLY in one layer in the box. After completing one layer, place packing paper on top. Repeat these layers until the box is full. Once the box is full, fill any remaining space with crumpled packing paper.
3. Artwork
Glass artwork often breaks because there is not enough cushioning in the moving box and the top of the box is left with a gap. The top of the box then collapses and the piece of art breaks.
Protect: To protect artwork from breaking use a picture box. Line the bottom of the box with crumpled paper. Place the glass art in the box, then stuff front, back and along the top with paper and or eco-bubble wrap. You want to be sure the box is completed packed with paper (top, bottom and sides) with no air gaps.
4. Lamp Shades
Lamp shades are an awkward shape and large, making it difficult to pack. If not packed properly, they can easily be dented or torn.
Protect: Wrap the lamp shade in eco-bubble wrap, covering every inch. Then fill the interior cavity of the lamp shade with packing paper (do not use newspaper as the print may rub off onto your lamp shade). Fill the box with enough packing paper to keep the shade from shifting around inside. Do not place anything on top of the shade, not even soft items such as linens. Use only packing paper to secure the lamp shade from shifting.
5. Liquid Cleaning Supplies
Many times homeowners pack bottles of liquid cleaning supplies without sealing them properly. This causes leaks and damages things inside and outside of the box. Do not pack or move flammable supplies!
Protect: First, remove the cap from each bottle and place a small piece of plastic wrap over the opening. Then tightly screw the cap back on. Use tape again to secure the cap to the bottle. Begin placing the cleaning products in a small book size box and check the weight as you go. You don’t want to pack the box too heavy. When the box is full and not too heavy, place packing paper all around the bottles to keep them from shifting. And, this is important, remember on every box be sure to use more than one strip of tape on the bottom and top of the box and run the tape in multiple directions. When a box is not taped properly, boxes can open at the bottom and spill on the floor. Always, label every box with its contents, room in the new home where the box should go and directional arrows pointing up. Repeat the label on each and every side of the box. You will hate us for this tip while you’re writing and rewriting the same thing over and over again and love us later when you have stacks of boxes and don’t have to turn boxes around to find out what’s what.
6. Wine & Liquor Bottles:
Again these bottles can easily leak or break, and damage items in and outside of the box.
Protect: Use a divided/cell box you can get free from a specialty wine shop or liquor store, or purchase a cell kit from a moving store. Use smaller boxes so they are easy to lift and carry. Again, be sure you double and even triple tape the bottom of the box. If you’re packing opened bottles, ensure they are properly sealed by tightening the caps. Tape the caps on to the bottles. Roll each bottle in packing paper with 3-4 layers of paper. Secure the wrapping with tape and make sure there are no loose ends. Label the bottle: “Bordeaux.” Finally, place the bottle into the box. If there’s any space or gaps between the bottle and the divider, fill it with paper. Make sure the box is not too heavy.
7. Mirrors
The big mistake with mirrors is that people pack them in picture boxes without any eco-bubble around the mirror. If the front of the mirror faces the wall of the box without protection, it will break.
Protect: Use a flat box or have your movers pack the mirrors in a custom wood crate to provide extra protection. If you’re doing the packing, line the flat box with crushed packing paper to create a padded bed for the mirror. Wrap the mirror completely in multiple sheets of paper or eco-bubble. Tape the wrapping tightly around the mirror and place the mirror in the box. Fill any gaps with more crumpled paper. Only pack one mirror to a box.
8. Glass Pictures
Glass picture frames are easily broken if not packed in the right box. We want to keep those precious memories in one piece!
Protect: Use a picture box. Line the bottom of box with crumpled packing paper. Wrap each picture frame in packing paper or eco-bubble and pack each frame in the box vertically. Stuff packing paper in between each picture and on top, making sure nothing will shift.
9. Stereo & Audio Equipment:
The reason stereo and audio equipment gets damaged is folks stack a few components in the same box and they do not put any layers of padding in-between the pieces of equipment.
Protect: If possible, pack your stereo equipment in their original cartons. If you did not keep their original boxes, use a dishpak box. Remember, dishpaks are specially designed boxes to handle and protect fragile items. If you can’t find dishpaks, use double corrugated boxes. After double taping the bottom of the box in the both directions, pack the bottom of each box with crumbled packing paper for padding. Wrap each electronic component separately in eco-bubble. Pull the wrap over and tape it all together. Make sure the item is completely covered. Place it up right, vertically in the box. Repeat this process for the next big item then place it vertically in the box next to the first item. Do not stack! Stuff packing paper in open spaces and on top for extra cushion.
10. Books:
This one is a surprising one, but if books are packed improperly they can actually get damaged. When books are placed too tight together the edges get folded and covers get damaged. Also, if books are packed with too many air pockets/gaps inside the box they can shift during transportation and get damaged (smashed corners, wrinkled covers, etc).
Protect: Use a book box. Place books flat, horizontally and stack them with the heaviest books on the bottom and the paperback books on top. Be sure not to make the box too heavy. Pack paper on top and sides if there are any air gaps.
With these steps your move will be unbreakable! Remember, you can always do some of the packing yourself and leave the rest to the professionals.
8 Vegetables to Grow in Your Garden this Spring

As the weather warms, you are no doubt yearning to be outside to get your hands working in the dirt again. If you have never tried gardening, spring is the perfect opportunity to give it a shot and plant your own vegetable garden. Growing your own vegetables is a great way to get some fresh air and exercise, and it also allows you to get the highest possible amount of nutrients from your food. Fresh vegetables are much healthier for you than those bought from the store, as they begin to lose nutritional value the longer they sit on a shelf.
Get your gardening gear out from storage. Here is a round up list of the easiest–and most practical–vegetables to grow in your garden.
1. Tomatoes
If you are new to gardening, tomatoes should absolutely be your first plant to try. Homegrown tomatoes, ripened in the sun, are a delicious addition to any meal. They are high in fiber, iron, magnesium, niacin, potassium, and several vitamins (including A and C). They are also one of the only sources of the beneficial antioxidant lycopene. If you’re just starting out or have limited space, try growing tomatoes in a container on your deck first. Usually, you can get by with just an 18-inch deep container. One plant will yield dozens of tomatoes throughout the season. Just remember that tomatoes like lots of sun and heat, so if you live in a colder area, it may take a little bit longer to get them growing.
2. Beans and Peas
Beans and peas are incredibly easy to grow. Depending on your preferences and your gardening space, you can choose to grow either bush or climbing varieties. Bush beans support themselves, while climbing or “pole” varieties need a stake or trellis to climb up on.
If you’re feeling extra organic, consider planting your beans and peas next to your corn. Beans fix nitrogen in the soil which aids the corn, and also use the stalk as a natural trellis. Both peas and beans are high in fiber, iron, potassium, and a wide range of vitamins. Plus, they continue to produce basket upon basket of delicious vegetables throughout the entire season.
3. Broccoli
Broccoli is a great vegetable to grow as it is one of the most nutritionally dense. It is high in crucial nutrients such as calcium, magnesium, iron, vitamin A, vitamin B6, and vitamin C.
Although broccoli can be grown in containers, it’s just as easy to plant it directly in the ground. It is commonly known as a cold-season crop, so it can withstand a light frost–and actually tastes better after doing so. Meaning, you can plant it when soil temperatures are still a bit chilly in early spring and keep it going long into autumn.
4. Peppers
There are dozens of varieties of peppers you can grow, but most of them are all cultivated in about the same way. Consider bell peppers for your first try at pepper planting. A cool feature of planting bell peppers is that you will have different types of peppers at every growing stage. Harvest them young for crunchy green peppers, or wait a few weeks to allow the sun to further ripen them into delicious red peppers.
Whichever type you choose, peppers are full of nutrients, such as riboflavin and potassium. They can also be planted in pots, but grow best directly in the ground. Like tomatoes, they like lots of heat. Make sure you plant them in a warm, sunny area.
5. Carrots
A word to the wise–if you have rocky or clay soils, consider planting carrots in a raised bed or container. Carrots like fertile, loose soil and need plenty of room to stretch out and extend their roots. Carrots are an icon of healthy eating and are high in vitamins A, B6, and C. Sow carrot seeds about two to three inches apart, and be sure to thin them as they form tops.
6. Leafy Greens
There are dozens of varieties of greens you can plant in your garden. Choose the one that best works for your climate and soil type. Popular varieties that tend to work almost anywhere include spinach and kale. Both are cold-season crops that can be started a bit earlier than other crops, and can be harvested continually throughout the year. As a bonus, once they begin to die back and your harvest dips, you can reseed over the existing plants to produce new, fresh plants. Regardless of the type of greens you plant, these are easy to grow and harvest and contain high amounts of iron, calcium, potassium, and vitamins.
7. Cucumbers
Make room for at least one cucumber plant in your garden this summer. Cucumber plants produce large quantities, all of which spiral out in spiky vines. They can spread up to twenty-five feet away, so make sure you have plenty of room. Whether you plant pickling or slicing cucumbers, you should plant about five seeds in 6-inch high hills, and then thin to the two strongest plants. These warm-season crops love heat, so consider planting them on top of a layer of black plastic to heat up the soil.
8. Zucchini
The last plant on our list is zucchini. Zucchini plants have a reputation for being prolific producers, developing so many fruits at a time. The roots of the plant need regular moisture, but besides that, this is a low-maintenance vegetable that will pump out a bumper crop with just a single plant. You can eat both the fruits and blossoms of these delicious giants. Like cucumbers, they prefer warm, moist soil, so the black plastic sheet method works well in this situation, too.
Growing your own vegetables is a noble task that can take very little time and skill. If you’re ready to start on your path to self-sufficiency, give these tasty plants a try this spring.
Stages of Buying a Home

It may be a goal you have had since childhood. Perhaps, you have rented for most of your adult life and now want to experience the joys and satisfaction of home ownership. Buying a home is a big step and requires a lot of important decisions along the way. With some advanced planning and research, you can be sure your home purchase is something you feel good about for many years ahead. Here are the basic steps that lead you to a successful transaction.
Understanding What You Can Afford
This is different from qualifying for a loan. This is calculating how much of your budget you will devote to your home and how much money you want for other things. For a person who values travel, they can afford more house than they should buy. Some of their money will go toward accommodations on the road or other travel expenses. If you love fishing, boating, or a hobby such as restoring classic cars, factor the required budget for your preferred pastime into your overall household budget. With that in mind, think twice about buying a home the bank says you can afford. You will be happiest in the home that allows you to enjoy life to its fullest.
Review Your Credit Report
Know your credit score prior to meeting with any loan officers or mortgage brokers. A lower score will result in a higher interest rate and possibly prevent you from qualifying for the loan you want. It can take several months to correct any errors in your report. By reviewing your report a few months before home shopping, you could save yourself several thousands of dollars over the life of your loan.
Choosing Your Professionals
The U.S. Department of Housing and Urban Development (HUD) advises potential home buyers to attend a homeownership education class prior to choosing a mortgage. The Consumer Financial Protection Bureau was established to help protect consumers from predatory lending and mandates all required information about your loan and real estate transaction be written in clear, easy to understand wording. It is an excellent resource for home buyers.
Take time to interview several loan professionals before signing with one. You can be pre-qualified by your bank or any loan company. That does not obligate you to choose them for your home loan. Discuss your goals with a Coldwell Banker® brand agent. They are here to consult with you at each step of the process. Also, it is a good idea to know who will be your attorney for the closing. Many builders want you to close the transaction with their attorney. As the home buyer, it is your right to choose the attorney who will represent you in the closing.
Choosing Your Home
Once you are pre-qualified, you are ready to begin shopping for your new home. For most buyers who plan to purchase with a standard 30-year fixed-rate mortgage, there are few restrictions on the houses they view. If you will be using a FHA loan, USDA home loan, or other special financing, you can only consider homes that qualify for these programs. HUD has incentives for first-time buyers and community servants like firefighters, teachers, and lawenforcement officers. To see if you qualify for special financing, and to learn if there are any Good Neighbor Next Door homes available in your area, consult with a Coldwell Banker® brand agent.
Take your lifestyle and future plans into consideration as you view homes. If you plan to move in a few years, you may want to choose a simple, easily affordable home that will always be in demand and fairly easy to sell. It is best to have a second and third choice in mind that you can go to if you have to walk away from negotiations on your first choice.
Negotiating the Contract
Buying a home is an emotional experience. Trust your home buying expert with Coldwell Banker Real Estate LLC for guidance. They work with lenders, home sellers, and other real estate agents every day. They will advise you on negotiation strategies and be there to provide objective advice that protects your best interest in the transaction. Most contracts have contingencies, and the negotiation is not complete until all contingencies are met.
Home Inspection
A thorough home inspection by a certified professional is crucial for any home purchase. You should attend the inspection and feel free to ask questions about any areas of concern. Once you have received the home inspection report, your Coldwell Banker brand agent will review it with you. You may choose to ask the seller to make some needed repairs, negotiate a lower price, or accept the report and move forward with the transaction as it is.
The Closing
The Real Estate Settlement Procedures Act (RESPA) requires that lenders provide home buyers with as accurate of a good faith estimate as possible and that they disclose the nature of all cost. It also prohibits kickbacks and other unlawful payments among real estate professionals and lenders. The TILA-RESPA Integrated Disclosurerule combines forms required by the Truth in Lending Act, also known as Regulation Z, and the Real Estate Procedures Act, known as Regulation X, into one simple form. This new document replaces the final document required by the TILA and the HUD-1. You have three days to review and discuss it with your Coldwell Banker brand agent.
For any changes in amounts before or after closing, the lender must provide you with a corrected Closing Disclosure showing the actual amounts. All financial figures must be documented in writing and not delivered verbally. With sufficient communications prior to closing, you know the amount of certified funds (if any) you need to bring to closing. You can relax, sign the necessary paperwork, and receive the keys to your new home.
Selling? Low-Cost Home Improvement Fixes that Make Your Home Shine

When selling a home, even tiny fixes can have a big impact. Here are 10 of the best low- (or no-) cost home improvement fixes to make your house stand above the competition:
1. Address the Heart of the Home
In real estate, the kitchen is a main selling feature and can be a make or break deal for potential home buyers. If a new kitchen just isn’t in the cards, consider replacing smaller ticket items and de-cluttering. Low- and no-cost fixes for the kitchen include:
- New cabinet hardware
- New faucets
- Installing a new backsplash
- Storing countertop appliances to create more work space
- Replacing dark valances with lighter fabric or removing them altogether

2. Update Switch Plate Covers
Switch plate and outlet covers are brittle, and can crack and yellow over time, resulting in a home that, no matter how well updated, still looks dated. New outlets and covers can be replaced in a snap for generally under five dollars, making it one of the lowest cost updates available. Consider flat switches that create a modern, streamlined silhouette and stick to white for a timeless look.
3. Beautify the Bathroom
An updated bathroom comes only second to kitchens in a buyer’s list of must-haves, so showing them a clean and uncluttered bathroom will score points with any potential buyer.
New flooring can give an otherwise tired bathroom a much needed facelift and create a newer looking bathroom overall. Coordinating linens, a new shower curtain, and thoroughly cleaned grout can top off this easy home improvement investment.
4. Address Storage
Storage is always a concern for buyers. Installing low-cost closet organizers to your existing space will increase storage and organization in your home. Add storage baskets to hide clutter and you will have beautiful storage spaces that will make any buyer envious.

5. Deep Clean for a Good Return
If your home contains wall to wall carpeting, clean carpets can make a world of difference to a buyer. Cleaning carpets can easily be completed in a weekend with a rental cleaning machine, and it creates a noticeably clean, odor free environment for buyers to tour.
6. Boost Curb Appeal
Nothing boosts curb appeal like a tidy yard. Trim and edge walkways, weed gardens, and trim shrubs for maximum impact. If you have a porch, consider potted, seasonal plants to bring the look together.
7. Improve the First Impression
As buyers approach your home, first impressions matter. Ensuring your entryway is clean and inviting with something as simple as a new mailbox or updated house numbers will make buyers feel welcome. Clean windows and doors for extra impact.

8. Add a Coat of Paint
Freshening up your living space with neutral colors will invite buyers to imagine their belongings in your home and will cover up any nicks, scratches, or dents your wall incurred over years of daily living.
9. Update Lighting
While not the lowest cost solution on our list, you will find that a new light fixture or two really breathes new life into key living spaces. If your budget is tight, look to kitchen, dining, and living rooms for the most bang for your buck.
10. Add Some Decor Pizzazz
Finally, a fresh look can be completed with nothing more than some colorful fabric. Inexpensive pillows and throws in a coordinating palette through your home will create a unified look that will have buyers hooked.
Lastly, don’t plan to tackle a home project DIY style until you read 5 Things You Need to Know Before DIY-ing A Home Improvement Project!
Source: CB Blue Matter Blog
Your Home’s April Honey Do List

Even though today is National No Housework Day (no, that’s not a belated April Fool’s Joke), spring cleaning season is in full swing. So, while you have permission to put off your honey do list until tomorrow, here’s a list of to do’s for your home this month.
1. April Showers Bring May Flowers – But, only if you prep the garden today! Lay mulch around shrubs and flower beds before the weeds take over next month. However, resist the urge to plant warm season annuals and vegetables until the last frost date has passed in your area.
2. Fresh Air, Fresh Paint – Planning to paint the exterior of your home, deck or front door? Start preparing exterior surfaces now by scraping and sanding so that when the warmer weather arrives, you’ll be ready to apply the first coat (without a coat on!)
3. Dust Off the Chaise Lounges – The days of lounging in the backyard are almost here! Take some time to clean and repair any outdoor furniture.
4. Get Rid of House Guests – While we all love having family and friends visit over the holidays, other unwelcome house guests can often make themselves at home in our roofs and walls during the winter. Follow this guide to inspect and repair damage from animals who took shelter in your home this winter season.
5. Organize the Garage or Shed – For most of the country, it’s finally time to stash the snow shovels and bust out the lawn mower. While you’re at it, consider Making Your Garage Smarter and More Energy Efficient
6. Spring Clean That Closet – Kick off your spring cleaning project by tackling one of the most cluttered spots of the home. Follow these three steps to a spring miracle: an organized closet.
Source: CB Blue Matter Blog

Five Things You Need to Know About Selling a Condo

Thinking of selling your condo? Whether you live in the condo or own it as an investment property, if you’re ready to sell your home, it’s time to talk to a qualified real estate agent in your area. By evaluating several criteria, including regional markets, time of year, features of your condo unit, as well as your specific needs as the seller, he or she can create a customized marketing plan for your condo. Here are five important topics to discuss with your real estate agent if you want to sell your home:
1. Best Time of Year to Sell Your Condo
The specifics of your area do more to determine the best time to put your home on the market than whether you’re selling a condo or a house. While the conventional wisdom is that spring is the best time for selling a home, this belief simply doesn’t ring true in every locale. In recent years the historic patterns have eased, and in some cases, totally disappeared. Still, different parts of the country have periods when sellers can be more aggressive with their pricing. And your real estate agent may suggest a distinct timing strategy for condominium sales, especially if your condo is in a resort destination.
2. Open House Strategy and How to De-Clutter
A condo that shows well will sell faster and bring a higher price. Small cosmetic touch-ups can make a big difference. Buyers often suspect that more serious problems may exist if they notice the need for minor repairs. If you want to sell your home, it’s important to make sure your condo is clean, tidy and free of personal clutter. Clear sinks and counters of dishes and toiletries. Neatly stack office supplies and organize storage areas. Replace dim light bulbs and clean windows. Even though your garden area may be commonly owned, do your best to create curb appeal by cleaning front steps and porches, and clearing lawns of toys or equipment.
3. Features to Accentuate
One of the best features to accentuate when selling a condo is the lifestyle of ease that comes with condominium ownership. Many buyers are looking for the hassle-free living experience that they can’t find with a single-family detached house. Another important attribute of any condo is the amenities of the association, which can include a hot tub, fitness center, owner’s lounge, covered parking and even concierge services. If you’re considering selling your condo, take the time to walk through it methodically with your real estate agent. Together you can point out which features of the actual condo unit should be accentuated. Does your unit have a wonderful view? Perhaps the location of your condominium is unique and desirable. Your real estate agent can help accentuate these features in sales and marketing materials.
4. Desired Price and Bottom Line Price
When setting the home price for your condo, it’s important to identify your desired price and your bottom line price. By assessing recent condo sale and listing statistics in your area, your real estate agent and a licensed appraiser can estimate your house value and recommend an appropriate target price range. Working with your agent, you can set an initial asking price, as well the absolute lowest home price you would comfortably accept. One advantage of selling a condo is that by assessing the prices of other units in your association that have recently sold or are currently listed, your real estate agent and the appraiser can determine a very accurate house value.
5. Disclosures
When selling your condo, you may be obligated to disclose problems that could affect the property’s value or desirability, as well as to disclose HOA minutes and costs of common insurance and utilities. In most states, it is illegal to fraudulently conceal major physical defects in your property, such as a water heater that leaks severely. And many states now require sellers to take a proactive role by making written disclosures on the condition of the condo unit. Ask your real estate agent for the particular laws of your state.
After reading this article, read more tips on selling a home and make sure you get the best value on your property on Coldwell Banker’s Seller Resources.
Source: CB Blue Matter Blog
How to Get Wood Flooring on Any Budget

Hardwood flooring is often considered a must-have feature by new homeowners or those undertaking a remodeling project. Wood is a natural, renewable resource, plus wood flooring complements all types of home decor, from traditional to contemporary. Hardwood flooring is often considered a must-have feature by new homeowners or those undertaking a remodeling project. Wood is a natural, renewable resource, plus wood flooring complements all types of home decor, from traditional to contemporary. The downside is that wood floors, especially solid wood floors, can be expensive. Some exotic wood species, such as Brazilian walnut, can cost more than $15 per square foot — and that doesn’t include installation labor. However, you can find alternatives that give you the look of real wood at a reduced price — some as low as $2 or $3 per square foot. Here are some of the best budget-friendly hardwood floor choices.
Calculating the Overall Price
The products listed below go from most expensive to least expensive, but there’s a lot of overlap among the categories. For example, some solid wood products are less expensive than some luxury vinyl tiles. Before you make your final decision, factor in the cost of professional installation, which can add as much as $3 to $10 per square foot to the total cost of a flooring project. Some of the items that can drive up installation costs include:
• Removing and disposing of the old flooring
• Repairing the subfloor when necessary
• The size and shape of the room(s)
• Stair installation
If you’re an experienced DIYer, you can save money by installing the floors yourself. Beginners should leave the job to the professionals, though — you may end up making mistakes that are even more expensive to fix.
Solid Wood

This is usually the most expensive option, but there are ways to reduce the cost, especially in the long run. When properly maintained, solid wood flooring will last as long as the house stands. You can freshen up the look at any time by sanding away the old finish and restaining and sealing the floor.
Some wood species are more expensive than others. Fortunately, many of the most common types, such as oak or maple, fall into the low- to mid-range of costs. Solid wood products can come finished or unfinished. If the floor is unfinished, the installer will stain and seal the floor once it is in place, which adds to the installation costs. On the flip side, the prefinished product may cost more up front.
Engineered Wood

These products are constructed of multiple thin layers of material that are bonded together under pressure. The top layer is made from a familiar wood species — such as oak or maple — and is usually treated with a factory-applied finish that resists dirt and scuff marks. Engineered wood floors are less likely than solid wood to wrap and twist because of moisture and humidity, so they can be installed in basements and bathrooms. Some products feature click-in-place installation — no need for adhesives or fasteners — which is an easier, faster installation method perfect for DIYers. However, a vapor barrier needs to be installed or attached to the flooring.
Bamboo

Bamboo floors are manufactured to either look like traditional wood flooring or showcase their distinctive grass-like look. Some bamboo products are harder than solid wood flooring. They are strong and long-lasting, but are easy to scratch and are not recommended for areas prone to moisture. Bamboo is a type of grass and grows to maturity much more quickly than trees do, which makes it a sustainable, eco-friendly option. Click-in-place installation is available for some products.
Porcelain Tile

New porcelain tiles can be made to look like anything, including real wood. Some products are available in planks that have a wood-like texture. Porcelain tiles are an inexpensive, easy way to achieve a “reclaimed” wood look — many tiles mimic the texture and color variation of aged planks. As with regular tiles, they are durable and can be used in wet areas, including bathrooms. They are also stain-resistant and much easier to clean than real wood — spills wipe up quickly, and using just water and a mild soap makes them shine. Porcelain tiles must be installed using mortar and grout.
Luxury Vinyl Tile

As with porcelain tiles, luxury vinyl tile (LVT) can look like wood and come in traditional-style planks. LVTs are thicker and more durable than standard vinyl. They are usually waterproof, are easier to clean than true hardwoods, and can be installed in any room in the house. To prolong their durability, many LVTs are treated to resist color fading and scratches.
Laminate

Laminate floors are composed of a high-density hardboard core protected by a melamine layer that can be made to look like anything — including real wood. The top layer protects against dirt and scuff marks, but the material should not be installed in rooms that are exposed to moisture. Click-in-place installation is available.
Hardwood flooring is a classic, timeless look that fits a wide range of design options. Thanks to today’s selection of flooring products, it’s easy to get a wood look at a lower cost. When making your final decision, be sure to include both the material costs and the installation costs. That way, you’ll get the look you want at a budget-friendly price.
DIY author Fran Donegan has written several books, including Paint Your Home. He also writes for The Home Depot about homeownership and projects that add value to your house. To see a selection of hardwood flooring options like those described by Fran in this article, please click here.
This article is editorial content that has been contributed to our site at our request and is published for the benefit of our readers. We have not been compensated for its placement.
Source: CB Blue Matter Blog

")


